Introduction to Zucchini Relish
Growing up, my grandmother always had a jar of her homemade zucchini relish in the fridge. It was her secret weapon, adding a burst of flavor to everything from sandwiches to grilled meats. If you’re looking for a quick solution to elevate your meals, this zucchini relish is just the ticket. It’s easy to make, and the vibrant colors and tangy taste will impress your loved ones. Plus, it’s a fantastic way to use up that summer zucchini bounty. Let’s dive into this delightful recipe that’s sure to become a staple in your kitchen!
Why You’ll Love This Zucchini Relish
This zucchini relish is a game-changer for busy weeknights. It’s quick to whip up, taking just about an hour and a half from start to finish. The sweet and tangy flavor profile pairs beautifully with a variety of dishes, making it a versatile condiment. Plus, it’s a fantastic way to sneak in some veggies without anyone noticing. Trust me, once you try it, you’ll be hooked!
Ingredients for Zucchini Relish
Gathering the right ingredients is the first step to creating this delicious zucchini relish. Here’s what you’ll need:
- Grated Zucchini: The star of the show! It adds a mild flavor and a lovely texture.
- Grated Onion: This brings a savory depth to the relish, balancing the sweetness of the other ingredients.
- Grated Carrot: Adds a touch of sweetness and vibrant color, making the relish visually appealing.
- Bell Pepper: Any color works! It contributes crunch and a hint of sweetness.
- Salt: Essential for drawing out moisture from the veggies, enhancing their flavors.
- Apple Cider Vinegar: This tangy ingredient gives the relish its signature zing and helps with preservation.
- Sugar: Balances the acidity of the vinegar, creating that perfect sweet-tart flavor.
- Mustard Seeds: These tiny seeds add a subtle crunch and a hint of spice.
- Celery Seeds: They bring an earthy flavor that complements the other ingredients beautifully.
- Ground Turmeric: Not just for color! It adds a warm, earthy note to the relish.
- Black Pepper: A dash of heat to round out the flavors.
- Garlic Powder: For an extra layer of flavor that enhances the overall taste.
For those looking to spice things up, consider adding red pepper flakes or a finely chopped jalapeño. If you want to switch things up, you can substitute half of the zucchini with grated yellow squash for a different flavor profile. You’ll find the exact quantities for each ingredient at the bottom of the article, ready for printing!
How to Make Zucchini Relish
Now that you have all your ingredients ready, let’s get cooking! Making zucchini relish is a straightforward process that anyone can master. Follow these simple steps, and you’ll have a delicious condiment to enjoy in no time.
Step 1: Prepare the Vegetables
Start by combining the grated zucchini, onion, carrot, and bell pepper in a large bowl. Sprinkle in the salt and mix everything well. This step is crucial as it helps draw out moisture from the veggies. Let the mixture sit for about an hour. You’ll notice the vegetables will start to release their juices, which is exactly what we want!
Step 2: Drain and Rinse
After an hour, it’s time to drain the mixture. Place it in a colander and rinse it with cold water. This helps remove excess salt and any bitterness. Once rinsed, give it a good squeeze to get rid of any remaining moisture. You want the mixture to be as dry as possible for the best texture in your relish.
Step 3: Make the Vinegar Mixture
In a large pot, combine the apple cider vinegar, sugar, mustard seeds, celery seeds, turmeric, black pepper, and garlic powder. Stir everything together and bring it to a boil over medium heat. Keep stirring until the sugar dissolves completely. The aroma will be fantastic, and you’ll know you’re on the right track!
Step 4: Combine and Simmer
Once the vinegar mixture is boiling, add the drained vegetable mixture to the pot. Stir well to combine everything. Bring it back to a boil, then reduce the heat and let it simmer for about 15-20 minutes. Stir occasionally to prevent sticking. You’ll see the relish thicken slightly, and the flavors will meld beautifully.
Step 5: Prepare Canning Jars
While the relish is simmering, it’s time to prepare your canning jars. Sterilize them by placing them in boiling water for about 10 minutes. This step is essential for preserving your relish and ensuring it stays fresh for months to come.
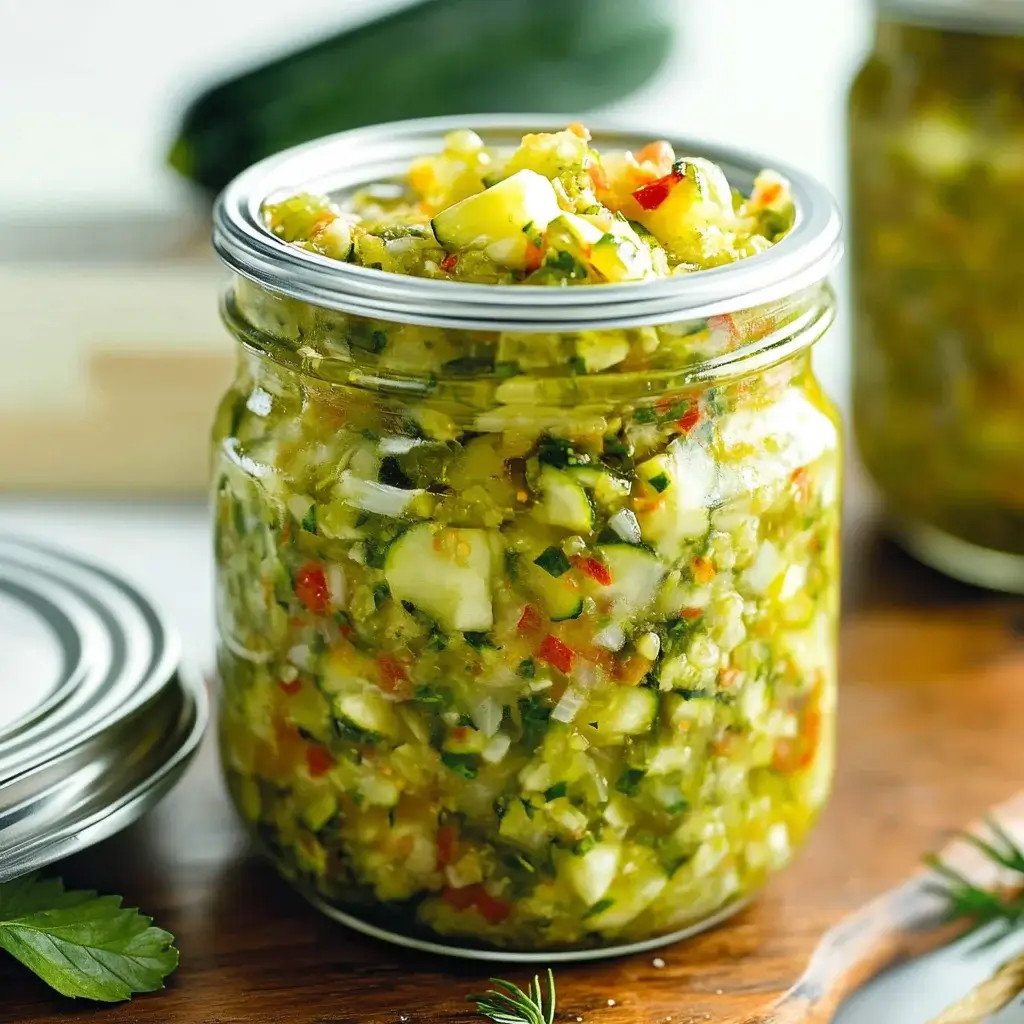
Step 6: Jar the Relish
Once the relish has thickened, carefully ladle it into the sterilized jars. Leave about 1/4 inch of headspace at the top. This space is important for sealing. Wipe the rims of the jars with a clean cloth to ensure a good seal. You don’t want any residue getting in the way!
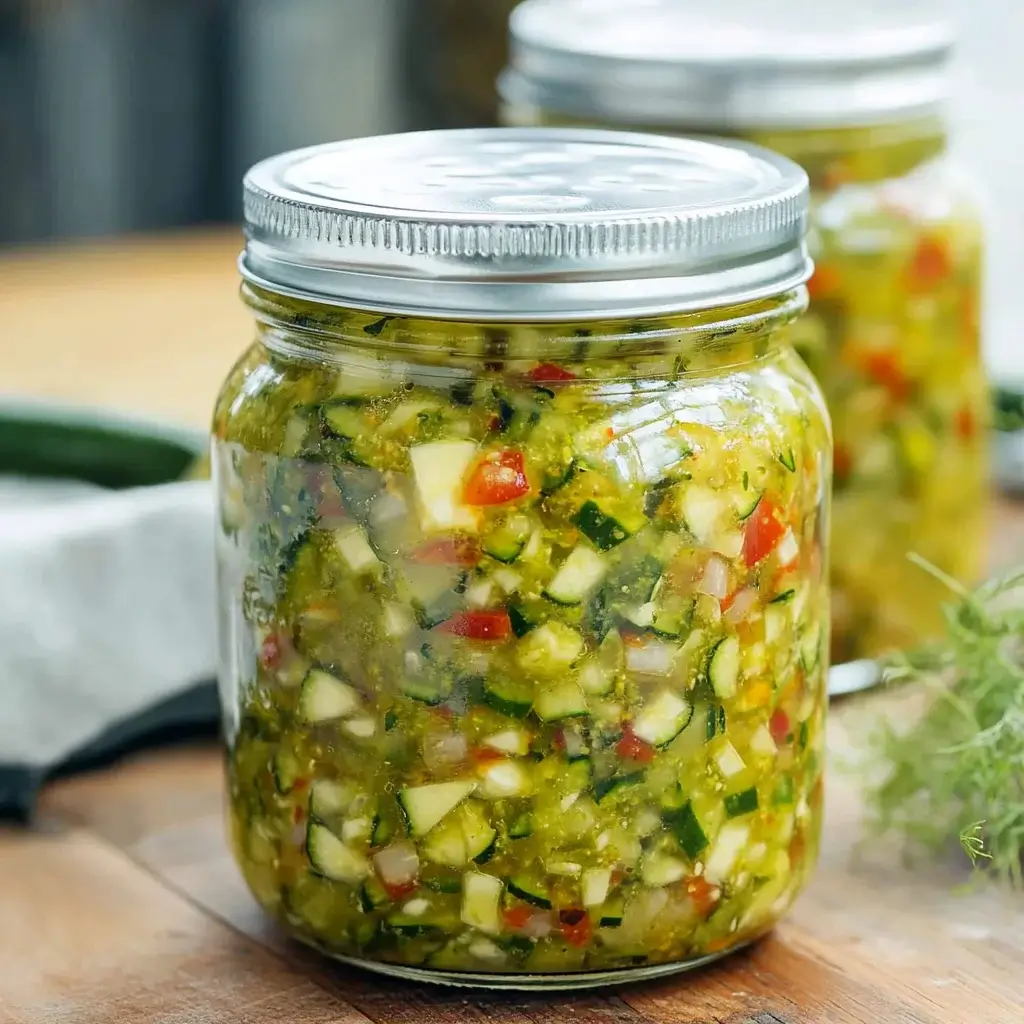
Step 7: Process the Jars
Seal the jars with their lids and process them in a boiling water bath for 10 minutes. This step helps preserve the relish and gives it that shelf-stable quality. Once done, allow the jars to cool completely at room temperature. Store them in a cool, dark place, and you’ll have delicious zucchini relish ready to enjoy for up to a year!
Tips for Success
- Use fresh, firm zucchinis for the best flavor and texture.
- Don’t skip the draining step; it’s key to avoiding watery relish.
- Experiment with spices to customize the flavor to your liking.
- Label your jars with the date to keep track of freshness.
- Store opened jars in the fridge and consume within a few weeks.
Equipment Needed
- Large Bowl: For mixing the vegetables. A mixing bowl works too.
- Colander: To drain the vegetable mixture. A fine mesh strainer can be a good substitute.
- Large Pot: For cooking the relish. Any heavy-bottomed pot will do.
- Canning Jars: Use mason jars for best results. Recycled jars can work in a pinch.
- Boiling Water Bath Setup: A large pot with a rack or a canning pot is ideal.
Variations
- Spicy Zucchini Relish: Add 1/4 teaspoon of red pepper flakes or a finely chopped jalapeño for a kick of heat.
- Herbed Relish: Incorporate fresh herbs like dill or cilantro for an aromatic twist.
- Sweet and Sour: Substitute half of the sugar with honey or maple syrup for a different sweetness profile.
- Low-Sodium Option: Reduce or omit the salt and use a salt substitute to make it heart-healthier.
- Vegan-Friendly: This recipe is already vegan, but you can enhance it with a splash of lemon juice for extra brightness.
Serving Suggestions
- Pair zucchini relish with grilled meats like chicken or pork for a refreshing contrast.
- Use it as a topping for burgers or hot dogs to elevate your cookout game.
- Serve alongside cheese and crackers for a delightful appetizer.
- Mix into potato or pasta salads for added flavor and texture.
- Enjoy with a chilled glass of iced tea or lemonade for a perfect summer meal.
FAQs about Zucchini Relish
Can I use frozen zucchini for this relish?
While fresh zucchini is best for texture and flavor, you can use frozen zucchini if needed. Just make sure to thaw and drain it well to remove excess moisture.
How long does zucchini relish last?
When properly canned and stored in a cool, dark place, zucchini relish can last up to a year. Once opened, keep it in the fridge and consume within a few weeks.
What can I serve with zucchini relish?
Zucchini relish pairs wonderfully with grilled meats, burgers, and sandwiches. It also makes a great addition to cheese platters or as a topping for hot dogs.
Can I adjust the sweetness of the relish?
Absolutely! If you prefer a less sweet relish, reduce the sugar to your taste. You can also experiment with natural sweeteners like honey or maple syrup.
Is zucchini relish gluten-free?
Yes, this zucchini relish recipe is naturally gluten-free, making it a great condiment for everyone to enjoy!
Final Thoughts
Creating this zucchini relish is more than just a cooking project; it’s a journey back to cherished memories and flavors. Each jar captures the essence of summer, ready to brighten up your meals all year long. The joy of sharing homemade relish with family and friends is unmatched. Whether you’re slathering it on a burger or serving it alongside grilled veggies, this relish adds a delightful twist to any dish. So, roll up your sleeves, embrace the process, and savor the satisfaction of making something truly special. Your taste buds will thank you!
PrintZucchini Relish: Discover This Easy, Flavorful Recipe!
- Total Time: 1 hour 30 minutes
- Yield: 8 servings
- Diet: Vegetarian
Description
A delicious and easy-to-make zucchini relish that adds a burst of flavor to your meals.
Ingredients
- 4 cups grated zucchini (about 2 medium zucchinis)
- 1 cup grated onion (about 1 medium onion)
- 1 cup grated carrot (about 1 medium carrot)
- 1 cup bell pepper, finely chopped (any color)
- 1 tablespoon salt
- 1 cup apple cider vinegar
- 1 cup sugar
- 1 teaspoon mustard seeds
- 1 teaspoon celery seeds
- 1 teaspoon ground turmeric
- 1 teaspoon black pepper
- 1/2 teaspoon garlic powder
Instructions
- In a large bowl, combine the grated zucchini, onion, carrot, bell pepper, and salt. Mix well and let it sit for about 1 hour to draw out moisture.
- After an hour, drain the mixture in a colander and rinse with cold water to remove excess salt. Squeeze out any remaining moisture.
- In a large pot, combine the apple cider vinegar, sugar, mustard seeds, celery seeds, turmeric, black pepper, and garlic powder. Bring to a boil over medium heat, stirring until the sugar dissolves.
- Add the drained vegetable mixture to the pot and stir well. Bring the mixture back to a boil, then reduce the heat and simmer for about 15-20 minutes, stirring occasionally.
- While the relish is simmering, prepare canning jars by sterilizing them in boiling water for 10 minutes.
- Once the relish has thickened slightly, remove it from heat and carefully ladle it into the sterilized jars, leaving about 1/4 inch of headspace. Wipe the rims of the jars with a clean cloth to ensure a good seal.
- Seal the jars with lids and process them in a boiling water bath for 10 minutes to ensure preservation.
- Allow the jars to cool completely at room temperature. Store in a cool, dark place for up to a year.
Notes
- For a spicier relish, add 1/4 teaspoon of red pepper flakes or a finely chopped jalapeño to the mixture.
- Substitute half of the zucchini with grated yellow squash for a different flavor profile.
- Prep Time: 1 hour
- Cook Time: 30 minutes
- Category: Condiment
- Method: Canning
- Cuisine: American
Nutrition
- Serving Size: 1/2 cup
- Calories: 90
- Sugar: 18g
- Sodium: 200mg
- Fat: 0g
- Saturated Fat: 0g
- Unsaturated Fat: 0g
- Trans Fat: 0g
- Carbohydrates: 22g
- Fiber: 4g
- Protein: 1g
- Cholesterol: 0mg