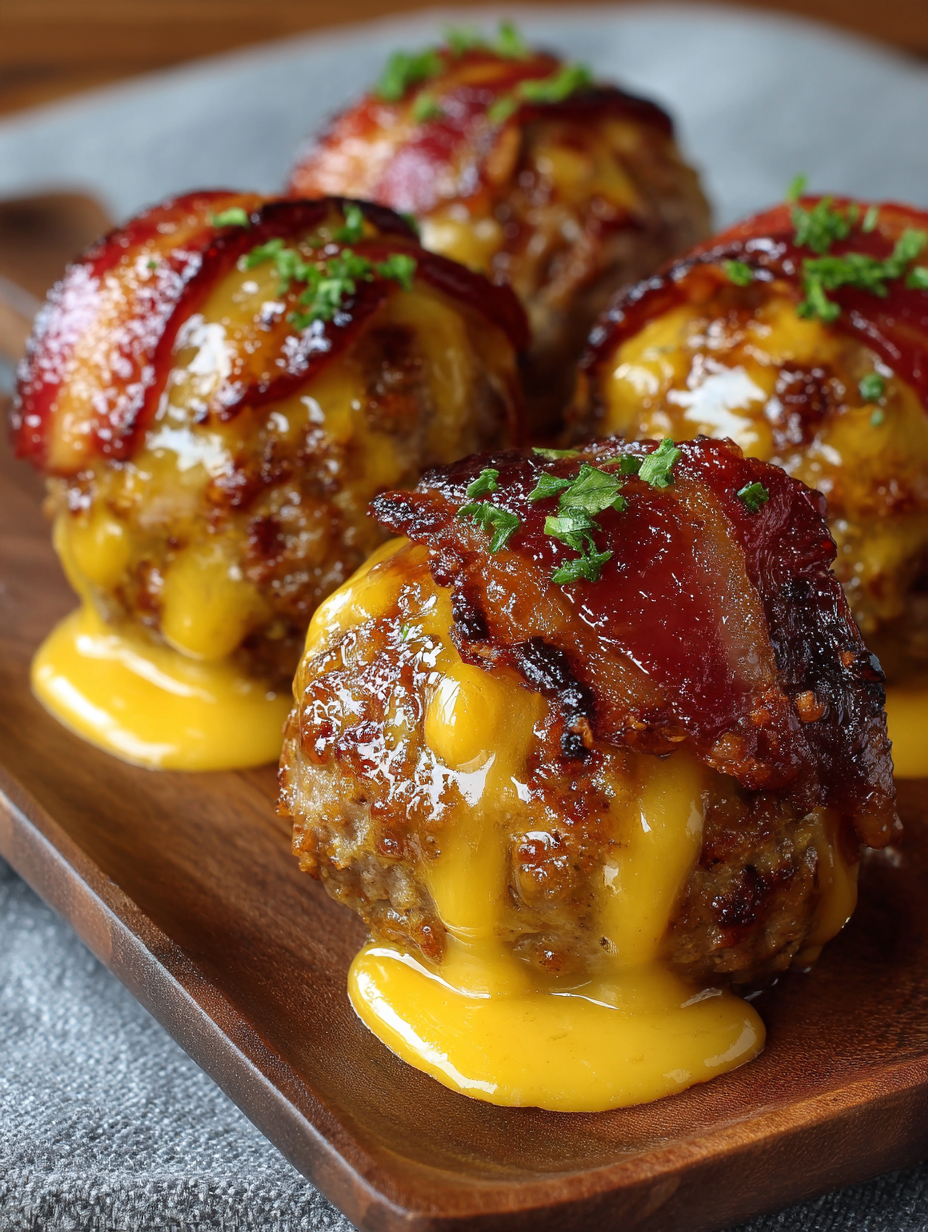
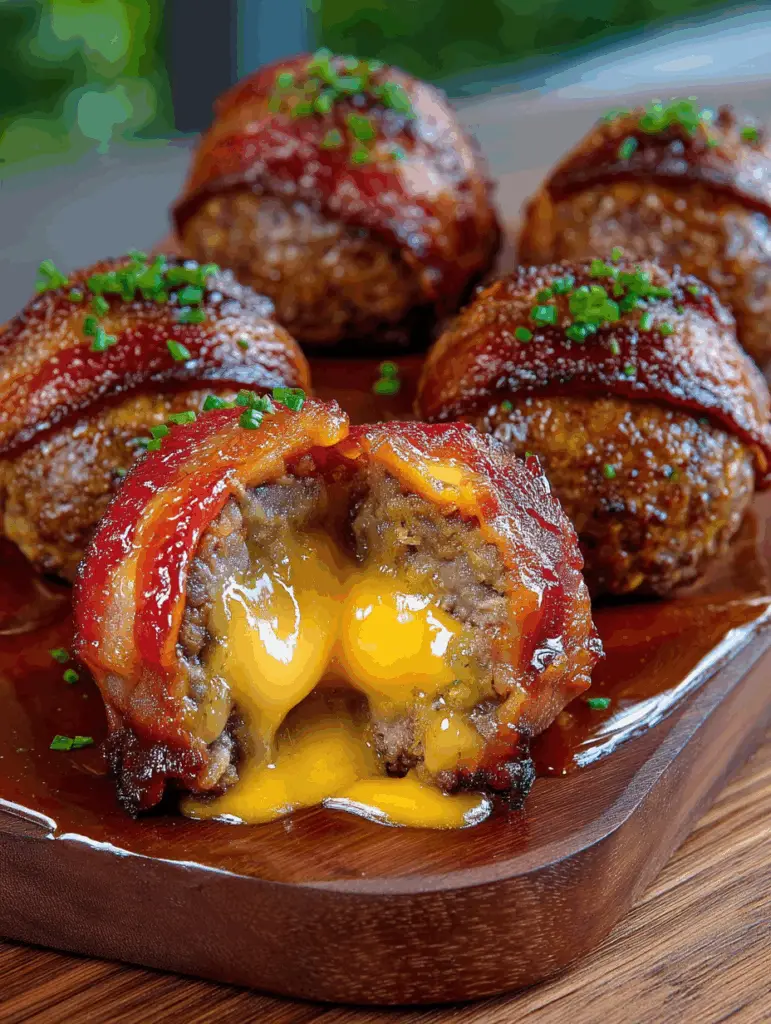
Introduction to BBQ Bacon Cheeseburger Bombs
There’s something magical about the combination of BBQ, bacon, and cheeseburgers that brings back memories of summer cookouts and backyard gatherings. These BBQ Bacon Cheeseburger Bombs are not just a meal; they’re a fun twist on a classic that’s perfect for impressing friends or satisfying a late-night craving. Whether you’re looking for a quick solution for a busy day or a dish to wow your loved ones, these little bombs pack a flavorful punch. Trust me, once you take a bite, you’ll be hooked on this deliciously cheesy goodness!
Why You’ll Love This BBQ Bacon Cheeseburger Bombs
These BBQ Bacon Cheeseburger Bombs are a game-changer for any home cook. They’re incredibly easy to whip up, making them perfect for busy weeknights or spontaneous gatherings. The taste? Out of this world! Imagine biting into a warm, cheesy explosion of flavors that combines the best of BBQ and cheeseburgers. Plus, they’re a hit with both kids and adults, ensuring everyone leaves the table happy!
Ingredients for BBQ Bacon Cheeseburger Bombs
Gathering the right ingredients is the first step to creating these mouthwatering BBQ Bacon Cheeseburger Bombs. Here’s what you’ll need:
- Lean ground beef: The star of the show, providing that classic cheeseburger flavor.
- Bacon: Finely chopped for that smoky, crispy goodness that elevates the dish.
- Onion: Adds a sweet and savory depth to the filling.
- Cream cheese: This creamy element binds everything together, making each bite rich and satisfying.
- BBQ sauce: A must for that tangy, sweet flavor that complements the beef perfectly.
- Ketchup: Adds a touch of sweetness and moisture to the filling.
- Yellow mustard: For a bit of tang that balances the richness of the other ingredients.
- Worcestershire sauce: A secret ingredient that enhances the umami flavor.
- Garlic powder: A sprinkle of this adds a warm, aromatic touch.
- Salt and black pepper: Essential for seasoning and bringing out the flavors.
- Cheddar cheese: Cut into small cubes, it melts beautifully inside the bombs.
- Refrigerated biscuit dough: The perfect outer layer that turns golden and flaky when baked.
- Egg white: Used for brushing on top, giving the bombs a lovely shine.
- Sesame seeds: Optional, but they add a nice crunch and visual appeal.
- Extra BBQ sauce: For brushing or dipping, because who doesn’t love more BBQ?
For those looking to mix things up, consider adding diced jalapeños for a spicy kick or using turkey or chicken instead of beef for a lighter option. You can find all the exact measurements at the bottom of the article, ready for printing!
How to Make BBQ Bacon Cheeseburger Bombs
Step 1: Preheat and Prepare
Start by preheating your oven to 190°C (375°F). While it warms up, line a baking sheet with parchment paper. This will prevent the BBQ Bacon Cheeseburger Bombs from sticking and make cleanup a breeze. Trust me, you’ll thank yourself later!
Step 2: Cook the Bacon
In a large skillet, cook the finely chopped bacon over medium heat until it’s nice and crispy. This should take about 5–7 minutes. Once done, remove excess grease, leaving about a tablespoon in the pan. That little bit will add flavor to the next steps!
Step 3: Sauté the Onion
Add the diced onion to the skillet with the bacon drippings. Cook for 2–3 minutes until the onion is softened and fragrant. This step adds a sweet and savory depth to your filling, making those BBQ Bacon Cheeseburger Bombs even more irresistible!
Step 4: Brown the Beef
Next, add the lean ground beef to the skillet. Cook it until it’s completely browned, breaking it apart with a spatula. This should take about 5–7 minutes. Don’t forget to drain any excess fat to keep your bombs from being greasy!
Step 5: Mix in the Flavor
Reduce the heat to low and stir in the softened cream cheese, BBQ sauce, ketchup, mustard, Worcestershire sauce, garlic powder, salt, and black pepper. Mix everything until the cream cheese melts and the flavors meld together beautifully. This is where the magic happens!
Step 6: Cool the Filling
Remove the skillet from the heat and let the filling cool for about 10 minutes. This cooling time is crucial for easy assembly and prevents the dough from getting soggy.
Step 7: Prepare the Dough
While the filling cools, take your refrigerated biscuit dough and flatten each portion into a thin circle. Aim for about 4 inches in diameter. This will create the perfect pocket for your delicious filling!
Step 8: Assemble the Bombs
Place about 2 tablespoons of the beef mixture in the center of each dough circle. Add a cube of cheddar cheese on top. Fold the dough around the filling and pinch the edges tightly closed. Make sure they’re sealed well to keep all that cheesy goodness inside!
Step 9: Bake to Perfection
Place each bomb seam-side down on the prepared baking sheet. Brush the tops with lightly beaten egg white and sprinkle with sesame seeds for that extra crunch. Bake for 15–20 minutes, or until the dough is golden brown and the filling is hot. Your kitchen will smell amazing!
Tips for Success
- Don’t rush the cooling time for the filling; it makes assembly easier.
- Use a non-stick spray on your hands when handling the dough to prevent sticking.
- Experiment with different cheeses like pepper jack for a spicy twist.
- For a crispy bottom, bake on a preheated baking stone if you have one.
- Make a double batch and freeze some for a quick snack later!
Equipment Needed
- Large skillet: A non-stick skillet works best, but any skillet will do.
- Baking sheet: Line it with parchment paper for easy cleanup.
- Spatula: Essential for mixing and flipping.
- Measuring cups and spoons: For accurate ingredient portions.
- Mixing bowl: To combine your filling ingredients.
Variations
- Spicy Kick: Add diced jalapeños or a splash of hot sauce to the filling for an extra kick.
- Cheese Lovers: Swap out cheddar for pepper jack or mozzarella for a different flavor profile.
- Healthier Option: Use ground turkey or chicken instead of beef for a leaner alternative.
- Vegetarian Delight: Replace the meat with black beans or lentils, and add extra veggies like bell peppers and corn.
- Gluten-Free: Use gluten-free biscuit dough to make these bombs suitable for gluten-sensitive diets.
Serving Suggestions
- Classic Sides: Serve with crispy fries or onion rings for that classic diner feel.
- Fresh Salad: A light coleslaw or garden salad balances the richness of the bombs.
- Drinks: Pair with a cold beer or a refreshing iced tea to complement the flavors.
- Presentation: Arrange on a platter with extra BBQ sauce for dipping to impress your guests!
FAQs about BBQ Bacon Cheeseburger Bombs
Can I make BBQ Bacon Cheeseburger Bombs ahead of time?
Absolutely! You can prepare the filling and assemble the bombs, then freeze them before baking. Just pop them in the oven when you’re ready for a delicious snack!
What can I serve with BBQ Bacon Cheeseburger Bombs?
These tasty bombs pair wonderfully with crispy fries, a fresh salad, or even some tangy coleslaw. Don’t forget extra BBQ sauce for dipping!
Can I use a different type of meat?
Yes! Feel free to swap the ground beef for ground turkey, chicken, or even a plant-based meat alternative. The flavors will still shine through!
How do I store leftovers?
Store any leftover BBQ Bacon Cheeseburger Bombs in an airtight container in the fridge for up to three days. Reheat in the oven for the best texture!
Can I customize the filling?
Definitely! Add your favorite ingredients like diced jalapeños for heat, or different cheeses for a unique twist. The possibilities are endless!
Final Thoughts
Creating BBQ Bacon Cheeseburger Bombs is more than just cooking; it’s about bringing joy to the table. Each bite bursts with flavor, reminding me of carefree summer days and backyard barbecues. These little delights are perfect for gatherings, game days, or simply treating yourself after a long week. The best part? They’re easy to make, so you can focus on what really matters—sharing good food and laughter with friends and family. So, roll up your sleeves, get cooking, and let these bombs become a new favorite in your home. Trust me, you won’t regret it!
PrintBBQ Bacon Cheeseburger Bombs: A Delightful Recipe!
- Total Time: 40 minutes
- Yield: 10 servings
- Diet: Gluten Free
Description
BBQ Bacon Cheeseburger Bombs are a delicious and fun twist on traditional cheeseburgers, featuring a savory filling wrapped in biscuit dough.
Ingredients
- 450 g lean ground beef
- 90 g bacon, finely chopped
- ½ medium onion, finely diced
- 75 g cream cheese, softened
- 2 tbsp BBQ sauce
- 1 tbsp ketchup
- 1 tsp yellow mustard
- 1 tsp Worcestershire sauce
- ½ tsp garlic powder
- ½ tsp salt
- ¼ tsp black pepper
- 140 g cheddar cheese, cut into 10 small cubes
- 10 refrigerated biscuit dough portions, about 460 g total
- 1 egg white, lightly beaten
- 1 tbsp sesame seeds
- Extra BBQ sauce, for brushing or dipping
Instructions
- Preheat the oven to 190°C (375°F). Line a baking sheet with parchment paper.
- Cook the bacon in a large skillet over medium heat until crisp. Remove excess grease, leaving about 1 tablespoon in the pan.
- Add the onion and cook for 2–3 minutes until softened.
- Add the ground beef and cook, breaking it apart, until completely browned. Drain any excess fat.
- Reduce the heat to low. Stir in the cream cheese, BBQ sauce, ketchup, mustard, Worcestershire sauce, garlic powder, salt, and pepper. Mix until the cream cheese melts and everything is well combined.
- Remove from the heat and allow the filling to cool for about 10 minutes.
- Flatten each biscuit dough portion into a thin circle. Place about 2 tablespoons of beef mixture in the center and add one cube of cheddar.
- Fold the dough around the filling and pinch the edges tightly closed. Place each bomb seam-side down on the baking sheet.
- Brush the tops with egg white and sprinkle with sesame seeds.
- Bake for 15–20 minutes, or until the dough is golden brown and the beef filling is hot.
- Brush with a little BBQ sauce during the last 2–3 minutes of baking, if desired.
- Let them cool for 5 minutes before serving.
Notes
- For a spicier kick, add some diced jalapeños to the filling.
- These bombs can be made ahead of time and frozen before baking.
- Serve with extra BBQ sauce for dipping.
- Prep Time: 20 minutes
- Cook Time: 20 minutes
- Category: Appetizer
- Method: Baking
- Cuisine: American
Nutrition
- Serving Size: 1 bomb
- Calories: 250
- Sugar: 1g
- Sodium: 500mg
- Fat: 15g
- Saturated Fat: 6g
- Unsaturated Fat: 8g
- Trans Fat: 0g
- Carbohydrates: 20g
- Fiber: 1g
- Protein: 10g
- Cholesterol: 40mg