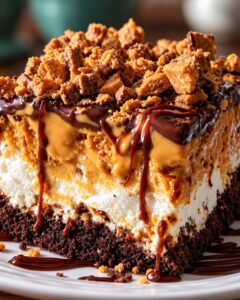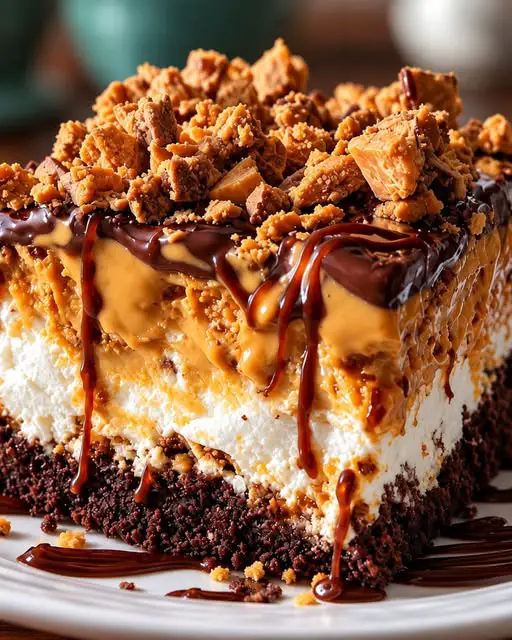
Introduction to Butterfinger Candy Bar Poke Cake
There’s something magical about a dessert that combines nostalgia with indulgence. The Butterfinger Candy Bar Poke Cake is just that—a delightful treat that brings back memories of childhood candy bars while satisfying your sweet tooth. This recipe is perfect for those busy days when you want to impress your loved ones without spending hours in the kitchen. With its rich chocolate base, creamy peanut butter, and crunchy Butterfinger topping, this cake is sure to become a favorite. Trust me, once you serve this, everyone will be asking for seconds!
Why You’ll Love This Butterfinger Candy Bar Poke Cake
This Butterfinger Candy Bar Poke Cake is a game-changer for dessert lovers. It’s incredibly easy to whip up, making it perfect for those last-minute gatherings or family dinners. The combination of chocolate, peanut butter, and caramel flavors creates a taste explosion that will leave everyone craving more. Plus, it’s a no-fuss recipe that requires minimal effort, so you can spend more time enjoying the company of your friends and family.
Ingredients for Butterfinger Candy Bar Poke Cake
Gathering the right ingredients is the first step to creating this delicious Butterfinger Candy Bar Poke Cake. Here’s what you’ll need:
- Chocolate cake mix: The base of our cake, providing that rich, chocolatey goodness.
- Eggs, oil, and water: These are typically listed on the cake mix box and are essential for baking the cake.
- Sweetened condensed milk: This creamy ingredient adds moisture and sweetness, making the cake irresistibly rich.
- Caramel sauce: A drizzle of this sweet sauce enhances the flavor and adds a gooey texture.
- Creamy peanut butter: Warmed slightly, it brings a nutty richness that pairs perfectly with chocolate.
- Cream cheese: Softened, it adds a tangy creaminess to the peanut butter topping.
- Powdered sugar: This sweetener helps to balance the flavors in the topping.
- Vanilla extract: A splash of this adds depth and warmth to the cake.
- Heavy whipping cream: Whipped to perfection, it creates a light and fluffy topping.
- Butterfinger candy bars: Crushed on top, these add a delightful crunch and nostalgic flavor.
- Chocolate syrup: A drizzle of this adds an extra layer of sweetness and visual appeal.
- Chopped roasted peanuts (optional): For those who love a little extra crunch, these can be sprinkled on top.
For exact measurements, check the bottom of the article where you can find everything listed for easy printing. Enjoy the process of gathering these ingredients, as each one plays a vital role in creating this indulgent dessert!
How to Make Butterfinger Candy Bar Poke Cake
Creating this Butterfinger Candy Bar Poke Cake is a delightful journey that’s as fun as it is delicious. Follow these simple steps, and you’ll have a show-stopping dessert that everyone will love!
Step 1: Prepare the Cake
Start by preheating your oven to 350°F. While it warms up, grab your chocolate cake mix and follow the package directions. This is where the magic begins! Once the cake is baked in a greased 9×13-inch baking dish, let it cool for about 15 minutes. Cooling is crucial; it allows the cake to set and makes it easier to poke holes without crumbling.
Step 2: Poke Holes in the Cake
Now comes the fun part! Using the handle of a wooden spoon or the end of a large straw, poke holes all over the cake. Space them about 1 inch apart. This step is essential because it allows the sweetened mixture to seep into the cake, creating that deliciously moist texture we all crave.
Step 3: Add the Sweetened Mixture
In a bowl, whisk together the sweetened condensed milk and caramel sauce until smooth. Slowly pour this luscious mixture over the cake, ensuring it fills all the holes. Don’t be shy—let it soak in! Drizzle the warmed peanut butter over the top for an extra layer of flavor. It’s like a warm hug for your cake!
Step 4: Make the Peanut Butter Topping
In another bowl, beat together the softened cream cheese, creamy peanut butter, powdered sugar, and vanilla extract until smooth. This topping is rich and creamy, adding a delightful contrast to the chocolate cake. Make sure there are no lumps; we want it silky!
Step 5: Whip the Cream
In a separate bowl, whip the heavy cream with the remaining powdered sugar until stiff peaks form. This is where the magic happens! Gently fold the whipped cream into the peanut butter mixture. This step lightens the topping, making it fluffy and irresistible.
Step 6: Assemble the Cake
Spread the peanut butter topping evenly over the cooled cake. Don’t rush this part; take your time to make it look beautiful. Then, sprinkle the crushed Butterfinger pieces generously on top. The crunch will add a delightful texture that complements the creamy layers.
Step 7: Drizzle and Chill
Finally, drizzle the cake with caramel sauce and chocolate syrup. If you’re feeling adventurous, add some chopped roasted peanuts for an extra crunch. Now, it’s time to chill! Refrigerate the cake for at least 2–4 hours, preferably overnight. This allows all those flavors to meld together, creating a dessert that’s truly unforgettable.
Tips for Success
- Let the cake cool completely before poking holes to prevent crumbling.
- Use a warm spoon to drizzle peanut butter easily over the cake.
- Chill the cake overnight for the best flavor and texture.
- Adjust the amount of crushed Butterfinger to suit your taste.
- For a richer topping, consider adding a splash of heavy cream to the peanut butter mixture.
Equipment Needed
- 9×13-inch baking dish: A standard size for baking cakes; a glass or metal dish works well.
- Mixing bowls: Use various sizes for mixing ingredients; a large bowl is essential for the whipped cream.
- Whisk: Perfect for blending the sweetened mixture; a fork can work in a pinch.
- Wooden spoon or straw: Ideal for poking holes in the cake; any long, sturdy object will do.
- Electric mixer: Great for beating the cream cheese and whipping cream; a hand whisk can suffice if you’re up for a workout!
Variations
- Gluten-Free Option: Substitute the chocolate cake mix with a gluten-free version to accommodate dietary needs.
- Nut-Free Version: Omit the peanut butter and crushed Butterfinger for a nut-free dessert. Use a chocolate frosting instead.
- Vegan Adaptation: Use a vegan chocolate cake mix, almond milk, and a plant-based cream cheese alternative for a vegan-friendly treat.
- Flavor Twists: Experiment with different candy bars like Snickers or Reese’s for a unique flavor profile.
- Fruit Addition: Add sliced bananas or strawberries between the layers for a fruity twist that complements the chocolate and peanut butter.
Serving Suggestions
- Pair with Ice Cream: A scoop of vanilla or chocolate ice cream complements the rich flavors beautifully.
- Fresh Berries: Serve with a side of fresh strawberries or raspberries for a refreshing contrast.
- Presentation: Garnish with extra crushed Butterfinger and a drizzle of caramel for an eye-catching finish.
- Drink Pairing: Enjoy with a cold glass of milk or a rich coffee to balance the sweetness.
FAQs about Butterfinger Candy Bar Poke Cake
Curious about this delightful Butterfinger Candy Bar Poke Cake? Here are some common questions I often hear, along with answers to help you navigate your baking adventure!
Can I make this Butterfinger Candy Bar Poke Cake ahead of time?
Absolutely! In fact, making it a day in advance allows the flavors to meld beautifully. Just keep it covered in the fridge until you’re ready to serve.
What can I substitute for the peanut butter?
If you’re looking for alternatives, try using almond butter or sunflower seed butter. Both will give you a similar creamy texture without the peanut flavor.
How do I store leftovers?
Store any leftover cake in an airtight container in the refrigerator. It should stay fresh for about 3-4 days, but trust me, it won’t last that long!
Can I use a different cake flavor?
Of course! While chocolate is a classic choice, vanilla or even red velvet cake can work wonderfully with the peanut butter and Butterfinger toppings.
Is this recipe suitable for kids?
Definitely! Kids will love the fun of poking holes in the cake and sprinkling the Butterfinger pieces. Just keep an eye on the sugar content if you’re serving it to little ones!
Final Thoughts
Creating this Butterfinger Candy Bar Poke Cake is more than just baking; it’s about sharing joy and deliciousness with those you love. Each slice is a delightful blend of flavors and textures that brings smiles and happy memories. Whether it’s a family gathering or a casual get-together with friends, this cake is sure to be the star of the show. The best part? It’s simple enough for any home cook to master. So, roll up your sleeves, gather your ingredients, and let the sweet magic unfold. Trust me, you’ll be glad you did!
PrintButterfinger Candy Bar Poke Cake: Indulge in This Treat!
- Total Time: 4 hours 30 minutes
- Yield: 12 servings
- Diet: Vegetarian
Description
Indulge in this delicious Butterfinger Candy Bar Poke Cake, a delightful dessert that combines chocolate cake with creamy peanut butter and caramel flavors, topped with crushed Butterfinger candy bars.
Ingredients
- 1 box (15.25 oz) chocolate cake mix
- Ingredients listed on the cake mix box, usually eggs, oil, and water
- 1 can (14 oz) sweetened condensed milk
- ½ cup caramel sauce
- ¼ cup creamy peanut butter, warmed slightly
- 8 oz cream cheese, softened
- ½ cup creamy peanut butter
- ½ cup powdered sugar
- 1 tsp vanilla extract
- 1 cup heavy whipping cream
- ½ cup powdered sugar
- 6–8 Butterfinger candy bars, crushed
- ½ cup caramel sauce
- ¼ cup chocolate syrup
- ½ cup chopped roasted peanuts, optional
Instructions
- Preheat the oven to 350°F. Prepare the chocolate cake mix according to the package directions and bake in a greased 9×13-inch baking dish. Let the cake cool for about 15 minutes.
- Using the handle of a wooden spoon or the end of a large straw, poke holes all over the cake, spacing them about 1 inch apart.
- Whisk together the sweetened condensed milk and caramel sauce. Slowly pour the mixture over the cake, making sure it fills the holes. Drizzle the warmed peanut butter over the top.
- Beat cream cheese, peanut butter, ½ cup powdered sugar, and vanilla until smooth.
- In a separate bowl, whip the heavy cream with the remaining ½ cup powdered sugar until stiff peaks form. Gently fold the whipped cream into the peanut butter mixture.
- Spread the peanut butter topping evenly over the cooled cake.
- Sprinkle the crushed Butterfinger pieces generously over the top.
- Drizzle with caramel sauce and chocolate syrup. Add chopped peanuts if desired.
- Refrigerate for at least 2–4 hours, preferably overnight, before serving.
Notes
- For best results, let the cake chill overnight to allow the flavors to meld.
- Feel free to adjust the amount of crushed Butterfinger candy bars based on your preference.
- This cake can be made a day in advance for convenience.
- Prep Time: 30 minutes
- Cook Time: 30 minutes
- Category: Dessert
- Method: Baking
- Cuisine: American
Nutrition
- Serving Size: 1 slice
- Calories: 450
- Sugar: 35g
- Sodium: 300mg
- Fat: 25g
- Saturated Fat: 10g
- Unsaturated Fat: 5g
- Trans Fat: 0g
- Carbohydrates: 50g
- Fiber: 2g
- Protein: 6g
- Cholesterol: 50mg