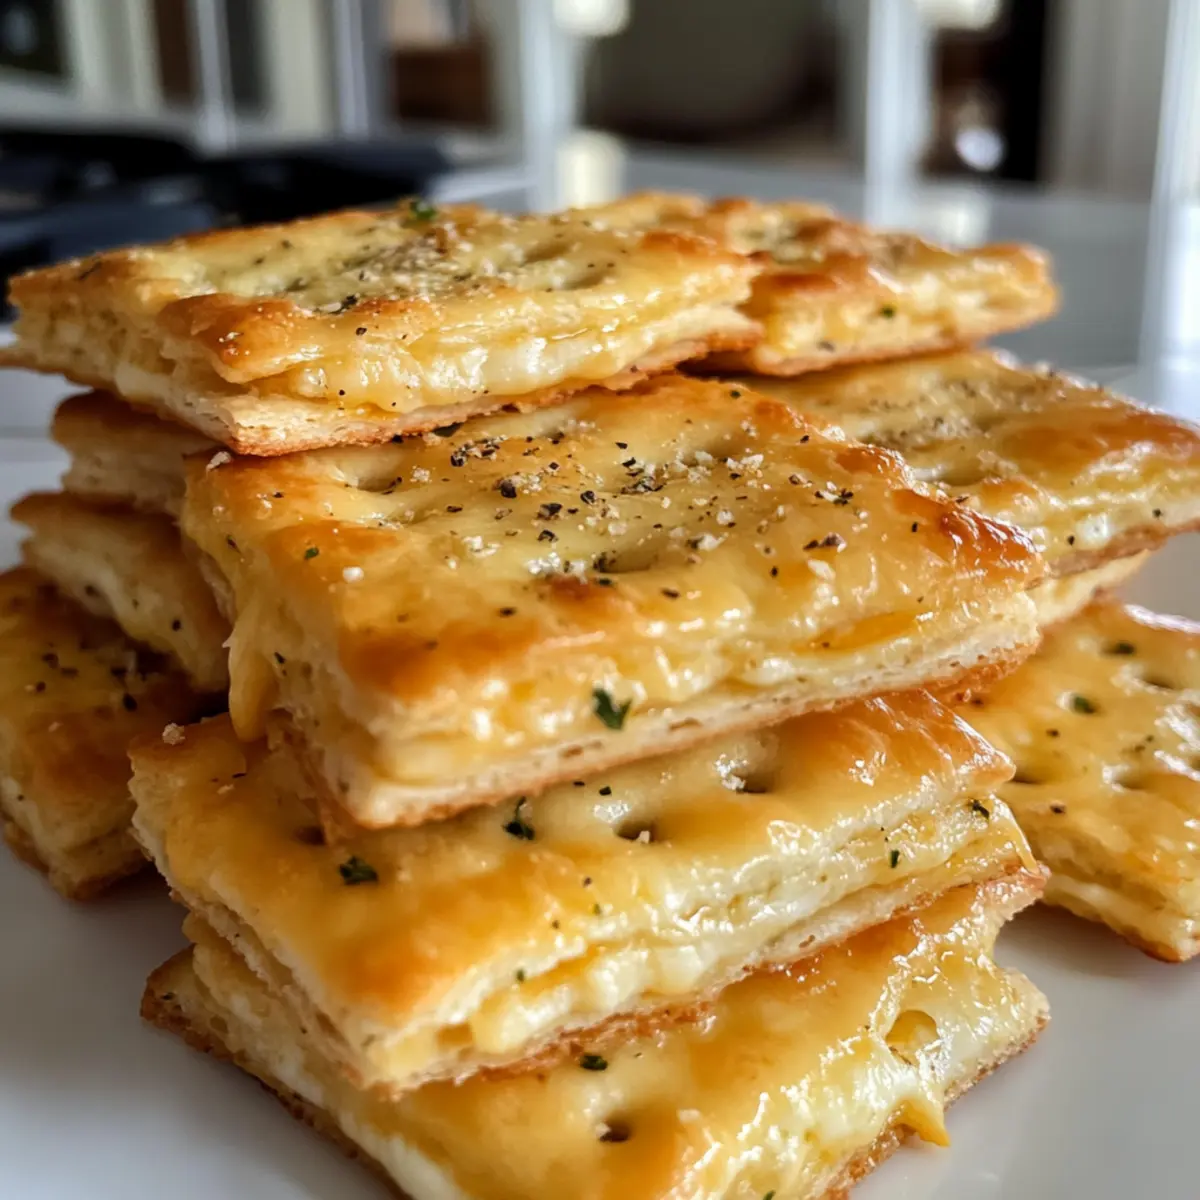
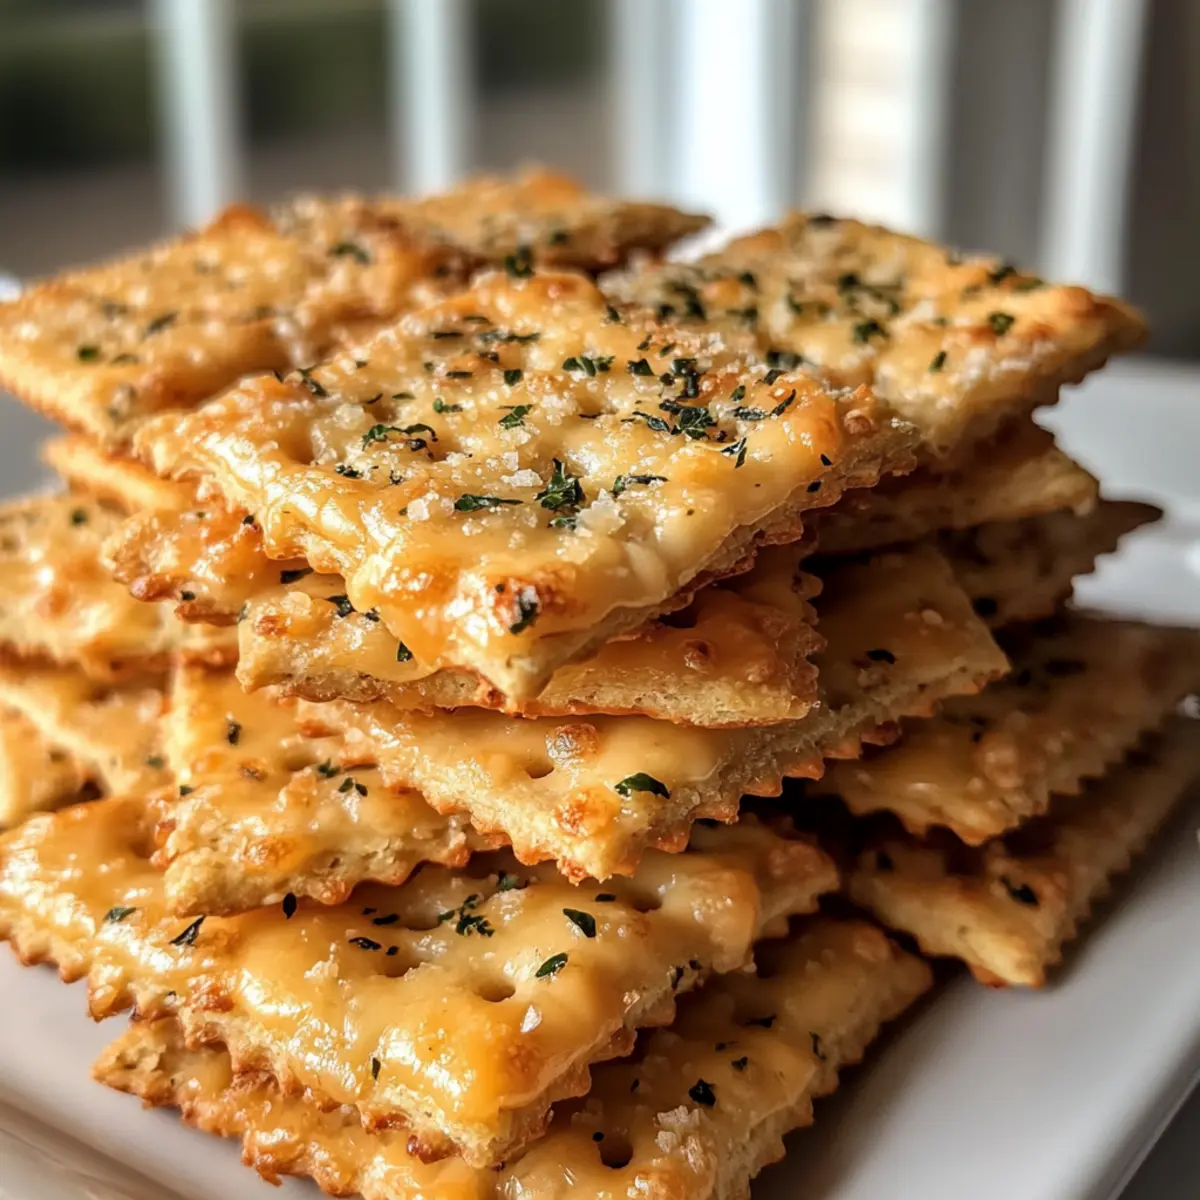
As the oven warms up, a sense of anticipation fills the air—there’s nothing like the aroma of garlic and melted cheese wafting through your kitchen! Today, we’re diving into a favorite comfort snack that’s sure to wow your family and friends: Easy Cheesy Garlic Ritz Bits. These delightful homemade bites are not only incredibly simple to whip up, making them perfect for any impromptu gathering, but they also offer a delicious upgrade from the bland store-bought snacks we often settle for. With golden, crunchy edges and a gooey, savory center, these Cheesy Garlic Ritz Bits will elevate your snacking game. Why opt for the ordinary when you can indulge in something extraordinary? Ready to make some magic in the kitchen? Let’s get started!

Why are Cheesy Garlic Ritz Bits irresistible?
Simplicity makes these bites a total win! Crafted in just a few easy steps, they’re perfect for beginners and seasoned chefs alike. Irresistible flavor bursts from the combination of fresh garlic and cheese, taking crunchy crackers to a whole new level. Versatility lets you customize each bit—add smoked paprika or experiment with different cheeses for your own twist! Crowd-pleasing appeal means they’re ideal for parties or family movie nights. Serve them warm for the ultimate snack satisfaction! If you’re also looking to impress with more cheesy goodness, check out our delightful Lemon Chicken Cheesy or whip up some Air Fryer Garlic for a complete snacking experience.
Cheesy Garlic Ritz Bits Ingredients
For the Ritz Bits
• Cheddar Cheese – Use freshly shredded cheddar for the best melting and flavor.
• Ritz Crackers – Choose regular or gluten-free varieties for that satisfying crunch.
• Garlic – Fresh garlic enhances the overall taste; don’t skimp on this star ingredient!
• Butter – Adds richness and creates that beautiful golden crust; olive oil works as a dairy-free substitute.
Optional Enhancements
• Smoked Paprika – A pinch adds depth and a delightful smoky flavor; perfect for a subtle kick.
• Cayenne Pepper – For those who enjoy a bit of heat, mix in a pinch for an exciting twist!
These Cheesy Garlic Ritz Bits are sure to become a beloved snack in your household. Enjoy making these treats from scratch, and watch your family rave about them!
Step‑by‑Step Instructions for Cheesy Garlic Ritz Bits
Step 1: Preheat Your Oven
Begin by preheating your oven to 325°F (165°C). This ensures an even and perfect bake for your Cheesy Garlic Ritz Bits. While the oven heats, gather your baking sheet, parchment paper (if desired for easy cleanup), and an oven mitt for safe handling afterward.
Step 2: Prepare the Cracker Sandwiches
Next, take a Ritz cracker and place a generous tablespoon of freshly shredded cheddar cheese upon it. Sprinkle a bit of minced garlic over the cheese for that aromatic kick. Top with another Ritz cracker to create a delightful sandwich. Repeat this process until you have created several sandwiches to bake.
Step 3: Butter the Outside
Melt some butter in a small bowl and use a pastry brush to gently coat the outer sides of each cracker sandwich. This step is crucial as it helps achieve a golden, crispy crust when baked. Be sure to cover all edges for maximum flavor.
Step 4: Arrange on Baking Sheet
Place the buttered cracker sandwiches carefully on your prepared baking sheet, ensuring they’re spaced apart for even baking. This allows air to circulate and gives each Cheesy Garlic Ritz Bit a perfect crispy finish.
Step 5: Bake to Perfection
Slide the baking sheet into the preheated oven and bake for 8-10 minutes. Keep an eye on them; once you see the edges turning golden and the cheese bubbling up, you know they’re ready to come out. The aroma will be irresistible!
Step 6: Cool Before Serving
Once baked, remove the sheet from the oven using your oven mitt and let the Cheesy Garlic Ritz Bits cool for a few minutes on the sheet. This pause helps lock in their crunchy texture. If you can resist the temptation, allow them to cool slightly for the best munching experience.
Step 7: Serve and Enjoy
Lastly, serve your warm Cheesy Garlic Ritz Bits to family and friends for a delightful snack! These bites are best enjoyed fresh out of the oven, showcasing their gooey cheese center and crispy exterior. Prepare to indulge in compliments and smiles!

Make Ahead Options
These Easy Cheesy Garlic Ritz Bits are perfect for meal prep enthusiasts! You can assemble the cracker sandwiches up to 24 hours in advance, which saves you precious time during busy weeknights. Simply prepare each sandwich with the shredded cheese and garlic, then store them in an airtight container in the refrigerator to keep them fresh. When you’re ready to enjoy your Cheesy Garlic Ritz Bits, brush the outsides with melted butter, bake at 325°F (165°C) for 8-10 minutes until golden, and indulge in the delightful crunch. Preparing ahead not only streamlines your cooking process but ensures that each bite is just as delicious as when made fresh!
How to Store and Freeze Cheesy Garlic Ritz Bits
Fridge: Store leftover Cheesy Garlic Ritz Bits in an airtight container for up to 3 days to maintain their freshness and flavor.
Freezer: Freeze individual portions wrapped tightly in plastic wrap or in a freezer bag for up to 2 months. Thaw in the fridge before reheating.
Reheating: To reheat, place the bits in a preheated oven at 350°F (175°C) for about 5-7 minutes, ensuring they regain their crispy texture.
Assembly Tips: You can prepare the cracker sandwiches a day ahead and refrigerate them before baking to save time on the day of serving.
Cheesy Garlic Ritz Bits Variations
Feel free to get creative and customize your Cheesy Garlic Ritz Bits to suit your taste buds!
-
Smoked Gouda: Swap half the cheddar for shredded smoked gouda for a delightful smoky flavor that adds depth.
-
Spicy Kick: Incorporate a pinch of cayenne pepper into the cheese mix for an extra layer of heat and excitement.
-
Flavored Crackers: Use flavored crackers, like sour cream & onion or herb, for a fun and intriguing twist on traditional flavors.
-
Herb Infusion: Add fresh herbs such as chopped parsley or chives into the cheese mixture to brighten up the overall taste.
-
Dairy-Free Delight: Substitute cheese with a dairy-free cheese alternative and use olive oil instead of butter for a lactose-free version.
-
Cheesy Trio: Combine cheddar, mozzarella, and pepper jack cheeses for a melty, cheesy extravaganza that will please any cheese lover.
-
Garlic Alternatives: If you’re feeling adventurous, try roasted garlic for a sweet, caramelized version to elevate the flavor.
-
Oven-Free Option: For a quick fix, make these in your air fryer for a crispy texture without heating the oven, perfect for smaller batches. If you enjoy easy recipes, consider pairing these bites with our crunchy Air Fryer Garlic for a complete snack experience!
What to Serve with Easy Cheesy Garlic Ritz Bits?
As you savor the irresistible garlic and cheese flavor, it’s time to elevate your snacking experience with some delightful pairings that complement these bites wonderfully.
-
Fresh Veggie Platter: Crisp carrots, cucumbers, and bell peppers add a refreshing crunch that balances the richness of the Ritz Bits, making for a satisfying snack combination.
-
Creamy Ranch Dip: This cool, zesty dip enhances the savory flavor of the Cheesy Garlic Ritz Bits, providing a delightful contrast with every bite.
-
Homemade Guacamole: The creamy, buttery texture of guacamole brings a luscious dimension to your snack spread, perfect alongside the crunchy bites.
-
Spicy Salsa: A kick of fresh, tangy salsa will elevate your snacking experience, adding a lively burst of flavor.
-
Savory Meat Skewers: Grilled chicken or beef skewers add protein and heartiness to your snack table, making it a fun and filling option for gatherings.
-
Zesty Lemonade or Iced Tea: Refreshing beverages like zesty lemonade or chilled iced tea sweeten the experience and cleanse the palate between bites.
-
Chocolate Chip Cookies: Why not end your snack adventure with something sweet? Chocolate chip cookies create a delightful balance to the savory garlic bites.
-
Cheese Board: Pairing your Easy Cheesy Garlic Ritz Bits with an assortment of cheeses and fruits rounds out a festive and enjoyable tasting experience, ensuring everyone is satisfied.
Expert Tips for Cheesy Garlic Ritz Bits
• Perfect Cheese Shreds: Use a Microplane grater for finely shredded cheese; this ensures better melting and a gooey center in your Cheesy Garlic Ritz Bits.
• Mind the Portions: Avoid overfilling your crackers with cheese; too much can lead to sogginess. A thin, even layer works best for crispy results.
• Serve Immediately: Enjoy your Cheesy Garlic Ritz Bits fresh out of the oven for the best texture. Reheating can soften the crackers significantly.
• Experiment with Flavors: Don’t hesitate to add smoked gouda or a sprinkle of cayenne for a unique twist that elevates the flavor profile!
• Cooling Time Matters: Let them cool briefly on the baking sheet. This step locks in that delightful crunch that makes these bites so enjoyable!
Cheesy Garlic Ritz Bits Recipe FAQs
What type of cheese works best for Cheesy Garlic Ritz Bits?
Absolutely! I recommend using freshly shredded cheddar cheese for the best melting and flavor. It creates that gooey filling everyone loves. If you’re feeling adventurous, try substituting half with smoked gouda for a smoky twist!
How should I store leftover Cheesy Garlic Ritz Bits?
Store any leftovers in an airtight container in the fridge for up to 3 days. This keeps them fresh and flavorful. When you’re ready to enjoy them again, just pop them in the oven for a few minutes!
Can I freeze Cheesy Garlic Ritz Bits? How?
Yes, you can! To freeze, wrap each individual cracker sandwich tightly in plastic wrap or place them in a freezer-safe bag. They will keep well for up to 2 months. When ready to eat, simply thaw them in the fridge overnight and then reheat in a preheated oven at 350°F (175°C) for 5-7 minutes to regain their delightful crispiness.
What if my Cheesy Garlic Ritz Bits come out soggy?
Very! If they turn soggy, it usually means there was too much cheese or not enough butter to create that crispy crust. Make sure to use a thin, even layer of cheese, and ensure you’ve thoroughly brushed the outsides with melted butter. If they come out soggy, allow them to rest briefly in the oven for a few extra minutes to help crisp them back up.
Can I use gluten-free crackers for Cheesy Garlic Ritz Bits?
Absolutely! If you or someone at your gathering has dietary restrictions, substituting regular Ritz crackers with gluten-free options will still yield that satisfying crunch and flavor. Just check the ingredients to ensure they fit your dietary needs!
What are some dietary considerations I should keep in mind?
When making Cheesy Garlic Ritz Bits, consider any cheese allergies or sensitivities. You can opt for dairy-free cheese alternatives if needed. Also, some might want to avoid garlic due to personal preferences; feel free to leave it out or use a milder garlic powder for a less intense flavor.
Cheesy Garlic Ritz Bits for Irresistible Snacking Bliss
Ingredients
Equipment
Method
- Preheat your oven to 325°F (165°C). Gather your baking sheet, parchment paper, and an oven mitt.
- Place a generous tablespoon of freshly shredded cheddar cheese on a Ritz cracker. Top with minced garlic and another Ritz cracker to create a sandwich.
- Melt butter and use a pastry brush to coat the outer sides of each cracker sandwich.
- Arrange the buttered sandwiches on a baking sheet, spaced apart for even baking.
- Bake in the oven for 8-10 minutes, or until edges are golden and cheese is bubbling.
- Remove from the oven and let cool for a few minutes on the baking sheet.
- Serve warm to family and friends and enjoy!