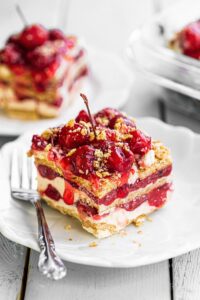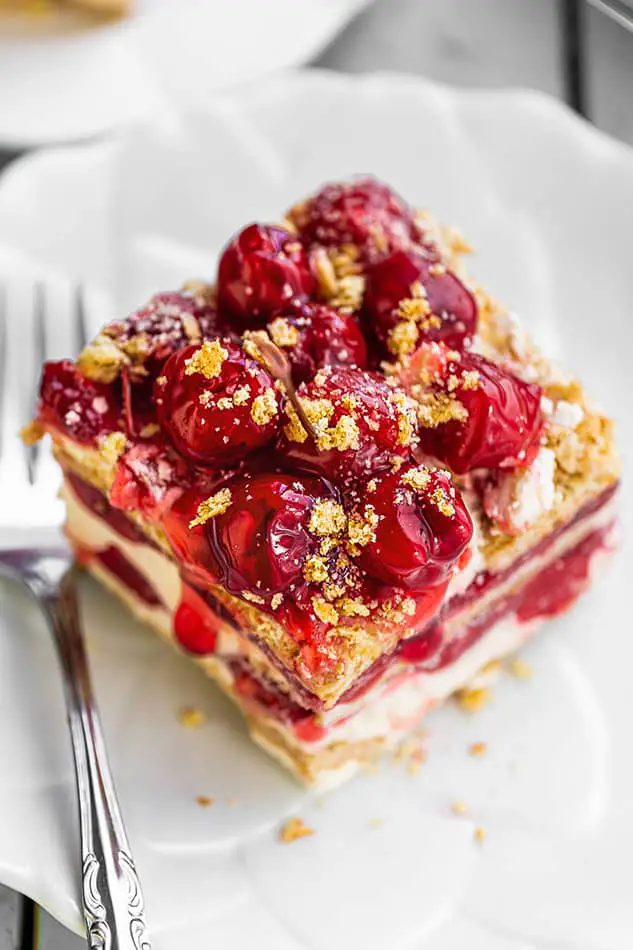
Introduction to Cherry Cheesecake Icebox Cake
There’s something magical about desserts that require little effort but deliver big on flavor. The Cherry Cheesecake Icebox Cake is just that—a delightful no-bake treat that’s perfect for any occasion. Whether you’re hosting a summer barbecue or simply craving something sweet after a long day, this cake is your go-to solution. It layers creamy cheesecake filling with crunchy graham crackers and luscious cherry pie filling, creating a symphony of textures and tastes. Plus, it’s a breeze to whip up, making it an ideal choice for busy days when you want to impress your loved ones.
Why You’ll Love This Cherry Cheesecake Icebox Cake
This Cherry Cheesecake Icebox Cake is a game-changer for dessert lovers. It’s incredibly easy to make, requiring no baking at all. Just mix, layer, and chill! The combination of creamy cheesecake and sweet cherry filling is a flavor explosion that will have everyone coming back for seconds. Plus, it’s a fantastic make-ahead option, allowing you to enjoy more time with family and friends while still serving a show-stopping dessert.
Ingredients for Cherry Cheesecake Icebox Cake
Gathering the right ingredients is the first step to creating this delightful Cherry Cheesecake Icebox Cake. Here’s what you’ll need:
- Cream Cheese: The star of the show! Softened cream cheese gives the cheesecake filling its rich and creamy texture.
- Powdered Sugar: This sweetener blends smoothly into the cream cheese, adding just the right amount of sweetness without any graininess.
- Vanilla Extract: A splash of vanilla enhances the flavor, making the cheesecake filling even more irresistible.
- Fresh Lemon Juice: A hint of acidity brightens the flavors and balances the sweetness of the filling.
- Heavy Whipping Cream: Whipped to stiff peaks, this ingredient adds lightness and a fluffy texture to the cheesecake.
- Graham Crackers: These crunchy layers provide a delightful contrast to the creamy filling. They also serve as the cake’s base.
- Cherry Pie Filling: The crowning glory! This sweet and tart topping brings a burst of flavor and color to the cake.
- Optional Toppings: Get creative! Fresh cherries, graham cracker crumbs, white chocolate shavings, whipped cream, or mint leaves can elevate your dessert.
For exact measurements, check the bottom of the article where you can find everything listed for easy printing. Enjoy the process of gathering these ingredients, as each one plays a vital role in crafting this no-bake masterpiece!
How to Make Cherry Cheesecake Icebox Cake
Creating this Cherry Cheesecake Icebox Cake is a straightforward process that anyone can master. Follow these simple steps, and you’ll have a stunning dessert that’s sure to impress. Let’s dive into the deliciousness!
Step 1: Make the Cheesecake Filling
Start by beating the softened cream cheese in a large bowl until it’s smooth and creamy. This step is crucial for achieving that velvety texture. Next, add the powdered sugar, vanilla extract, and fresh lemon juice. Mix until everything is well combined. In a separate bowl, whip the cold heavy cream until it forms stiff peaks. Gently fold the whipped cream into the cream cheese mixture. This folding technique is key; it keeps the filling light and airy, ensuring a delightful cheesecake experience.
Step 2: Assemble the Cake
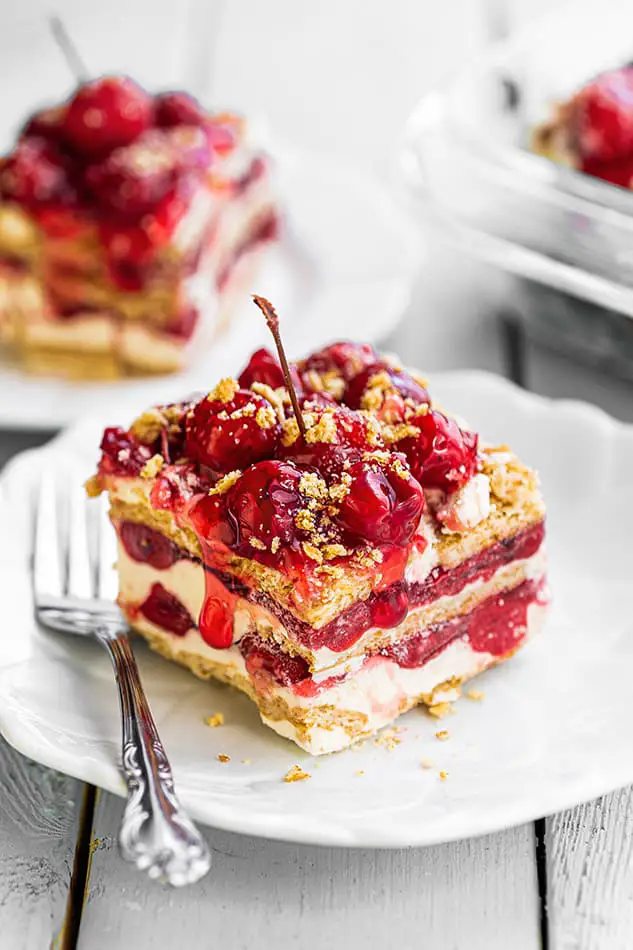
Now it’s time to layer your masterpiece! Lightly grease or line a 9×13-inch baking dish. Start by arranging a single layer of graham crackers at the bottom. Don’t worry about breaking them to fit; it adds character! Spread one-third of the cheesecake filling evenly over the crackers, followed by one-third of the cherry pie filling. Repeat this layering process two more times: graham crackers, cheesecake filling, and cherry pie filling. Finish with a generous layer of cherry pie filling on top for that eye-catching finish.
Step 3: Chill
Cover the assembled cake and refrigerate it for 6–8 hours, preferably overnight. This chilling time is essential as it allows the graham crackers to soften, transforming the layers into a cake-like texture that’s simply irresistible.
Step 4: Garnish
Before serving, get creative with your garnishes! Top the cake with whipped cream, fresh cherries, graham cracker crumbs, or even white chocolate shavings. A sprinkle of fresh mint leaves can add a pop of color and freshness. These finishing touches not only enhance the presentation but also elevate the flavor!
Tips for Success
- Make sure your cream cheese is at room temperature for easy mixing.
- Whip the heavy cream until stiff peaks form; this ensures a light filling.
- Chill the cake overnight for the best flavor and texture.
- Feel free to experiment with different pie fillings, like blueberry or strawberry.
- Use a sharp knife to cut clean slices for a beautiful presentation.
Equipment Needed
- Mixing Bowls: A large bowl for the filling and a smaller one for whipping cream. Any size will do!
- Electric Mixer: A hand mixer or stand mixer makes whipping cream a breeze.
- 9×13-inch Baking Dish: Essential for assembling your cake; a glass or metal dish works great.
- Spatula: Perfect for folding and spreading the cheesecake filling evenly.
- Plastic Wrap: To cover the cake while it chills in the fridge.
Variations
- Chocolate Cherry Cheesecake: Add cocoa powder to the cheesecake filling for a rich chocolate twist.
- Berry Medley: Swap out the cherry pie filling for a mix of blueberries, raspberries, and strawberries for a fruity explosion.
- Gluten-Free Option: Use gluten-free graham crackers to make this dessert suitable for those with gluten sensitivities.
- Vegan Version: Substitute cream cheese with a vegan alternative and use coconut cream instead of heavy whipping cream.
- Nutty Crunch: Incorporate crushed nuts, like pecans or almonds, between the layers for added texture and flavor.
Serving Suggestions
- Pair with a scoop of vanilla ice cream for an extra creamy treat.
- Serve alongside fresh fruit, like strawberries or blueberries, for a refreshing contrast.
- Complement with a cup of coffee or iced tea to balance the sweetness.
- Present on a decorative platter, garnished with mint leaves for a pop of color.
FAQs about Cherry Cheesecake Icebox Cake
Can I make Cherry Cheesecake Icebox Cake ahead of time?
Absolutely! This no-bake dessert is perfect for making ahead. In fact, chilling it overnight enhances the flavors and texture, making it even more delicious.
How long does Cherry Cheesecake Icebox Cake last in the fridge?
Stored properly in an airtight container, this cake can last up to 3-4 days in the fridge. Just be sure to keep it covered to maintain its freshness!
Can I use a different fruit filling?
Definitely! While cherry pie filling is a classic choice, feel free to experiment with other fruit fillings like blueberry, strawberry, or even mixed berries for a delightful twist.
Is this dessert suitable for vegetarians?
Yes! The Cherry Cheesecake Icebox Cake is vegetarian-friendly, as it contains no meat or animal-derived ingredients aside from dairy.
What can I do if I don’t have graham crackers?
If graham crackers aren’t available, you can substitute them with crushed cookies like digestive biscuits or vanilla wafers. They’ll still provide that delightful crunch!
Final Thoughts
Creating a Cherry Cheesecake Icebox Cake is more than just whipping up a dessert; it’s about crafting memories. Each layer tells a story, from the creamy filling to the sweet cherry topping. This no-bake treat is perfect for gatherings, family dinners, or simply indulging after a long day. The joy of sharing this cake with loved ones, watching their faces light up with each bite, is truly priceless. So, roll up your sleeves, gather your ingredients, and let this delightful dessert bring a little sweetness into your life. You won’t regret it!
PrintCherry Cheesecake Icebox Cake: A Delightful No-Bake Treat!
- Total Time: 6-8 hours (chilling time)
- Yield: 12 servings
- Diet: Vegetarian
Description
A delightful no-bake Cherry Cheesecake Icebox Cake that combines creamy cheesecake filling with layers of graham crackers and cherry pie filling.
Ingredients
- 2 (8 oz/225 g) packages cream cheese, softened
- 1 cup (120 g) powdered sugar
- 1 tsp vanilla extract
- 1 tsp fresh lemon juice
- 2 cups (480 ml) heavy whipping cream, cold (or 1 (8 oz) container whipped topping, thawed)
- 18–20 whole graham cracker sheets
- 2 (21 oz/595 g) cans cherry pie filling
- Optional Toppings: Fresh cherries, Graham cracker crumbs, White chocolate shavings, Whipped cream, Fresh mint leaves
Instructions
- Make the Cheesecake Filling: In a large bowl, beat the cream cheese until smooth and creamy. Add the powdered sugar, vanilla extract, and lemon juice. Beat until well combined. In a separate bowl, whip the heavy cream to stiff peaks. Gently fold the whipped cream into the cream cheese mixture until light and fluffy.
- Assemble the Cake: Lightly grease or line a 9×13-inch baking dish. Arrange a single layer of graham crackers on the bottom, breaking pieces as needed to fit. Spread one-third of the cheesecake filling evenly over the crackers. Spoon one-third of the cherry pie filling over the cheesecake layer. Repeat the layers two more times: Graham crackers, Cheesecake filling, Cherry pie filling. Finish with a generous layer of cherry pie filling on top.
- Chill: Cover and refrigerate for 6–8 hours, preferably overnight, allowing the graham crackers to soften into a cake-like texture.
- Garnish: Before serving, decorate with whipped cream, fresh cherries, graham cracker crumbs, white chocolate shavings, or mint leaves if desired.
Notes
- For best results, chill overnight to allow flavors to meld.
- Feel free to customize toppings based on preference.
- Prep Time: 30 minutes
- Cook Time: 0 minutes
- Category: Dessert
- Method: No-Bake
- Cuisine: American
Nutrition
- Serving Size: 1 slice
- Calories: 350
- Sugar: 25g
- Sodium: 200mg
- Fat: 25g
- Saturated Fat: 15g
- Unsaturated Fat: 5g
- Trans Fat: 0g
- Carbohydrates: 30g
- Fiber: 1g
- Protein: 4g
- Cholesterol: 80mg