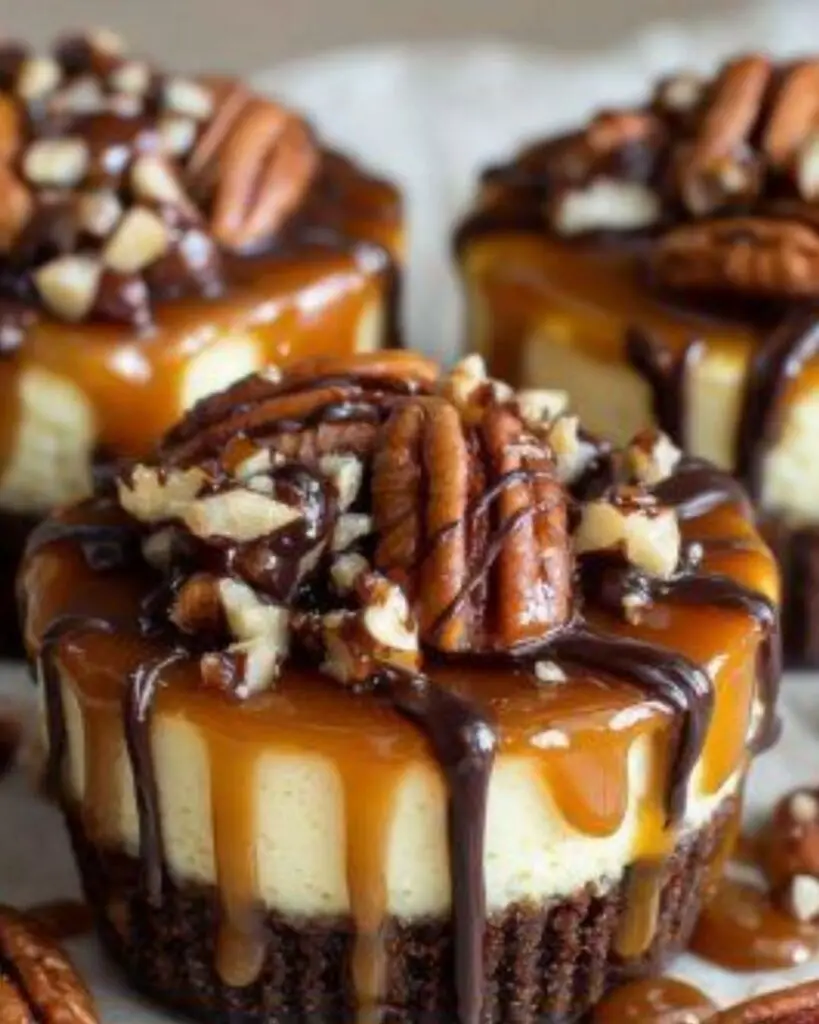
Introduction to Mini Turtle Cheesecakes
There’s something magical about desserts that bring back memories, isn’t there? Mini Turtle Cheesecakes are one of those treats that can transport you to a cozy kitchen filled with laughter and sweet aromas. These little delights are perfect for impressing your loved ones or simply indulging after a long day. With a rich chocolate cookie crust, creamy filling, and a decadent topping of caramel and pecans, they’re a quick solution for satisfying your sweet tooth. Plus, they’re easy to whip up, making them a go-to recipe for any occasion!
Why You’ll Love This Mini Turtle Cheesecakes
These Mini Turtle Cheesecakes are a dessert lover’s dream come true! They combine the rich flavors of chocolate, caramel, and pecans in a bite-sized treat that’s both easy to make and utterly delicious. With minimal prep time and a straightforward baking process, you can have these beauties ready to impress in no time. Plus, they’re perfect for sharing—or not! Who could resist a second helping?
Ingredients for Mini Turtle Cheesecakes
Gathering the right ingredients is the first step to creating these delightful Mini Turtle Cheesecakes. Each component plays a crucial role in building flavor and texture. Here’s what you’ll need:
- Chocolate cookie crumbs: These form the base of your cheesecakes. You can use crushed Oreos for a classic taste or any chocolate cookie you prefer.
- Granulated sugar: This sweetens both the crust and the filling, balancing the rich flavors.
- Unsalted butter: Melted butter binds the cookie crumbs together, creating a deliciously rich crust.
- Full-fat cream cheese: The star of the show! It gives the cheesecake its creamy texture and rich flavor. Always opt for full-fat for the best results.
- Eggs: They help set the filling, giving it that perfect cheesecake consistency.
- Vanilla extract: A splash of vanilla enhances the overall flavor, adding warmth and depth.
- Sour cream: This adds a tangy richness to the filling, making it even creamier.
- All-purpose flour: A small amount helps stabilize the filling, ensuring it holds its shape.
- Salt: Just a pinch enhances the sweetness and balances the flavors.
- Thick caramel sauce: This is drizzled on top for that signature turtle flavor. You can use store-bought or homemade.
- Toasted pecans: These add a delightful crunch and nutty flavor, essential for that turtle dessert vibe.
- Semi-sweet chocolate chips: Used for the drizzle, they provide a rich chocolatey finish.
- Heavy cream: This is mixed with chocolate chips to create a smooth drizzle.
- Flaky sea salt: Optional, but a sprinkle on top elevates the flavors, adding a gourmet touch.
For exact measurements, check the bottom of the article where you can find everything listed for easy printing!
How to Make Mini Turtle Cheesecakes
Step 1: Preheat and Prepare
Start by preheating your oven to 325°F (163°C). While it warms up, grab a 12-cup muffin pan and line it with paper liners. This step is crucial for easy removal later. The liners will help keep your Mini Turtle Cheesecakes intact and looking fabulous. Trust me, you want these little beauties to shine when you serve them!
Step 2: Make the Crust
In a mixing bowl, combine your chocolate cookie crumbs, granulated sugar, and melted butter. Stir until everything is well mixed and resembles wet sand. Now, divide this mixture evenly among the muffin cups, about two tablespoons per cup. Press the crumbs firmly into the bottom to create a solid crust. This is where the magic begins, so make sure it’s packed well!
Step 3: Prepare the Cheesecake Filling
In a large bowl, beat the softened cream cheese until it’s smooth and creamy. Gradually add in the granulated sugar, mixing until combined. Next, add the eggs one at a time, ensuring each is fully incorporated before adding the next. Stir in the vanilla extract, sour cream, flour, and a pinch of salt. This filling is what makes your Mini Turtle Cheesecakes so rich and delicious!
Step 4: Bake the Cheesecakes
Now it’s time to fill those crusts! Spoon the cheesecake batter evenly over each crust, filling them about three-quarters full. Place the muffin pan in the preheated oven and bake for 18 to 22 minutes. The edges should be set, while the centers remain slightly jiggly. This is the perfect texture for a creamy cheesecake. Let them cool in the pan for a bit before moving on!
Step 5: Cool and Chill
Once baked, allow the cheesecakes to cool at room temperature for about 30 minutes. After that, transfer them to the refrigerator and chill for at least four hours, or preferably overnight. This chilling time is essential for the flavors to meld and the texture to become perfectly creamy. Patience is key here, but it’s worth the wait!
Step 6: Drizzle and Serve
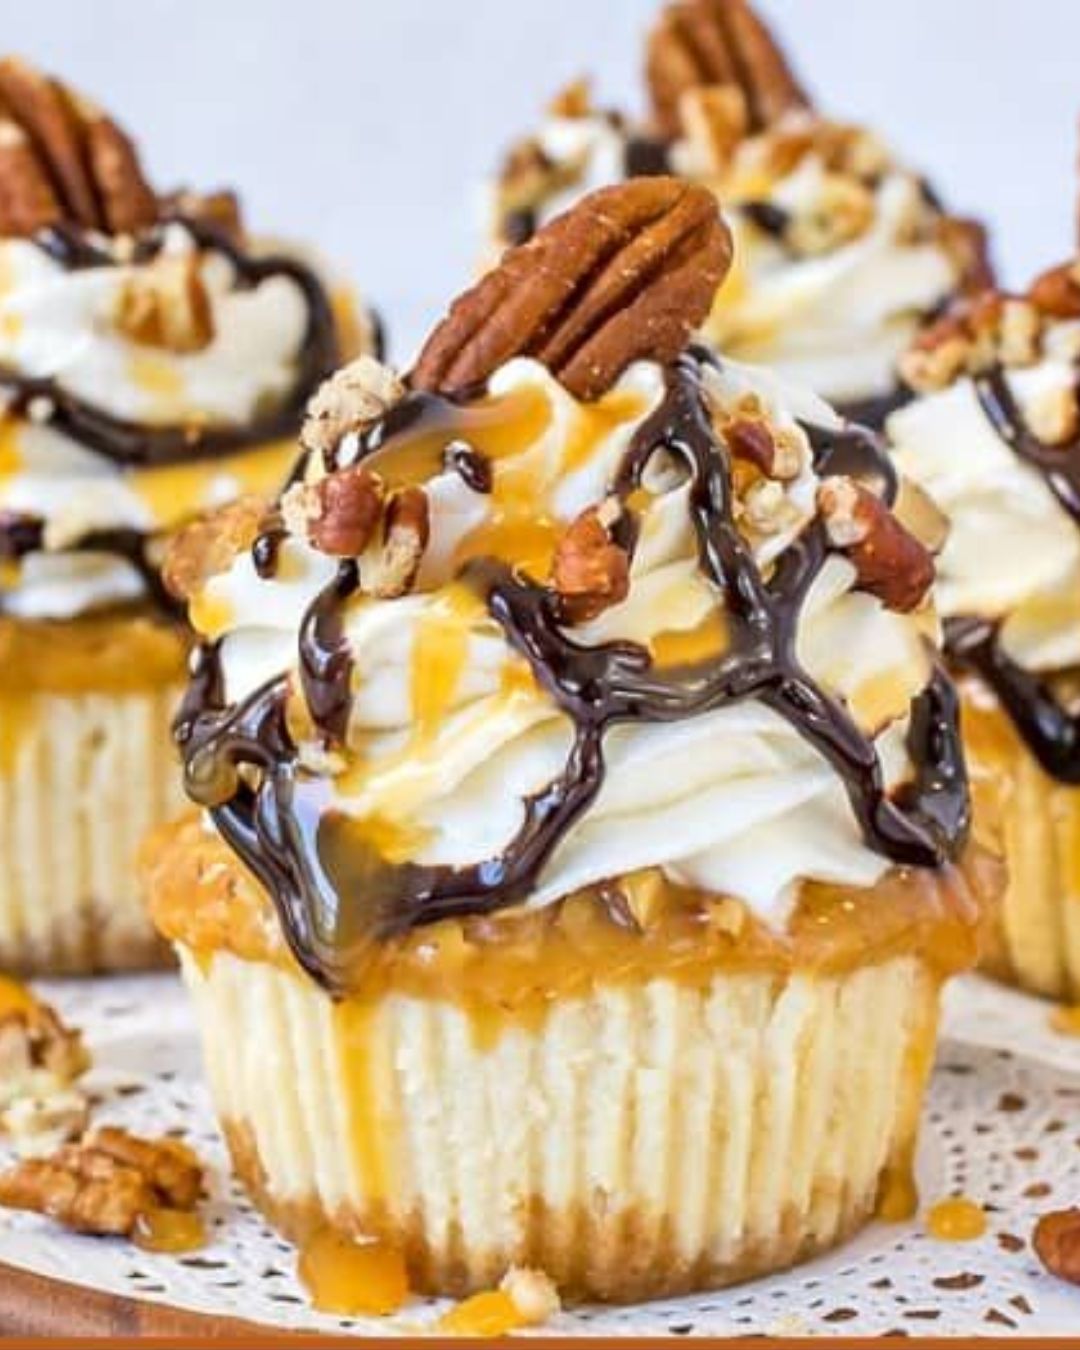
For the final touch, prepare the chocolate drizzle. In a microwave-safe bowl, combine the semi-sweet chocolate chips and heavy cream. Microwave in 20-second intervals, stirring until smooth. Once your cheesecakes are chilled, spoon about a tablespoon of caramel sauce over each one. Sprinkle with toasted pecans, then drizzle with the melted chocolate. Serve them chilled or let them sit at room temperature for a few minutes for the creamiest texture!
Tips for Success
- Use room temperature cream cheese for a smoother filling.
- Don’t overmix the batter; mix just until combined to avoid cracks.
- Chill the cheesecakes overnight for the best flavor and texture.
- Feel free to customize toppings with your favorite nuts or sauces.
- Keep an eye on baking time; every oven is different!
Equipment Needed
- Muffin pan: A standard 12-cup muffin pan works best, but you can use silicone molds for easy removal.
- Mixing bowls: A large bowl for the filling and a smaller one for the crust.
- Electric mixer: A hand mixer or stand mixer will make beating the cream cheese a breeze.
- Measuring cups and spoons: Essential for accurate ingredient measurements.
- Microwave-safe bowl: For melting chocolate and cream together.
Variations
- Gluten-Free: Substitute chocolate cookie crumbs with gluten-free cookies or almond flour for a gluten-free version.
- Nut-Free: Omit the pecans and use a different topping like crushed graham crackers or a sprinkle of toffee bits.
- Cheesecake Swirls: Add a layer of your favorite fruit preserves or chocolate ganache in the filling for a fun twist.
- Vegan Option: Use vegan cream cheese, flax eggs, and coconut oil for a plant-based version of these cheesecakes.
- Flavor Infusions: Experiment with flavored extracts like almond or hazelnut to give your cheesecakes a unique taste.
Serving Suggestions
- Pair with a scoop of vanilla ice cream for a delightful contrast in temperature and texture.
- Serve alongside fresh berries for a pop of color and a refreshing bite.
- Drizzle extra caramel sauce on the plate for an elegant presentation.
- Enjoy with a cup of coffee or a rich espresso to balance the sweetness.
- Garnish with a sprig of mint for a touch of freshness and visual appeal.
FAQs about Mini Turtle Cheesecakes
Curious about these delightful Mini Turtle Cheesecakes? Here are some common questions I often hear, along with answers to help you on your baking journey!
Can I make Mini Turtle Cheesecakes ahead of time?
Absolutely! These cheesecakes are perfect for making in advance. Just prepare them a day ahead and let them chill overnight. This enhances the flavors and ensures they’re ready to impress when you need them.
What can I use instead of cream cheese?
If you’re looking for a substitute, try using mascarpone cheese for a similar creamy texture. For a lighter option, Greek yogurt can work, but it will change the flavor slightly.
How do I store leftover Mini Turtle Cheesecakes?
Store any leftovers in an airtight container in the refrigerator. They’ll stay fresh for about 3 to 5 days. Just remember to let them sit at room temperature for a few minutes before serving for the best texture!
Can I freeze Mini Turtle Cheesecakes?
Yes, you can freeze them! Wrap each cheesecake tightly in plastic wrap and then place them in a freezer-safe container. They can be frozen for up to 2 months. Thaw them in the fridge overnight before serving.
What’s the best way to serve Mini Turtle Cheesecakes?
For the ultimate experience, serve them chilled with a drizzle of extra caramel sauce and a sprinkle of flaky sea salt. Pairing them with a hot cup of coffee or tea makes for a delightful treat!
Final Thoughts
Creating Mini Turtle Cheesecakes is more than just baking; it’s about crafting moments of joy. Each bite is a delightful blend of flavors that can turn an ordinary day into something special. Whether you’re sharing them with friends or savoring one alone, these cheesecakes bring a sense of comfort and indulgence. The process is simple, yet the results are impressive, making it a perfect recipe for any occasion. So, roll up your sleeves, gather your ingredients, and let the sweet aroma fill your kitchen. Trust me, you’ll be glad you did!
PrintMini Turtle Cheesecakes: A Decadent Delight to Try!
- Total Time: 4 hours 55 minutes
- Yield: 12 mini cheesecakes
- Diet: Vegetarian
Description
Mini Turtle Cheesecakes are a delightful dessert featuring a chocolate cookie crust, creamy cheesecake filling, and topped with caramel, pecans, and chocolate drizzle.
Ingredients
- 1½ cups (150 g) chocolate cookie crumbs (Oreos with filling removed)
- 3 tbsp (38 g) granulated sugar
- 5 tbsp (70 g) unsalted butter, melted
- 16 oz (450 g) full-fat cream cheese, softened
- ½ cup (100 g) granulated sugar
- 2 large eggs, room temperature
- 1 tsp vanilla extract
- ¼ cup (60 g) sour cream
- 1 tbsp all-purpose flour
- Pinch of salt
- ¾ cup thick caramel sauce
- 1 cup toasted pecans, roughly chopped
- ½ cup semi-sweet chocolate chips
- 2 tbsp heavy cream
- Flaky sea salt (optional)
Instructions
- Preheat the oven to 325°F (163°C) and line a 12-cup muffin pan with paper liners.
- In a bowl, combine the chocolate cookie crumbs, sugar, and melted butter. Divide evenly among the muffin cups (about 2 tablespoons per cup) and press firmly into the bottoms. Bake for 5 minutes and let cool.
- Beat the cream cheese until smooth, then add the sugar and beat until creamy. Mix in the eggs one at a time, then stir in the vanilla, sour cream, flour, and salt until just combined.
- Divide the cheesecake batter evenly over the crusts, filling each liner about ¾ full. Bake for 18–22 minutes, or until the edges are set and the centers are slightly jiggly. Cool completely at room temperature and refrigerate for at least 4 hours, preferably overnight.
- For the chocolate drizzle, place the chocolate chips and heavy cream in a microwave-safe bowl and microwave in 20-second intervals, stirring after each, until smooth.
- Spoon about 1 tablespoon of caramel sauce over each chilled cheesecake, sprinkle with toasted pecans, and drizzle with melted chocolate. Finish with a pinch of flaky sea salt, if desired.
- Serve chilled or let the cheesecakes sit at room temperature for 10–15 minutes before serving for the creamiest texture.
Notes
- For best results, use full-fat cream cheese.
- Allow the cheesecakes to chill overnight for improved flavor and texture.
- Feel free to adjust the amount of caramel and chocolate drizzle to your liking.
- Prep Time: 30 minutes
- Cook Time: 25 minutes
- Category: Dessert
- Method: Baking
- Cuisine: American
Nutrition
- Serving Size: 1 cheesecake
- Calories: 320
- Sugar: 22g
- Sodium: 180mg
- Fat: 22g
- Saturated Fat: 10g
- Unsaturated Fat: 8g
- Trans Fat: 0g
- Carbohydrates: 30g
- Fiber: 1g
- Protein: 4g
- Cholesterol: 80mg