Introduction to Classic Cherry Cheesecake
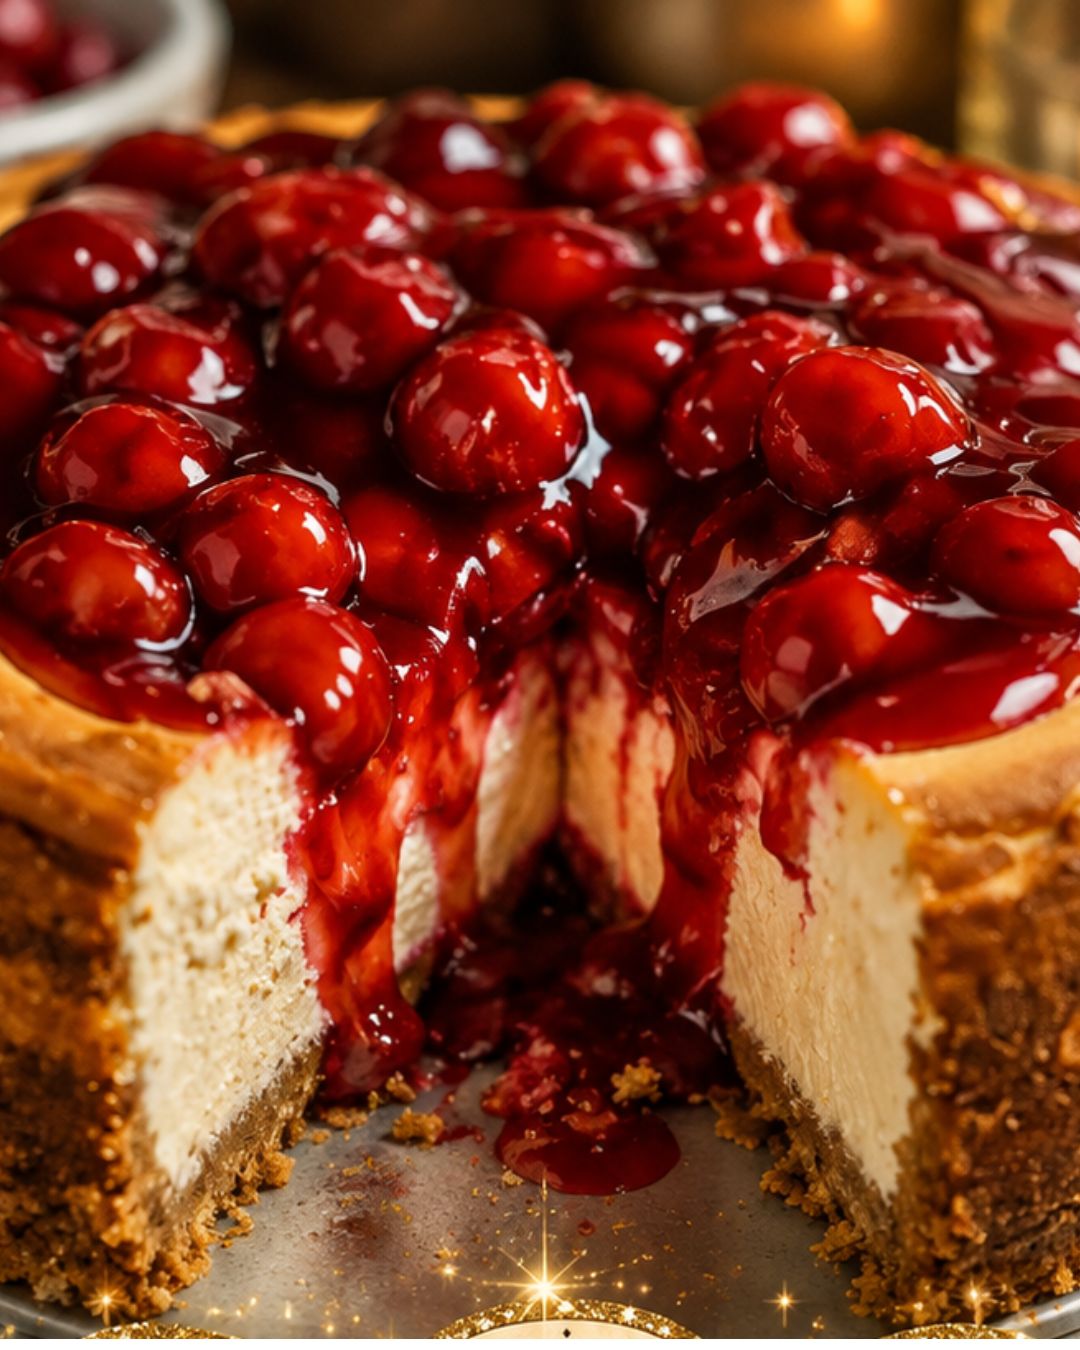
There’s something magical about a Classic Cherry Cheesecake that takes me back to family gatherings. The moment I see that creamy slice topped with vibrant cherries, I’m reminded of laughter and shared stories around the table. This dessert isn’t just a treat; it’s a way to connect with loved ones. Whether you’re looking to impress guests or simply indulge after a long day, this cheesecake is your go-to solution. It’s surprisingly easy to make, and the flavors are simply irresistible. Let’s dive into this velvety delight that’s sure to become a favorite in your home!
Why You’ll Love This Classic Cherry Cheesecake
This Classic Cherry Cheesecake is a dessert that checks all the boxes. It’s easy to whip up, making it perfect for busy weeknights or last-minute gatherings. The creamy filling paired with the sweet-tart cherry topping creates a flavor explosion that’s hard to resist. Plus, it’s a crowd-pleaser! Your friends and family will be asking for seconds, and you’ll love how simple it is to make this indulgent treat.
Ingredients for Classic Cherry Cheesecake
Gathering the right ingredients is the first step to creating your Classic Cherry Cheesecake. Each component plays a vital role in achieving that perfect balance of flavors and textures. Here’s what you’ll need:
- Graham cracker crumbs: These form the base of your cheesecake, providing a sweet and crunchy crust.
- Granulated sugar: Essential for sweetness, it enhances the flavors of both the crust and the filling.
- Unsalted butter: This adds richness to the crust and helps bind the crumbs together.
- Salt: Just a pinch elevates the flavors, balancing the sweetness.
- Full-fat cream cheese: The star of the show! It gives the cheesecake its creamy texture and rich flavor.
- Large eggs: They provide structure and stability to the filling, ensuring it sets perfectly.
- Sour cream: Adds a tangy flavor and creaminess, making the filling even more luscious.
- Vanilla extract: A must-have for that warm, aromatic flavor that complements the cheesecake.
- All-purpose flour: Helps to stabilize the filling, giving it a smooth consistency.
- Lemon juice: A splash brightens the flavors and cuts through the richness.
- Fresh or frozen cherries: The crowning glory! They provide a sweet-tart topping that’s simply irresistible.
- Additional sugar: Used for the cherry topping, it balances the tartness of the cherries.
- Cornstarch: This thickens the cherry sauce, giving it a luscious texture.
- Water: Helps dissolve the cornstarch for a smooth topping.
- Extra lemon juice and vanilla extract: These enhance the cherry topping, adding depth to the flavor.
For exact measurements, check the bottom of the article where you can find everything listed for easy printing. Happy baking!
How to Make Classic Cherry Cheesecake
Creating a Classic Cherry Cheesecake is a delightful journey that fills your kitchen with sweet aromas. Follow these simple steps, and you’ll have a show-stopping dessert that’s sure to impress!
Step 1: Prepare the Crust
Start by preheating your oven to 325°F. While it warms up, grab a mixing bowl and combine the graham cracker crumbs, sugar, melted butter, and salt. Mix until everything is well combined and resembles wet sand. Press this mixture firmly into the bottom of a 9-inch springform pan. Make sure it’s even! Bake the crust for about 10 minutes, then let it cool slightly. This crust is the perfect foundation for your cheesecake.
Step 2: Make the Cheesecake Filling
In a large mixing bowl, beat the softened cream cheese and sugar together on medium-low speed until smooth and creamy. This step is crucial for a lump-free filling! Add the eggs one at a time, mixing well after each addition. Then, stir in the sour cream, vanilla extract, flour, salt, and lemon juice. Keep mixing until everything is perfectly blended. The filling should be silky and luscious, ready to pour over your crust.
Step 3: Bake the Cheesecake
Pour the cheesecake filling over the cooled crust, spreading it evenly. Now, it’s time to bake! Place the pan in the preheated oven and bake for 65 to 75 minutes. You’ll know it’s done when the edges are set, but the center still jiggles slightly. Once baked, turn off the oven, crack the door open, and let the cheesecake sit inside for an hour. This gentle cooling helps prevent cracks.
Step 4: Cool and Chill
After the hour is up, remove the cheesecake from the oven and let it cool completely at room temperature. Once cooled, cover it and refrigerate for at least 6 hours, or overnight if you can wait! Chilling is essential for the flavors to meld and the texture to firm up. Trust me, the wait is worth it!
Step 5: Prepare the Cherry Topping
While your cheesecake chills, it’s time to make the cherry topping. In a saucepan over medium heat, combine the cherries, sugar, and lemon juice. Cook for about 5 to 7 minutes until the cherries soften. In a small bowl, whisk together the cornstarch and water until smooth. Stir this mixture into the cherries and cook for another 2 to 3 minutes until the sauce thickens. Remove from heat, stir in the vanilla extract, and let it cool completely.
Step 6: Assemble and Serve
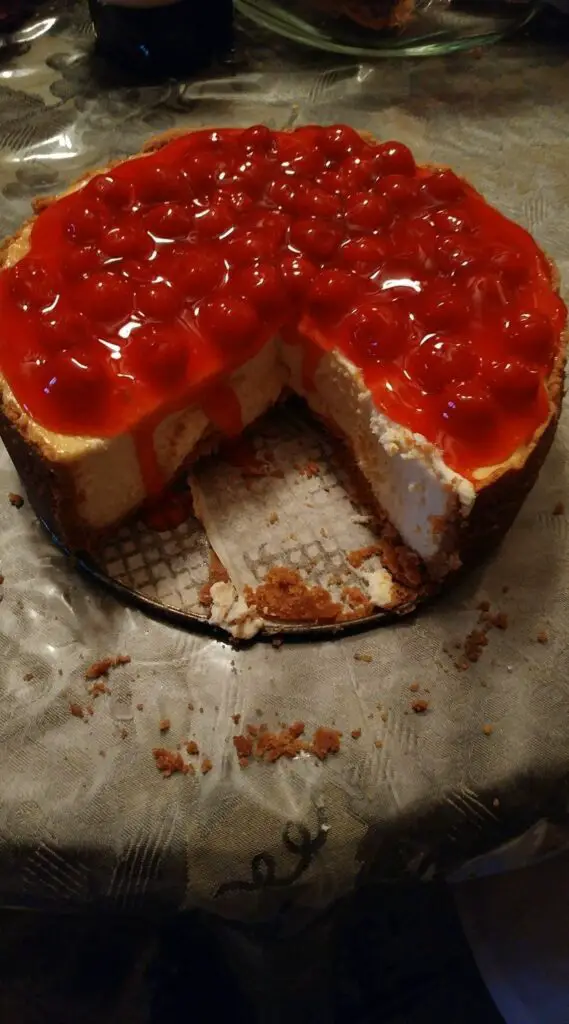
Once your cheesecake is chilled and the cherry topping is cool, it’s time to assemble! Carefully remove the cheesecake from the springform pan. Spoon the cherry topping over the center, letting it cascade down the sides. Serve chilled, and watch as everyone digs in with delight. This Classic Cherry Cheesecake is not just a dessert; it’s a celebration!
Tips for Success
- Always use room temperature ingredients for a smoother filling.
- Don’t skip the cooling step in the oven; it helps prevent cracks.
- For a firmer cheesecake, refrigerate overnight for the best texture.
- Use fresh cherries when in season for maximum flavor.
- Experiment with different fruit toppings like blueberries or strawberries for variety.
Equipment Needed
- 9-inch springform pan: Essential for easy removal; a regular cake pan works too, but slicing will be trickier.
- Mixing bowls: Use a large bowl for the filling and a smaller one for the cherry topping.
- Electric mixer: A hand mixer is perfect; a whisk can work, but it’ll take longer.
- Spatula: Great for scraping down the sides and smoothing the filling.
- Saucepan: Needed for cooking the cherry topping; a small pot will do just fine.
Variations
- Chocolate Cherry Cheesecake: Add melted chocolate to the filling for a rich twist that pairs beautifully with cherries.
- Low-Carb Option: Substitute graham cracker crumbs with almond flour and use a sugar substitute to make it keto-friendly.
- Vegan Version: Replace cream cheese with cashew cream and use flax eggs for a plant-based delight.
- Different Fruit Toppings: Swap cherries for blueberries, strawberries, or raspberries for a fresh take on this classic dessert.
- Spiced Cheesecake: Add a pinch of cinnamon or nutmeg to the filling for a warm, cozy flavor.
Serving Suggestions
- Pair with a dollop of whipped cream for extra creaminess.
- Serve alongside a scoop of vanilla ice cream for a delightful contrast.
- Complement with a cup of freshly brewed coffee or tea.
- Garnish with mint leaves for a pop of color.
- Present on a decorative platter for an elegant touch.
FAQs about Classic Cherry Cheesecake
As you embark on your journey to create the perfect Classic Cherry Cheesecake, you might have a few questions. Here are some common queries that can help you along the way:
Can I use frozen cherries for the topping?
Absolutely! Frozen cherries work wonderfully in this recipe. Just make sure to thaw and drain them before cooking to avoid excess moisture in your topping.
How do I prevent my cheesecake from cracking?
To minimize cracks, ensure your ingredients are at room temperature before mixing. Also, remember to cool the cheesecake gradually in the oven after baking. This gentle cooling helps maintain its structure.
Can I make this cheesecake ahead of time?
Yes! In fact, making it a day in advance is ideal. It allows the flavors to meld beautifully and ensures a firmer texture. Just keep it refrigerated until you’re ready to serve.
What can I substitute for sour cream?
If you don’t have sour cream on hand, you can use Greek yogurt as a great alternative. It will still provide that creamy texture and tangy flavor.
How should I store leftover cheesecake?
Store any leftovers in an airtight container in the refrigerator. It should stay fresh for up to five days, but I doubt it will last that long!
Final Thoughts
Creating a Classic Cherry Cheesecake is more than just baking; it’s about crafting memories. Each slice tells a story, whether it’s a family celebration or a quiet evening treat. The creamy texture, the sweet-tart cherry topping, and the buttery crust come together to create a dessert that feels special. I love how this cheesecake brings people together, sparking joy and laughter around the table. So, roll up your sleeves, embrace the process, and enjoy every moment. Trust me, the smiles you’ll receive will be worth every effort. Happy baking, and may your cheesecake adventures be delicious!
PrintClassic Cherry Cheesecake: Indulge in this velvety treat!
- Total Time: 7 hours 45 minutes (including chilling time)
- Yield: 12 servings
- Diet: Vegetarian
Description
Indulge in this velvety Classic Cherry Cheesecake, featuring a graham cracker crust, creamy cheesecake filling, and a luscious cherry topping.
Ingredients
- 2 cups graham cracker crumbs
- ¼ cup granulated sugar
- 6 tablespoons unsalted butter, melted
- ¼ teaspoon salt
- 32 ounces full-fat cream cheese, softened
- 1¼ cups granulated sugar
- 4 large eggs, room temperature
- 1 cup sour cream
- 2 teaspoons vanilla extract
- 2 tablespoons all-purpose flour
- ¼ teaspoon salt
- 1 tablespoon lemon juice
- 4 cups pitted fresh or frozen cherries
- ½ cup granulated sugar
- 2 tablespoons cornstarch
- 2 tablespoons water
- 1 tablespoon lemon juice
- ½ teaspoon vanilla extract
Instructions
- Preheat the oven to 325°F and grease a 9-inch springform pan.
- Combine the graham cracker crumbs, sugar, melted butter, and salt, then press firmly into the bottom of the pan and bake for 10 minutes. Let cool slightly.
- Beat the softened cream cheese and sugar on medium-low speed until smooth. Add eggs one at a time, then mix in sour cream, vanilla, flour, salt, and lemon juice until smooth.
- Pour the filling over the crust and bake at 325°F for 65–75 minutes until the edges are set and the center jiggles slightly. Turn off the oven, crack the door, and leave the cheesecake inside for 1 hour. Cool completely and refrigerate for at least 6 hours.
- For the cherry topping, cook cherries, sugar, and lemon juice in a saucepan over medium heat for 5–7 minutes. Whisk cornstarch and water, then stir into the cherries and cook for another 2–3 minutes until thick. Stir in vanilla and cool completely.
- Once chilled, remove the cheesecake from the pan, spoon the cherry topping over the center, and serve chilled.
Notes
- For best results, refrigerate the cheesecake overnight.
- Use fresh cherries when in season for the best flavor.
- Ensure all ingredients are at room temperature before mixing.
- Prep Time: 30 minutes
- Cook Time: 1 hour 15 minutes
- Category: Dessert
- Method: Baking
- Cuisine: American
Nutrition
- Serving Size: 1 slice
- Calories: 350
- Sugar: 25g
- Sodium: 300mg
- Fat: 22g
- Saturated Fat: 12g
- Unsaturated Fat: 8g
- Trans Fat: 0g
- Carbohydrates: 30g
- Fiber: 1g
- Protein: 5g
- Cholesterol: 90mg