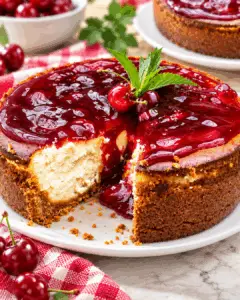
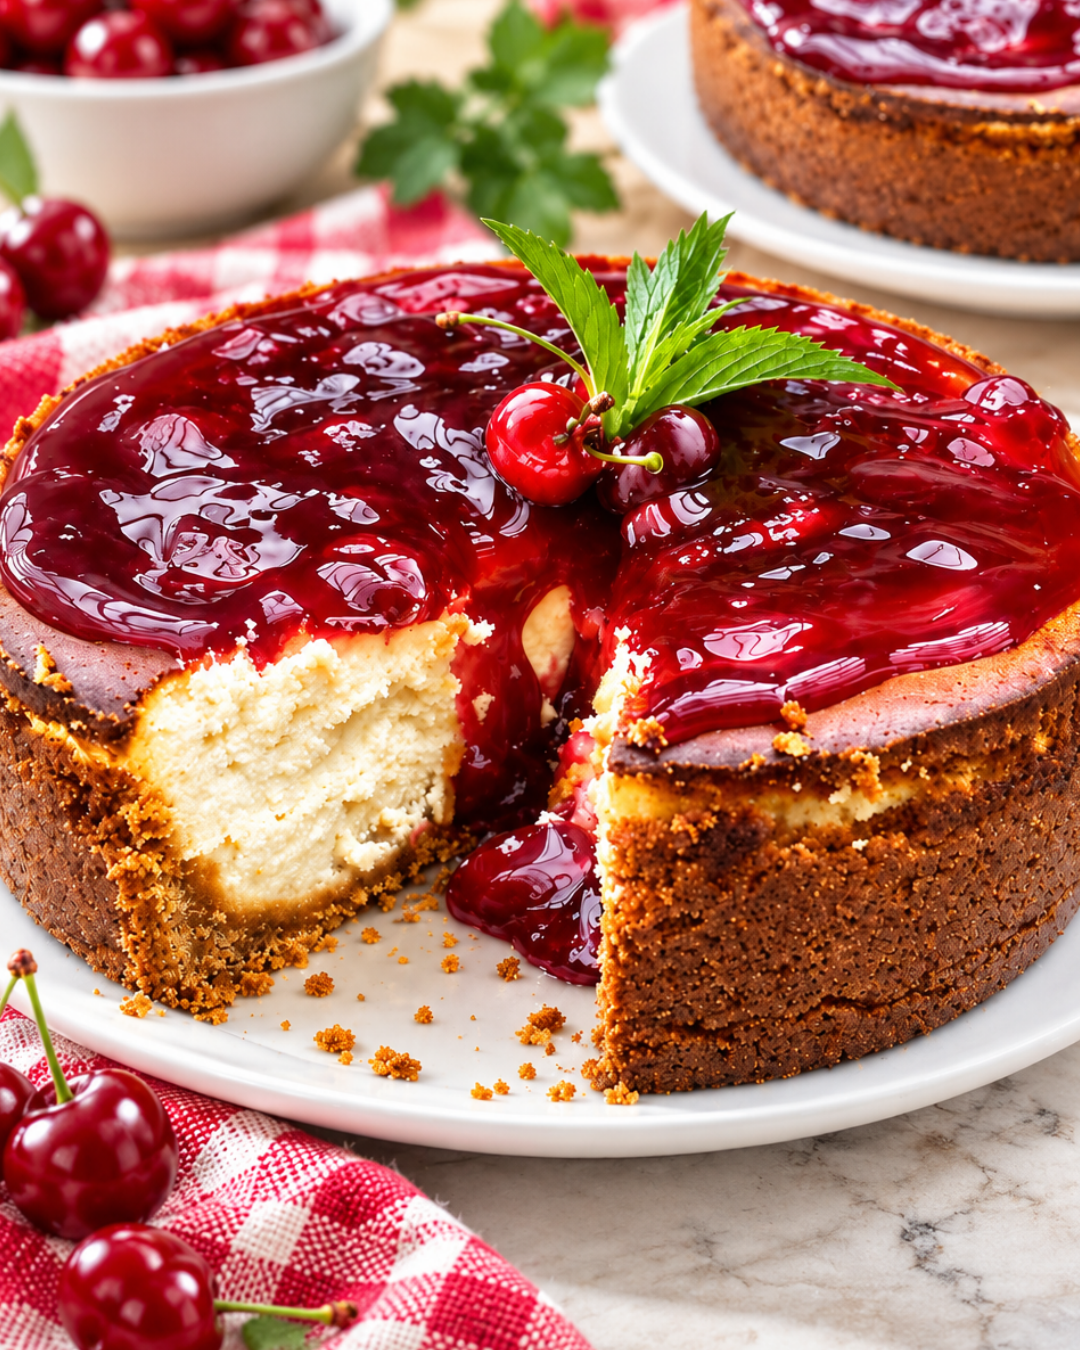
Introduction to Creamy Baked Cherry Cheesecake with Homemade Cherry Topping
There’s something magical about a dessert that brings people together, and my Creamy Baked Cherry Cheesecake with Homemade Cherry Topping does just that.
Whether it’s a family gathering or a casual dinner with friends, this cheesecake is sure to impress.
It’s creamy, dreamy, and topped with a luscious cherry topping that sings of summer.
Plus, it’s surprisingly easy to whip up, making it a perfect choice for those busy days when you want to treat your loved ones without spending hours in the kitchen.
Trust me, this dessert will become a favorite in no time!
Why You’ll Love This Creamy Baked Cherry Cheesecake with Homemade Cherry Topping
This Creamy Baked Cherry Cheesecake is a game-changer for dessert lovers.
It combines rich flavors with a delightful texture that melts in your mouth.
The best part? It’s simple to make, even for those who claim they can’t bake.
With minimal prep time and a few straightforward steps, you’ll have a stunning dessert that’s perfect for any occasion.
Your friends and family will be begging for seconds!
Ingredients for Creamy Baked Cherry Cheesecake with Homemade Cherry Topping
Creating this delightful cheesecake starts with gathering the right ingredients.
Here’s what you’ll need:
- Graham cracker crumbs: These form the base of your crust, providing a sweet and crunchy texture.
- Granulated sugar: A touch of sweetness for both the crust and the filling, balancing the flavors beautifully.
- Unsalted butter: This adds richness to the crust, helping it hold together while baking.
- Full-fat cream cheese: The star of the filling, it gives the cheesecake its creamy texture and tangy flavor.
- Ricotta cheese: This adds a lightness to the filling, making it extra fluffy and delicious.
- Greek yogurt: A healthier twist that enhances creaminess while adding a slight tang.
- Large eggs: Essential for binding the filling together, ensuring it sets perfectly.
- Evaporated milk: This adds moisture and creaminess, enriching the overall flavor.
- All-purpose flour: A small amount helps stabilize the filling, preventing cracks.
- Vanilla extract: A must-have for that warm, sweet aroma that complements the cheesecake.
- Lemon zest: This brightens the flavors, adding a refreshing note to the rich filling.
- Fresh or frozen sweet cherries: The star of the topping, bringing a burst of fruity goodness.
- Lime zest and juice: These add a zesty kick to the cherry topping, enhancing its flavor.
- Honey: A natural sweetener that complements the cherries beautifully.
- Cornstarch: This thickens the cherry topping, giving it a glossy finish.
- Cold water: Used to dissolve the cornstarch, ensuring a smooth consistency.
For exact measurements, check the bottom of the article where you can find everything listed for easy printing.
With these ingredients on hand, you’re well on your way to creating a dessert that will wow everyone at the table!
How to Make Creamy Baked Cherry Cheesecake with Homemade Cherry Topping
Creating this Creamy Baked Cherry Cheesecake with Homemade Cherry Topping is a delightful journey.
Follow these simple steps, and you’ll have a dessert that’s sure to impress!
Step 1: Preheat and Prepare the Pan
Start by preheating your oven to 350°F.
While it warms up, grab a 10-inch springform pan and lightly grease it.
This will help the cheesecake release easily once it’s baked.
A little preparation goes a long way!
Step 2: Make the Graham Cracker Crust
In a mixing bowl, combine your graham cracker crumbs, sugar, and melted butter.
Stir until the mixture resembles wet sand.
Then, press it firmly into the bottom and slightly up the sides of the prepared pan.
This crust is the perfect foundation for your creamy cheesecake!
Step 3: Bake the Crust
Pop the crust into the oven and bake for about 10 minutes.
You’re looking for a light golden color.
Once it’s ready, remove it from the oven and let it cool while you prepare the filling.
This step ensures a crunchy base for your cheesecake.
Step 4: Prepare the Cheesecake Filling
In a large mixing bowl, beat the softened cream cheese until it’s smooth and creamy.
Add in the ricotta cheese, Greek yogurt, and sugar.
Mix until everything is well combined and creamy.
This filling is where the magic happens!
Step 5: Add Eggs and Other Ingredients
Now, it’s time to add the eggs.
Do this one at a time, mixing on low speed after each addition.
Next, blend in the vanilla extract, lemon zest, evaporated milk, and flour until smooth.
Be careful not to overmix; we want a perfect texture!
Step 6: Pour and Smooth the Filling
Pour the cheesecake mixture over your cooled crust.
Use a spatula to smooth the surface evenly.
This ensures every slice looks as good as it tastes.
You’re almost there!
Step 7: Bake the Cheesecake
Reduce the oven temperature to 325°F and bake for approximately 55–70 minutes.
The edges should be set, but the center should still have a slight wobble.
If the top starts to brown too quickly, loosely cover it with foil.
This will keep your cheesecake looking perfect!
Step 8: Cool the Cheesecake
Once baked, turn off the oven and crack the door open.
Let the cheesecake rest inside for about 30 minutes.
This gentle cooling helps prevent cracks.
After that, transfer it to a cooling rack to cool completely.
Step 9: Make the Cherry Topping
While the cheesecake cools, it’s time to prepare the cherry topping.
In a saucepan, combine the cherries, sugar, lime zest, lime juice, and honey.
Cook over medium heat for 5–10 minutes, stirring gently until the cherries soften.
This topping is the cherry on top—literally!
Step 10: Chill the Cheesecake
Once the cheesecake has cooled completely, refrigerate it for at least 4–6 hours, preferably overnight.
This chilling time allows the flavors to meld and the cheesecake to set perfectly.
Patience is key here!
Step 11: Add the Cherry Topping
When you’re ready to serve, remove the sides of the springform pan.
Spoon the cooled cherry topping over the cheesecake, spreading it evenly.
This adds a burst of flavor and color to your dessert!
Step 12: Slice and Serve
To slice the cheesecake, use a sharp knife.
Wipe the blade between cuts for neat edges.
Serve chilled, and watch your friends and family enjoy every bite.
This dessert is sure to be a hit!
Tips for Success
- Use room-temperature ingredients for a smoother filling.
- Don’t overmix the batter to avoid cracks in your cheesecake.
- Check for doneness by ensuring the center has a slight wobble.
- Cool the cheesecake gradually to prevent sudden temperature changes.
- Chill the cheesecake overnight for the best flavor and texture.
Equipment Needed
- 10-inch springform pan: Essential for easy removal; a regular cake pan works too, but slicing will be trickier.
- Mixing bowls: Use a large bowl for the filling; any size will do, just ensure it’s sturdy.
- Electric mixer: A hand mixer is perfect; a whisk can work, but it’ll take more effort.
- Spatula: Great for smoothing the filling; a wooden spoon can also do the job.
- Saucepan: Needed for the cherry topping; any medium-sized pot will suffice.
Variations
- Chocolate Cherry Cheesecake: Add melted chocolate to the filling for a rich twist.
- Gluten-Free Option: Substitute graham cracker crumbs with gluten-free cookies or almond flour for the crust.
- Fruit Medley Topping: Mix in other berries like blueberries or raspberries with the cherries for a colorful topping.
- Vegan Version: Use vegan cream cheese and a flaxseed mixture instead of eggs for a plant-based alternative.
- Nutty Crust: Incorporate crushed nuts like pecans or almonds into the crust for added flavor and crunch.
Serving Suggestions
- Pair with Coffee: A rich cup of coffee complements the cheesecake’s sweetness beautifully.
- Fresh Whipped Cream: Add a dollop of whipped cream for extra creaminess and flair.
- Garnish with Mint: A sprig of fresh mint adds a pop of color and freshness.
- Serve with Ice Cream: Vanilla or cherry ice cream makes for a delightful combination.
- Presentation: Use a cake stand to elevate your cheesecake for a stunning display.
FAQs about Creamy Baked Cherry Cheesecake with Homemade Cherry Topping
Can I use frozen cherries for the topping?
Absolutely! Frozen cherries work just as well as fresh ones. Just make sure to thaw and drain any excess liquid before cooking them down for the topping.
How do I prevent my cheesecake from cracking?
To avoid cracks, ensure you don’t overmix the batter and bake at a lower temperature. Cooling the cheesecake gradually in the oven also helps maintain its structure.
Can I make this cheesecake ahead of time?
Yes! This cheesecake is perfect for making ahead. Just refrigerate it for at least 4–6 hours, or overnight for the best flavor and texture.
What can I substitute for ricotta cheese?
If you don’t have ricotta, you can use mascarpone cheese or even cottage cheese blended until smooth. Both will give you a creamy texture.
How should I store leftovers?
Store any leftover cheesecake in an airtight container in the refrigerator for up to 5 days. Just make sure to keep the cherry topping separate until you’re ready to serve!
Final Thoughts
Creating this Creamy Baked Cherry Cheesecake with Homemade Cherry Topping is more than just baking; it’s about crafting memories.
Each slice tells a story, whether it’s a celebration or a simple family dinner.
The creamy texture paired with the vibrant cherry topping is a delightful experience that brings smiles all around.
I love how this recipe invites everyone to gather and share in the joy of good food.
So, roll up your sleeves, embrace the process, and enjoy the sweet rewards of your efforts.
Trust me, this cheesecake will become a cherished favorite in your home!
PrintCreamy Baked Cherry Cheesecake with Homemade Cherry Topping Made Easy!
- Total Time: 5 hours 40 minutes (including chilling time)
- Yield: 12 servings
- Diet: Vegetarian
Description
A delicious and creamy baked cherry cheesecake topped with a homemade cherry topping, perfect for any occasion.
Ingredients
- For the graham cracker crust:
- 4 cups graham cracker crumbs
- 3 tablespoons granulated sugar
- 10 tablespoons unsalted butter, melted
- For the creamy cheesecake filling:
- 2 packages (8 oz each) full-fat cream cheese, softened
- 1 container (about 16 oz) full-fat ricotta cheese
- 1 cup vanilla or plain Greek yogurt
- 2 cups granulated sugar
- 5 large eggs, at room temperature
- 1 cup evaporated milk
- 1/4 cup all-purpose flour
- 1 1/2 tablespoons vanilla extract
- Zest of 1 lemon
- For the homemade cherry topping:
- 2 cups pitted fresh or frozen sweet cherries
- 1/3 cup granulated sugar
- Zest of 1 lime
- 2 teaspoons lime juice
- 1 teaspoon honey
- 1 tablespoon cornstarch
- 1 tablespoon cold water
Instructions
- Preheat the oven to 350°F. Lightly grease a 10-inch springform pan.
- Combine the graham cracker crumbs, sugar, and melted butter in a bowl. Mix until the crumbs resemble wet sand. Press firmly into the bottom and slightly up the sides of the pan.
- Bake for about 10 minutes until lightly golden. Remove from the oven and let cool while preparing the filling.
- In a large mixing bowl, beat the softened cream cheese until smooth. Add the ricotta, Greek yogurt, and sugar. Mix until creamy and well combined.
- Add the eggs one at a time, mixing on low speed after each addition. Blend in the vanilla extract, lemon zest, evaporated milk, and flour until smooth. Avoid overmixing.
- Pour the cheesecake mixture over the cooled crust and smooth the surface.
- Reduce the oven temperature to 325°F and bake for approximately 55–70 minutes, until the edges are set and the center still has a slight wobble. If the top browns too quickly, loosely cover it with foil.
- Turn off the oven, crack the door open, and let the cheesecake rest inside for about 30 minutes. Transfer to a cooling rack and let it cool completely.
- Add the cherries, sugar, lime zest, lime juice, and honey to a saucepan. Cook over medium heat for 5–10 minutes, stirring gently, until the cherries soften and release their juices.
- Mix the cornstarch with the cold water in a small bowl. Stir the mixture into the cherries and cook for another 1–2 minutes, until glossy and thickened. Remove from the heat and cool completely.
- Refrigerate the cooled cheesecake for at least 4–6 hours, preferably overnight, until fully set.
- Remove the sides of the springform pan. Spoon the cooled cherry topping over the cheesecake, spreading it evenly across the surface.
- Cut into slices with a sharp knife, wiping the blade between cuts for neat edges. Serve chilled.
Notes
- Use room-temperature ingredients for smoother blending.
- Avoid overmixing to prevent cracking.
- Ensure the center retains a gentle wobble when removing from the oven.
- Cool the cherry topping completely before adding to the cheesecake.
- Add almond extract to the cherry topping for extra flavor.
- Store covered in the refrigerator for up to 5 days.
- Prep Time: 30 minutes
- Cook Time: 1 hour 10 minutes
- Category: Dessert
- Method: Baking
- Cuisine: American
Nutrition
- Serving Size: 1 slice
- Calories: 450
- Sugar: 30g
- Sodium: 300mg
- Fat: 25g
- Saturated Fat: 15g
- Unsaturated Fat: 5g
- Trans Fat: 0g
- Carbohydrates: 45g
- Fiber: 2g
- Protein: 8g
- Cholesterol: 100mg