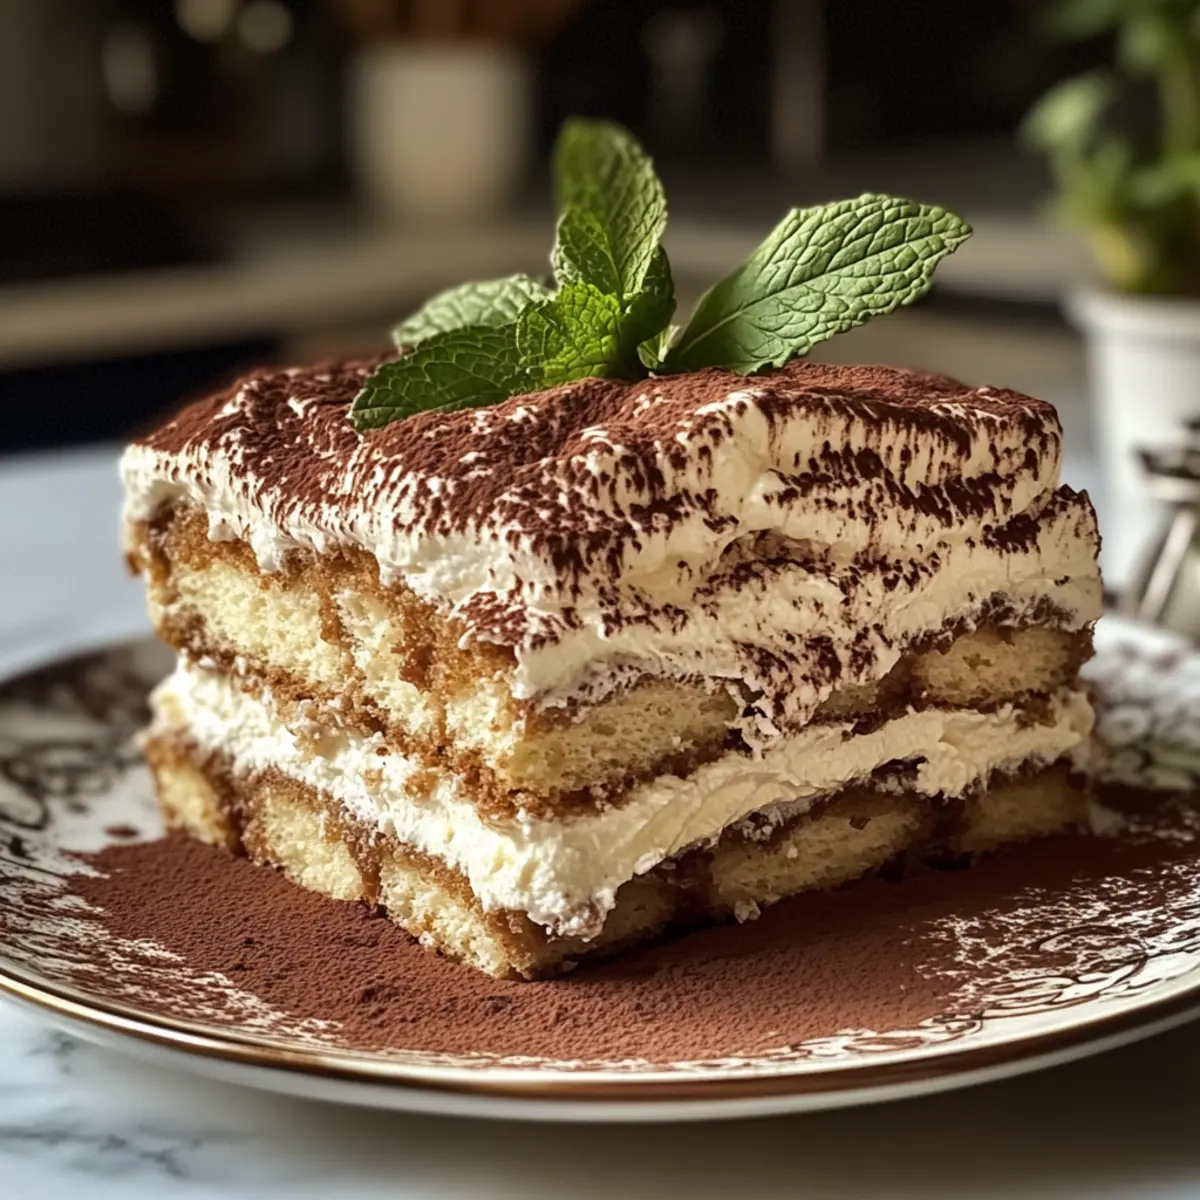
As I stood in my kitchen, a soothing aroma wafted through the air, transporting me to a quaint café in Italy. It was there I first savored the sensational blend of Earl Grey tea and rich dessert, a memory that inspired this Earl Grey Tiramisu recipe. With its creamy mascarpone layers, delicate ladyfingers, and effortless no-bake preparation, this dessert not only captivates the palate but also proves a delightful showstopper for gatherings. Plus, you can whip it up with minimal fuss, leaving you more time to enjoy the company of your friends and family. So, are you ready to elevate your dessert game and indulge in a sweet treat that promises to impress? Let’s dive into crafting this luxurious masterpiece!
Why is Earl Grey Tiramisu a Must-Try?
Irresistible Combination: This Earl Grey Tiramisu marries rich, creamy mascarpone with the distinct, aromatic flavors of Earl Grey tea, creating a dessert that’s as refreshing as it is indulgent.
No-Bake Convenience: With a simple no-bake process, you can create a show-stopping dessert without the fuss of an oven.
Crowd-Pleasing Delight: Perfect for gatherings, this dessert is sure to impress guests with both its elegant presentation and superb taste.
Versatile Flavor Options: Feel free to experiment by adding fresh berries or a drizzle of bergamot syrup for an extra citrusy flair.
Make Ahead Perfection: Prepare it in advance to save time on busy occasions; it’s even better after resting overnight, allowing the flavors to meld beautifully! Whether you’re a seasoned chef or a home cook, this Earl Grey Tiramisu is a quick ticket to dessert bliss.
Earl Grey Tiramisu Ingredients
For the Creamy Base
• Mascarpone Cheese – Adds creaminess and richness; substitute with ricotta for a lighter texture, but the flavor may differ.
• Heavy Cream – Whipped to create a light, airy texture; coconut cream can be used for a dairy-free version.
• Granulated Sugar – Provides sweetness; consider honey or maple syrup for natural sweetness alternatives.
• Brewed Earl Grey Tea – Offers distinctive tea flavor; use loose leaf or a high-quality tea bag for the best results.
• Bergamot Syrup (optional) – Enhances the bergamot flavor; omit if not available or desired.
• Vanilla Extract – Adds aroma and depth; replace with almond extract for a different flavor profile.
For the Layering
• Ladyfinger Cookies – Serves as the base structure; Savoiardi or sponge cake can be substituted if ladyfingers are unavailable.
• Cocoa Powder – Used for dusting and adds a hint of chocolate flavor; dark or unsweetened cocoa can deliver a richer taste.
• Fresh Mint Leaves (optional) – For garnish; adds a touch of color and freshness, but can be omitted if unavailable.
This Earl Grey Tiramisu is an easy no-bake treat that showcases delightful flavors, making it perfect for impressing your guests!
Step‑by‑Step Instructions for Earl Grey Tiramisu
Step 1: Brew the Tea
Start by brewing about 1 cup of strong Earl Grey tea using loose leaves or a high-quality tea bag. Allow the tea to steep for 5–7 minutes, infusing it with its aromatic flavors. Once brewed, remove the tea leaves or bag, and let the tea cool completely at room temperature—this is crucial for maintaining the structure of the ladyfingers.
Step 2: Prepare the Cream Mixture
In a large mixing bowl, combine 8 ounces of mascarpone cheese, 1 cup of heavy cream, ½ cup of granulated sugar, and 1 teaspoon of vanilla extract. Using an electric mixer, beat the mixture on medium speed until soft peaks form, which should take about 2–3 minutes. The mixture should be smooth and creamy, ready to elevate the luxurious layers of your Earl Grey Tiramisu.
Step 3: Assemble the Base Layer
Quickly dip each ladyfinger cookie into the cooled Earl Grey tea, ensuring a brief soak of just 1–2 seconds—don’t allow them to become soggy. Arrange the dipped ladyfingers in a single layer at the bottom of a rectangular or square dish, creating an even base for the dessert. This initial layer sets the foundation for your delightful Earl Grey Tiramisu.
Step 4: Layer the Cream Mixture
Once the base layer of ladyfingers is set, spoon a generous portion of the creamy mascarpone mixture over the cookies. Spread it evenly using a spatula, covering the ladyfingers completely. The cream should create a luscious layer, filling any gaps to ensure a beautiful presentation when sliced. This combination of flavors is what makes the Earl Grey Tiramisu a delightful indulgence.
Step 5: Repeat the Layering Process
Continue the layering process by dipping the remaining ladyfingers into the cooled tea and placing them on top of the mascarpone layer. Follow this with another layer of the creamy mixture, repeating the process until all the ingredients are used, finishing with a smooth layer of cream. This method builds flavor and texture, ensuring every bite of the Earl Grey Tiramisu is heavenly.
Step 6: Chill for Flavor Development
Cover the assembled dish tightly with plastic wrap and refrigerate for at least 4 hours, though overnight is preferred for optimal flavor melding. Chilling allows the flavors of the Earl Grey tea and creamy mascarpone to blend beautifully, resulting in a richer taste and a firmer texture that’s easier to slice when serving.
Step 7: Final Touches Before Serving
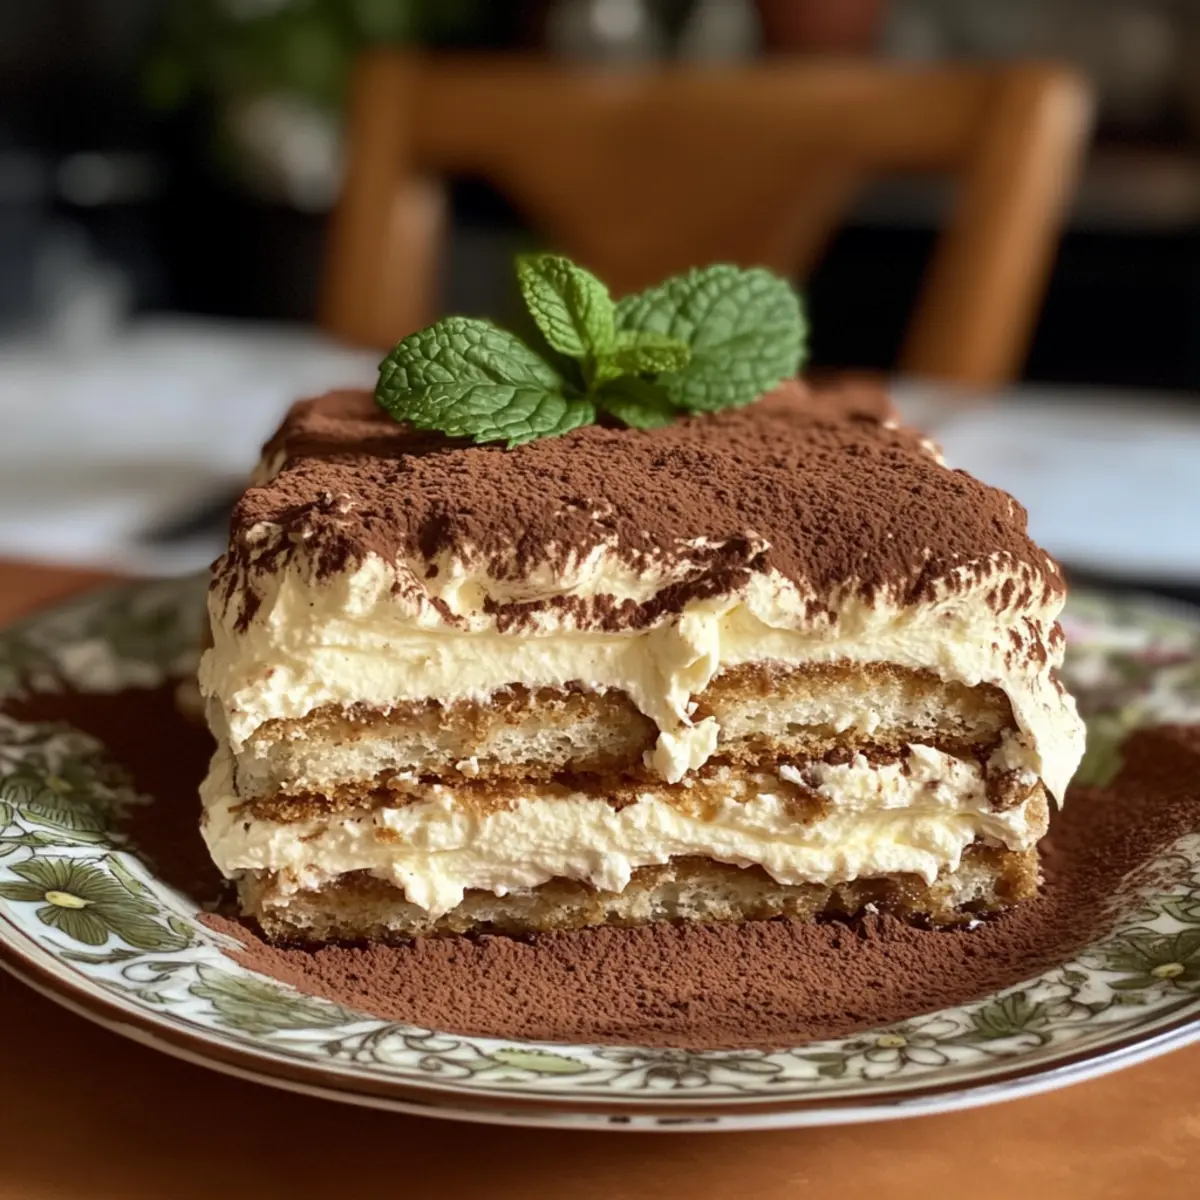
Just before serving your Earl Grey Tiramisu, unwrap the dish and dust the top generously with cocoa powder for a touch of elegance. If desired, garnish with fresh mint leaves for a splash of color and added freshness. This final step elevates the dessert’s aesthetic and adds a delightful finish to this easy no-bake treat, making it a true showstopper.
Expert Tips for Earl Grey Tiramisu
- Cool the Tea: Ensure your brewed Earl Grey tea is completely cooled before dipping ladyfingers; this prevents sogginess and preserves their structure.
- Quick Dip: Dip ladyfingers swiftly in the tea for about 1–2 seconds only; soaking them too long can lead to a mushy texture.
- Chill Time: Allow the Earl Grey Tiramisu to chill for at least 4 hours, but for best results, let it rest overnight; this enhances the flavors beautifully.
- Cutting Technique: Use a serrated knife when slicing your tiramisu to maintain the distinct layers; a smooth knife can squish the dessert.
- Customization Options: Don’t hesitate to get creative; substitute different flavored teas or add fresh berries to personalize your dessert!
Make Ahead Options
These Earl Grey Tiramisu layers are perfect for meal prep enthusiasts looking to save time! You can prepare the creamy mascarpone mixture and dip the ladyfingers up to 24 hours in advance; simply store them separately in the refrigerator to maintain freshness and prevent sogginess. Then, when you’re ready to assemble, layer the soaked ladyfingers with the cream mixture. For the best flavor fusion, let the assembled tiramisu chill in the refrigerator overnight. Just before serving, dust with cocoa powder and garnish with fresh mint leaves for a beautiful presentation. This method keeps the tiramisu just as delicious while allowing you to enjoy more time with your guests!
Storage Tips for Earl Grey Tiramisu
- Fridge: Store your Earl Grey Tiramisu covered tightly with plastic wrap in the refrigerator for up to 2 days. This ensures it remains fresh and flavors meld beautifully.
- Freezer: If you wish to keep it longer, you can freeze the assembled tiramisu for up to 1 month. Wrap it tightly in plastic and then in aluminum foil to prevent freezer burn.
- Thawing: When ready to enjoy, thaw in the refrigerator overnight. Avoid refreezing to maintain the texture and flavors of the dessert.
- Reheating: Tiramisu is best served chilled; simply dust with cocoa powder and garnish again before serving—no reheating necessary!
Earl Grey Tiramisu: Fun Flavor Twists
Feel free to personalize your Earl Grey Tiramisu with these scrumptious variations for a dessert that’s uniquely yours!
-
Chai Twist: Swap Earl Grey for chai tea to infuse warm spices, creating a cozy, fragrant dessert.
-
Citrus Burst: Add a layer of orange or lemon zest between the cream and ladyfingers to brighten each bite with zestiness.
-
Chocolate Delight: Substitute the mascarpone with chocolate mousse for a chocolate-centric version—delivering double the indulgence.
-
Nutty Flavor: Incorporate a spoonful of almond or hazelnut extract in the cream for a pleasantly nutty undertone.
-
Vegan Option: For a dairy-free treat, use silken tofu blended with coconut cream and maple syrup, ensuring everyone can enjoy this treat!
-
Herbal Infusion: Experiment with other herbal teas like chamomile or peppermint for a refreshing twist that complements the creaminess.
-
Spicy Kick: Sprinkle a dash of cayenne pepper into your cocoa powder before dusting, adding surprising warmth to your dessert.
-
Maple Sweetness: Swap granulated sugar for maple syrup to achieve a subtle maple flavor that beautifully pairs with the tea notes.
By trying these variations, you’ll ensure your Earl Grey Tiramisu is a reflection of your taste and creativity! If you’re interested in more delightful desserts, consider exploring my No-Bake Cheesecake or Berry Pavlova for additional ideas.
What to Serve with Earl Grey Tiramisu?
Indulging in the luxurious layers of Earl Grey Tiramisu sets the stage for a memorable dining experience, and the right accompaniments can elevate it even further.
-
Fresh Berries: A mix of raspberries, strawberries, or blueberries adds a burst of color and a refreshing tartness that complements the creamy sweetness of the tiramisu beautifully. Their vibrant flavors create a delightful contrast, making each bite even more enjoyable.
-
Chocolate Covered Espresso Beans: For an after-dinner treat, these provide a satisfying crunch and an extra hit of coffee flavor, enhancing the tea notes in the dessert. They create a delightful texture contrast and excitement alongside the silky tiramisu.
-
Whipped Cream or Chantilly Cream: A light dollop of freshly whipped cream tops off the tiramisu perfectly. It adds a rich, silky texture that harmonizes with the dessert while maintaining a lighter feel.
-
Earl Grey Tea: Hop onto the aromatic tea theme by serving a warm cup of Earl Grey alongside your tiramisu. This not only enhances the dessert’s flavors but also creates a lovely, soothing experience that invites conversation and relaxation.
-
Homemade Citrus Sorbet: A refreshing sorbet, like lemon or bergamot, can cleanse the palate between bites. The refreshing zest pairs well, offering a bright, cooling contrast to the indulgent tiramisu.
-
Almond Biscotti: Adding a crunchy, nutty element, almond biscotti are perfect for dipping in the Earl Grey tea if desired. Their texture and subtle sweetness enhance the overall experience, creating an enjoyable twist!
-
Sparkling Dessert Wine: To elevate the occasion, a glass of light sparkling wine or prosecco provides a festive touch. The bubbles cut through the creaminess of the tiramisu, making each celebration even more special.
Earl Grey Tiramisu Recipe FAQs
What type of Earl Grey tea should I use for the best flavor?
I recommend using high-quality loose leaf Earl Grey tea or a premium tea bag for brewing your dessert. The aromatic blend of bergamot is what makes this Earl Grey Tiramisu so special, so the better the tea, the richer the flavor!
How should I store Earl Grey Tiramisu and for how long?
Store your Earl Grey Tiramisu tightly covered with plastic wrap in the refrigerator for up to 2 days. This helps keep it fresh while allowing the flavors to meld beautifully. If you want to keep it longer, it can be frozen for up to a month—just wrap it tightly in plastic followed by aluminum foil to prevent freezer burn.
Can I freeze Earl Grey Tiramisu? If so, how should I do it?
Absolutely! To freeze your Earl Grey Tiramisu, ensure it is fully assembled and tightly wrapped first with plastic wrap, then with aluminum foil. This prevents freezer burn and preserves flavor. When you’re ready to enjoy, simply thaw it in the refrigerator overnight. I usually recommend consuming it straight from the fridge for the best texture!
What can I do if my ladyfingers become too soggy during assembly?
If your ladyfingers get too soggy, it’s likely because they were soaked in tea for too long. To avoid this, dip each ladyfinger swiftly for just 1-2 seconds before arranging, allowing them to absorb the flavor without losing their structure. If they do fall apart, consider making an additional layer with any unused ladyfingers to maintain that lovely texture in your Earl Grey Tiramisu!
Earl Grey Tiramisu: Delightfully Easy No-Bake Indulgence
Ingredients
Equipment
Method
- Brew about 1 cup of strong Earl Grey tea and let it cool completely.
- In a large bowl, combine mascarpone, heavy cream, sugar, and vanilla. Beat until soft peaks form.
- Dip each ladyfinger in cooled tea for 1-2 seconds and arrange in the dish.
- Spoon a portion of the cream mixture over the ladyfingers, spreading evenly.
- Repeat layering with remaining ladyfingers and cream, finishing with a smooth cream layer.
- Cover and refrigerate for at least 4 hours or overnight.
- Dust with cocoa powder and garnish with mint leaves before serving.