A Childhood Favorite with a Healthier Touch
Marshmallows have always been a symbol of comfort and nostalgia. Whether roasted over an open fire, melting into a steaming mug of hot cocoa, or layered between graham crackers and chocolate for the perfect s’more, they bring a sense of warmth and joy. As a child, I remember tearing open a fresh bag of store-bought marshmallows, the sugary aroma filling the air as I pulled apart the soft, pillowy cubes. It was a treat that felt magical, something so simple yet undeniably special.
But as I grew older and became more mindful of the ingredients in my food, I started questioning the processed nature of these beloved sweets. The artificial flavors, corn syrup, and preservatives didn’t align with the wholesome lifestyle I was striving for. I longed for a way to recreate that same childhood magic—only with ingredients I could feel good about.
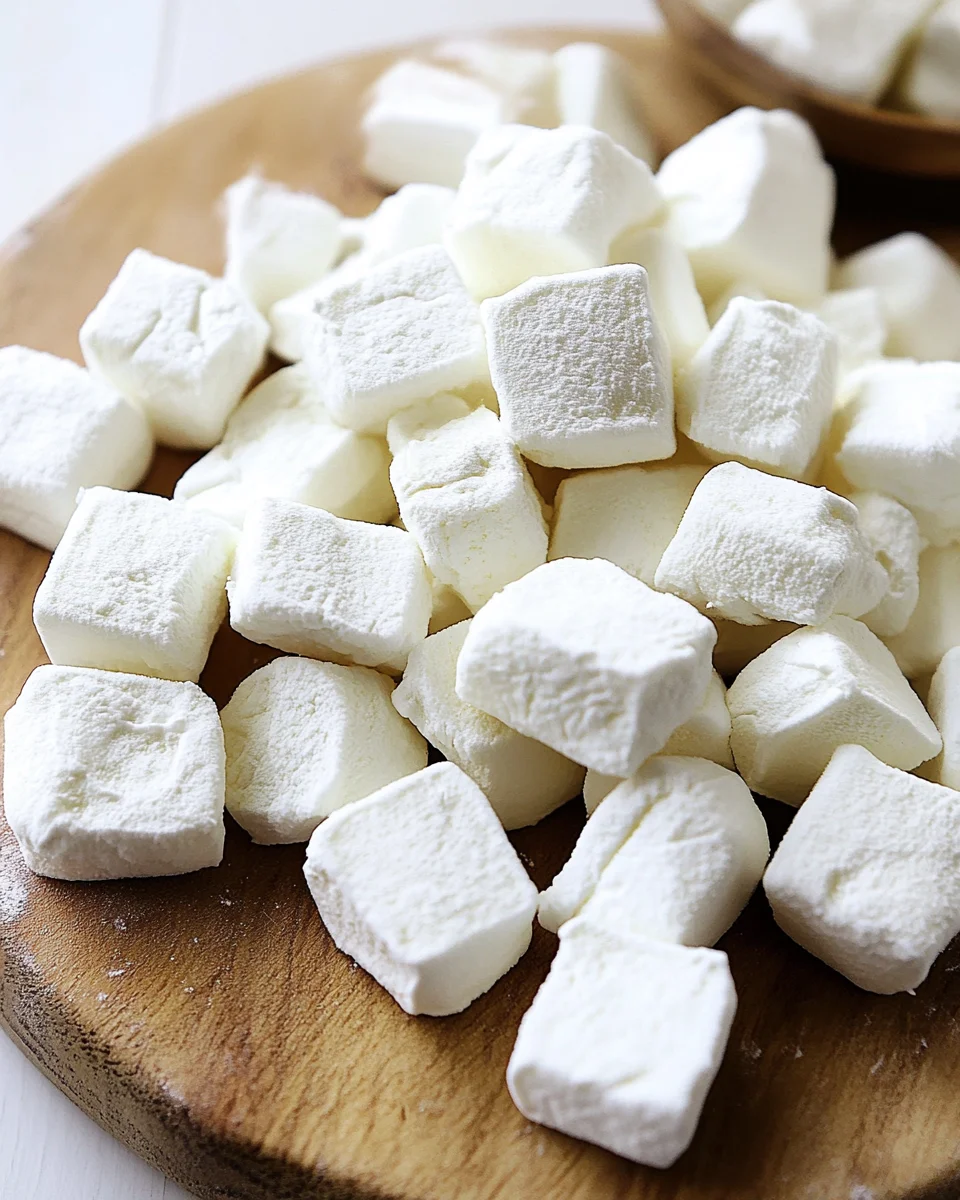
That’s when I discovered homemade marshmallows. Made with just a handful of simple, natural ingredients, they offer the same delightful texture and taste without the unnecessary additives. This recipe, sweetened with honey and stabilized with high-quality gelatin, brings back all the joy of traditional marshmallows while embracing a more nourishing approach. Whether you’re looking for a healthier alternative or simply want to experience the satisfaction of making them from scratch, these homemade honey marshmallows will transform the way you see this classic treat.
What Makes Homemade Marshmallows Special?
A Healthier Alternative to Store-Bought Marshmallows
Traditional marshmallows are packed with refined sugars, high-fructose corn syrup, and artificial flavors—ingredients that can cause blood sugar spikes and contribute to inflammation. This homemade version, on the other hand, is naturally sweetened with honey, which not only provides a more complex flavor but also offers trace nutrients and antioxidants. By eliminating processed sugars and artificial additives, these marshmallows become a treat you can enjoy without guilt.
Gelatin: The Secret to a Nutrient-Rich Treat
One of the key ingredients in this recipe is gelatin, which is responsible for giving marshmallows their signature bouncy texture. But beyond its structural role, gelatin also comes with a range of health benefits. Derived from collagen, it supports gut health, joint function, and skin elasticity. Many people incorporate gelatin into their diets for its ability to promote digestion and strengthen connective tissues. Unlike store-bought marshmallows that use highly processed stabilizers, these homemade marshmallows turn a simple treat into a nourishing addition to your diet.
The Perfect Texture: Soft, Fluffy, and Light
Many homemade marshmallow recipes fall short when it comes to achieving that perfect cloud-like texture. The key is in the whipping process, which incorporates air into the mixture, creating marshmallows that are light and delicate rather than dense or sticky. When made correctly, they have a melt-in-your-mouth consistency that rivals anything you can buy at the store.
Naturally Flavored and Customizable
One of the best things about making marshmallows from scratch is the ability to customize them. This recipe includes vanilla extract for a classic taste, but you can easily experiment with different flavors:
- Peppermint extract for a holiday-inspired twist
- Almond extract for a nutty undertone
- Cinnamon or pumpkin spice for a warm, spiced version
- Cocoa powder for a rich chocolate variation
- Freeze-dried fruit powders for a fruity marshmallow
The possibilities are endless, allowing you to tailor your marshmallows to suit any occasion or craving.
Ingredients – Pure and Simple Sweetness
- For the Marshmallow Base:
- ½ cup water (for blooming gelatin)
- ½ cup water (for heating with honey)
- 3 tbsp grass-fed gelatin
- 1 cup honey
- 1 tsp vanilla extract or vanilla bean powder
- ¼ tsp salt
- For Dusting:
- ¼ cup arrowroot powder (or tapioca starch)
Directions – Crafting Fluffy Perfection
- Prepare the Pan
- Line a 9×13-inch pan with parchment paper, leaving an overhang on the sides for easy removal.
- Lightly dust the bottom with arrowroot powder.
- Bloom the Gelatin
- In the bowl of a stand mixer, combine ½ cup water with gelatin.
- Whisk lightly and let it sit to bloom while preparing the honey mixture.
- Heat the Honey Mixture
- In a heavy-bottomed saucepan, combine honey, remaining ½ cup water, and salt.
- Bring to a gentle boil, then reduce heat to medium and simmer for 8 minutes without stirring.
- Whisk the Mixture
- Turn the stand mixer to low and break up the bloomed gelatin.
- Slowly pour the hot honey mixture in a thin stream down the side of the bowl, avoiding direct contact with the gelatin.
- Beat to Perfection
- Increase the mixer speed to high and whip for 8 minutes until thick, glossy, and fluffy.
- Add vanilla in the last minute of whipping.
- Set the Marshmallows
- Transfer the mixture to the prepared pan and spread evenly.
- Let sit uncovered at room temperature for at least 4 hours or overnight.
- Cut and Coat
- Remove from the pan and dust the top with arrowroot powder.
- Cut into squares and toss in additional arrowroot powder to prevent sticking.
Nutritional Breakdown – Light and Wholesome
- Calories: 24 kcal
- Carbohydrates: 6g
- Protein: 0.4g
- Fat: 0.001g
- Sodium: 1mg
- Potassium: 4mg
- Fiber: 0.03g
- Sugar: 6g
- Vitamin C: 0.04mg
- Calcium: 1mg
- Iron: 0.04mg
Soft, airy, and naturally sweetened, these homemade marshmallows are a delightful treat without the guilt. Enjoy them in hot cocoa, s’mores, or straight from the jar!
FAQs About Homemade Marshmallows
Are homemade marshmallows difficult to make?
Not at all! While they require a bit of patience, the process is surprisingly simple. The key steps—blooming the gelatin, heating the honey, and whipping the mixture—are easy to follow, even for beginners. The most important part is timing, especially when pouring the hot syrup into the gelatin while whipping. Once you master that, homemade marshmallows become a fun and rewarding project.
Can I make these marshmallows vegan?
This particular recipe relies on gelatin, which is derived from animal collagen, so it is not vegan. However, if you’re looking for a plant-based alternative, you can try using agar-agar, a seaweed-based gelling agent. Keep in mind that agar sets differently than gelatin, so the texture may not be exactly the same.
How long do homemade marshmallows last?
Homemade marshmallows can be stored in an airtight container at room temperature for up to four days. After that, it’s best to move them to the refrigerator, where they can last for up to three weeks. If you want to store them even longer, they can be frozen for up to three months without losing their texture.
Can I use a different sweetener instead of honey?
Yes! While honey provides a wonderful depth of flavor, you can substitute it with maple syrup for a slightly different taste. Keep in mind that maple syrup is thinner than honey, so you may need to adjust the cooking time slightly. Other natural liquid sweeteners, like coconut nectar, may also work, but avoid using granulated sugars, as they won’t dissolve properly in this recipe.
Why do I need to dust marshmallows with arrowroot powder?
Marshmallows are naturally sticky, so coating them with arrowroot powder (or tapioca starch) prevents them from clumping together. If you prefer a slightly sweeter finish, you can mix a small amount of powdered sugar with the arrowroot powder for a light, sugary coating.
Can I toast these marshmallows?
Yes! Unlike many homemade marshmallows that tend to melt too quickly, these hold up well to heat. They will toast just like store-bought marshmallows, developing a caramelized, golden-brown exterior while staying soft inside. They’re perfect for s’mores, roasting over a campfire, or topping sweet potato casseroles.
Can I use these marshmallows for baking?
Absolutely! These marshmallows can be used in recipes that call for traditional marshmallows, such as Rice Krispie treats, hot cocoa toppings, and rocky road desserts. Because they are made without preservatives, they may melt a little faster than commercial marshmallows, so keep an eye on them when using them in baked goods.
Conclusion: A Sweet Treat Worth Making
Homemade honey marshmallows are more than just a healthier alternative to store-bought versions—they’re a way to bring back the simple joy of a childhood favorite while embracing real, wholesome ingredients. Whether you’re making them for a special occasion, a cozy night in, or as a thoughtful homemade gift, these marshmallows will quickly become a staple in your kitchen.
Not only do they offer a nostalgic, melt-in-your-mouth texture, but they also provide the satisfaction of knowing exactly what goes into your treats. No artificial flavors, no corn syrup—just pure, natural ingredients combined to create something truly special.
So, the next time you’re craving a sweet, fluffy indulgence, skip the store-bought bag and try making your own. You’ll never look at marshmallows the same way again.
Homemade Honey Marshmallows: A Wholesome Twist on a Classic Treat
- Total Time: 4 hours 25 minutes (including setting time)
- Yield: 24 marshmallows
Description
These Cloud-Like Honey Marshmallows are soft, airy, and naturally sweetened, making them a delightful treat without the guilt. Enjoy them in hot cocoa, s’mores, or simply as a wholesome snack!
Ingredients
For the Marshmallow Base
- 1/2 cup water (for blooming gelatin)
- 1/2 cup water (for heating with honey)
- 3 tbsp grass-fed gelatin
- 1 cup honey
- 1 tsp vanilla extract or vanilla bean powder
- 1/4 tsp salt
For Dusting
- 1/4 cup arrowroot powder (or tapioca starch)
Instructions
Step 1: Prepare the Pan
- Line a 9×13-inch pan with parchment paper, leaving an overhang for easy removal.
- Lightly dust the bottom with arrowroot powder.
Step 2: Bloom the Gelatin
- In the bowl of a stand mixer, combine 1/2 cup water with gelatin.
- Whisk lightly and let it sit to bloom while preparing the honey mixture.
Step 3: Heat the Honey Mixture
- In a heavy-bottomed saucepan, combine honey, remaining 1/2 cup water, and salt.
- Bring to a gentle boil, then reduce heat to medium and simmer for 8 minutes without stirring.
Step 4: Whisk the Mixture
- Turn the stand mixer to low and break up the bloomed gelatin.
- Slowly pour the hot honey mixture in a thin stream down the side of the bowl, avoiding direct contact with the gelatin.
Step 5: Beat to Perfection
- Increase the mixer speed to high and whip for 8 minutes until thick, glossy, and fluffy.
- Add vanilla in the last minute of whipping.
Step 6: Set the Marshmallows
- Transfer the mixture to the prepared pan and spread evenly.
- Let sit uncovered at room temperature for at least 4 hours or overnight.
Step 7: Cut and Coat
- Remove from the pan and dust the top with arrowroot powder.
- Cut into squares and toss in additional arrowroot powder to prevent sticking.
Notes
- For a flavored twist, add cinnamon, cocoa powder, or peppermint extract.
- Make ahead – These marshmallows keep well in an airtight container for up to a week.
- Perfect for gifts – Wrap in decorative bags and give as homemade treats!
- Prep Time: 15 minutes
- Cook Time: 10 minutes
- Category: Dessert/Snack
- Method: No-Bake
- Cuisine: American