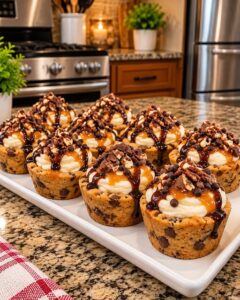
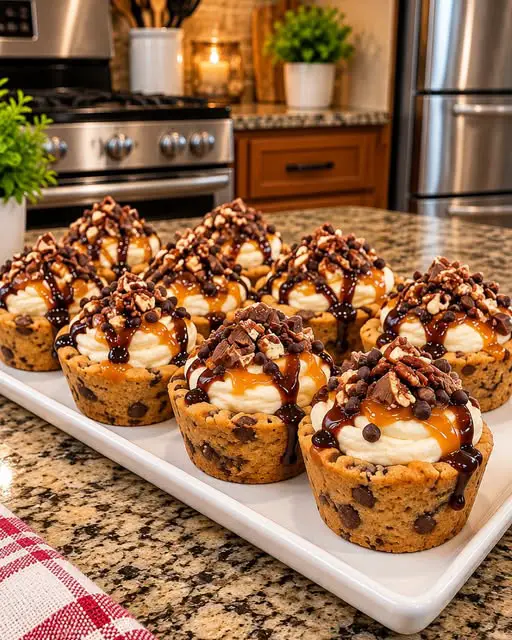
Introduction to Loaded Cheesecake Cookie Cups
There’s something magical about dessert that brings people together. Loaded Cheesecake Cookie Cups are the perfect blend of soft, chewy cookie and creamy cheesecake filling, making them a delightful treat for any occasion.
Whether you’re looking to impress guests at a gathering or simply want to indulge after a long day, these cookie cups are a quick solution that satisfies every sweet tooth.
With their customizable toppings, they’re not just a dessert; they’re a canvas for your creativity. Trust me, once you try these, they’ll become a staple in your dessert repertoire!
Why You’ll Love This Loaded Cheesecake Cookie Cups
These Loaded Cheesecake Cookie Cups are a game-changer in the dessert world.
They’re incredibly easy to whip up, making them perfect for busy weeknights or last-minute gatherings.
The combination of a soft cookie base and rich cheesecake filling is simply irresistible.
Plus, you can customize the toppings to suit your taste, ensuring everyone leaves with a smile.
Trust me, once you try them, you’ll be hooked!
Ingredients for Loaded Cheesecake Cookie Cups
Creating Loaded Cheesecake Cookie Cups is a delightful journey, and it all starts with the right ingredients. Here’s what you’ll need:
- Unsalted butter: This adds richness and moisture to the cookie base. Softened butter blends easily with sugars for that fluffy texture.
- Brown sugar: Packed brown sugar brings a deep, caramel-like flavor, enhancing the overall taste of the cookie.
- Granulated sugar: This sweetener balances the richness of the brown sugar and helps create a tender cookie.
- Egg: A large egg binds the ingredients together, providing structure and moisture.
- Vanilla extract: Pure vanilla extract adds a warm, aromatic flavor that elevates the dessert.
- All-purpose flour: The backbone of the cookie, flour gives it structure and a soft bite.
- Baking soda: This leavening agent helps the cookie cups rise and become light and airy.
- Salt: Just a pinch enhances the sweetness and balances the flavors.
- Semi-sweet chocolate chips: These little morsels add bursts of chocolatey goodness throughout the cookie.
- Cream cheese: The star of the cheesecake filling, cream cheese provides that rich, creamy texture we all love.
- Powdered sugar: This sweetener helps achieve a smooth, creamy filling without any graininess.
- Heavy whipping cream: Cold whipping cream is whipped to stiff peaks, adding lightness to the cheesecake filling.
- Mini chocolate chips: These are perfect for sprinkling on top, adding extra chocolate flavor and a fun texture.
- Crushed chocolate sandwich cookies: These add a delightful crunch and chocolatey flavor to the topping.
- Caramel sauce: A drizzle of caramel adds a sweet, gooey finish that complements the cheesecake perfectly.
- Chocolate sauce: This adds an extra layer of indulgence and visual appeal.
- Chopped toasted pecans or walnuts: These nuts provide a crunchy contrast and a nutty flavor that enhances the overall experience.
- Whipped cream: A dollop on top adds a light, airy finish to each cookie cup.
For exact measurements, check the bottom of the article where you can find everything listed for easy printing. Enjoy gathering these ingredients; each one plays a vital role in creating these delicious Loaded Cheesecake Cookie Cups!
How to Make Loaded Cheesecake Cookie Cups
Creating Loaded Cheesecake Cookie Cups is a fun and rewarding experience. Follow these simple steps, and you’ll have a batch of delightful treats ready to impress.
Step 1: Preheat and Prepare
Start by preheating your oven to 350°F.
While it warms up, grab a 12-cup muffin pan and grease it generously with nonstick cooking spray.
This ensures your cookie cups come out easily after baking.
Step 2: Cream the Butter and Sugars
In a large mixing bowl, combine the softened butter, brown sugar, and granulated sugar.
Using a hand mixer or a sturdy spoon, cream them together until the mixture is light and fluffy.
This step is crucial for achieving that perfect cookie texture.
Step 3: Add Egg and Vanilla
Next, crack in the large egg and pour in the vanilla extract.
Mix until everything is well combined.
The egg adds moisture, while the vanilla brings a warm aroma that makes your kitchen smell heavenly.
Step 4: Combine Dry Ingredients
In a separate bowl, whisk together the all-purpose flour, baking soda, and salt.
Gradually add this dry mixture to your wet ingredients.
Stir until a soft dough forms, but don’t overmix; we want those cookie cups to be tender!
Step 5: Fold in Chocolate Chips
Now, gently fold in the semi-sweet chocolate chips.
These little gems will melt slightly during baking, creating pockets of chocolatey goodness in every bite.
Step 6: Shape the Cookie Cups
Divide the dough evenly among the muffin cups.
Press the dough into the bottom and slightly up the sides to create a cup shape.
This is where the cheesecake filling will sit, so make sure the walls are sturdy!
Step 7: Bake the Cookie Cups
Pop the muffin pan into the oven and bake for 12–15 minutes.
Keep an eye on them; the edges should be lightly golden, while the centers may puff up a bit.
Once done, let them cool for a few minutes before gently pressing down the centers with a spoon.
Step 8: Prepare the Cheesecake Filling
In a mixing bowl, beat the softened cream cheese and powdered sugar until smooth and creamy.
Add in the vanilla extract and mix again.
In a separate chilled bowl, whip the cold heavy cream until stiff peaks form.
Then, gently fold the whipped cream into the cream cheese mixture until it’s light and fluffy.
Step 9: Fill the Cookie Cups
Once your cookie cups are completely cool, it’s time to fill them!
Spoon or pipe the cheesecake filling into each cup.
Don’t be shy; fill them generously for that perfect cheesecake experience.
Step 10: Add Toppings and Chill
Finally, sprinkle mini chocolate chips, crushed chocolate sandwich cookies, and chopped nuts on top.
Drizzle with caramel and chocolate sauce for that extra indulgence.
Refrigerate the cookie cups for at least an hour to let the cheesecake filling set.
Add a dollop of whipped cream just before serving for a delightful finish!
Tips for Success
- Grease the muffin pan well to ensure easy removal of the cookie cups.
- Press down the centers while the cookie cups are still warm for the best shape.
- Allow the cookie shells to cool completely before adding the cheesecake filling.
- For a professional touch, use a piping bag to fill the cups with cheesecake.
- Add toppings just before serving to maintain their texture and freshness.
Equipment Needed
- Muffin pan: A standard 12-cup muffin pan works best, but a silicone mold can also be used for easy removal.
- Mixing bowls: Use at least two bowls—one for wet ingredients and another for dry.
- Hand mixer or whisk: A hand mixer speeds up the process, but a whisk will do just fine.
- Spoon or piping bag: A spoon is great for filling, but a piping bag gives a neat finish.
Variations
- Fruit Toppings: Swap out the chocolate toppings for fresh berries or sliced bananas for a fruity twist.
- Nut-Free Option: Omit the nuts and use sunflower seeds or pumpkin seeds for a crunchy texture without allergens.
- Gluten-Free Version: Substitute all-purpose flour with a gluten-free flour blend to accommodate dietary needs.
- Flavor Infusions: Add a teaspoon of lemon or almond extract to the cheesecake filling for a unique flavor profile.
- Vegan Adaptation: Use vegan butter, a flax egg, and dairy-free cream cheese for a plant-based version of these cookie cups.
Serving Suggestions
- Pair with Coffee: A rich cup of coffee complements the sweetness of the cookie cups beautifully.
- Ice Cream Side: Serve with a scoop of vanilla or chocolate ice cream for an indulgent dessert experience.
- Presentation: Arrange on a decorative platter and garnish with fresh mint leaves for a pop of color.
- Drinks: Consider pairing with a dessert wine or a creamy milkshake for a fun twist.
FAQs about Loaded Cheesecake Cookie Cups
Can I make Loaded Cheesecake Cookie Cups ahead of time?
Absolutely! You can prepare the cookie cups and cheesecake filling a day in advance. Just assemble them and refrigerate until you’re ready to serve. This makes them perfect for parties or gatherings!
What can I use instead of cream cheese?
If you’re looking for a substitute, try using mascarpone cheese or a dairy-free cream cheese alternative. Both options will give you a creamy texture without compromising flavor.
How do I store leftover cookie cups?
Store any leftovers in an airtight container in the refrigerator. They’ll stay fresh for up to three days, but trust me, they won’t last that long!
Can I freeze Loaded Cheesecake Cookie Cups?
Yes, you can freeze the cookie cups without the cheesecake filling. Just bake and cool them, then store in a freezer-safe container. When you’re ready to enjoy, thaw and fill with the cheesecake mixture.
What toppings can I use for these cookie cups?
The sky’s the limit! You can use fresh fruits, nuts, chocolate shavings, or even a drizzle of peanut butter. Get creative and make them your own!
Final Thoughts
Loaded Cheesecake Cookie Cups are more than just a dessert; they’re a celebration of flavors and creativity.
Each bite offers a delightful contrast between the soft cookie and the creamy cheesecake filling, making them a hit at any gathering.
Whether you’re sharing them with friends or enjoying them solo after a long day, these treats bring joy and satisfaction.
Plus, the endless topping possibilities mean you can customize them to suit any occasion.
So roll up your sleeves, gather your ingredients, and dive into this delicious adventure. You won’t regret it!
PrintLoaded Cheesecake Cookie Cups: Discover This Irresistible Recipe!
- Total Time: 1 hour 45 minutes
- Yield: 12 cookie cups
- Diet: Vegetarian
Description
Loaded Cheesecake Cookie Cups are delicious dessert treats that combine a soft cookie base with a creamy cheesecake filling, topped with various indulgent toppings.
Ingredients
- 1/2 cup unsalted butter, softened
- 1/2 cup brown sugar, packed
- 1/4 cup granulated sugar
- 1 large egg
- 1 teaspoon vanilla extract
- 1 1/2 cups all-purpose flour
- 1/2 teaspoon baking soda
- 1/4 teaspoon salt
- 3/4 cup semi-sweet chocolate chips
- 8 oz cream cheese, softened
- 1/3 cup powdered sugar
- 1 teaspoon vanilla extract
- 1/2 cup heavy whipping cream, cold
- 1/4 cup mini chocolate chips
- 1/4 cup crushed chocolate sandwich cookies
- 2 tablespoons caramel sauce
- 2 tablespoons chocolate sauce
- 2 tablespoons chopped toasted pecans or walnuts
- Whipped cream, for topping
Instructions
- Preheat your oven to 350°F. Grease a 12-cup muffin pan generously with nonstick cooking spray.
- In a large bowl, cream together the softened butter, brown sugar, and granulated sugar until light and fluffy.
- Mix in the egg and vanilla extract until well combined.
- In a separate bowl, whisk together the flour, baking soda, and salt. Gradually add the dry mixture to the wet ingredients, mixing until a soft dough forms.
- Fold in the semi-sweet chocolate chips.
- Divide the dough evenly among the muffin cups. Press the dough into the bottom and slightly up the sides to create a cup shape.
- Bake for 12–15 minutes, or until the edges are lightly golden. The centers may puff up during baking.
- While the cookies are still warm, gently press the centers down using the back of a small spoon or the bottom of a measuring spoon. Allow them to cool completely before removing from the pan.
- Beat the softened cream cheese and powdered sugar until smooth and creamy. Add vanilla extract and mix again.
- In a separate chilled bowl, beat the cold heavy whipping cream until stiff peaks form.
- Gently fold the whipped cream into the cream cheese mixture until light and fluffy.
- Spoon or pipe the cheesecake filling into each cooled cookie cup.
- Sprinkle with mini chocolate chips, crushed cookies, and chopped nuts. Drizzle with caramel and chocolate sauce.
- Refrigerate for at least 1 hour to allow the cheesecake filling to set. Add a little whipped cream before serving if desired.
Notes
- Grease the muffin pan well to make removing the cookie cups easier.
- Press the centers down while the cookies are still warm, as they become firm once cooled.
- Make sure the cookie shells are completely cool before adding the cheesecake filling.
- Use a piping bag for a prettier cheesecake filling.
- Add toppings just before serving for the best texture.
- Prep Time: 30 minutes
- Cook Time: 15 minutes
- Category: Dessert
- Method: Baking
- Cuisine: American
Nutrition
- Serving Size: 1 cookie cup
- Calories: 250
- Sugar: 18g
- Sodium: 150mg
- Fat: 15g
- Saturated Fat: 8g
- Unsaturated Fat: 5g
- Trans Fat: 0g
- Carbohydrates: 28g
- Fiber: 1g
- Protein: 3g
- Cholesterol: 30mg