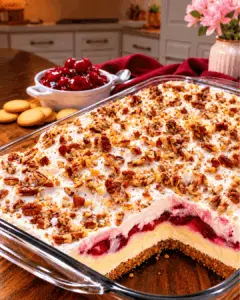
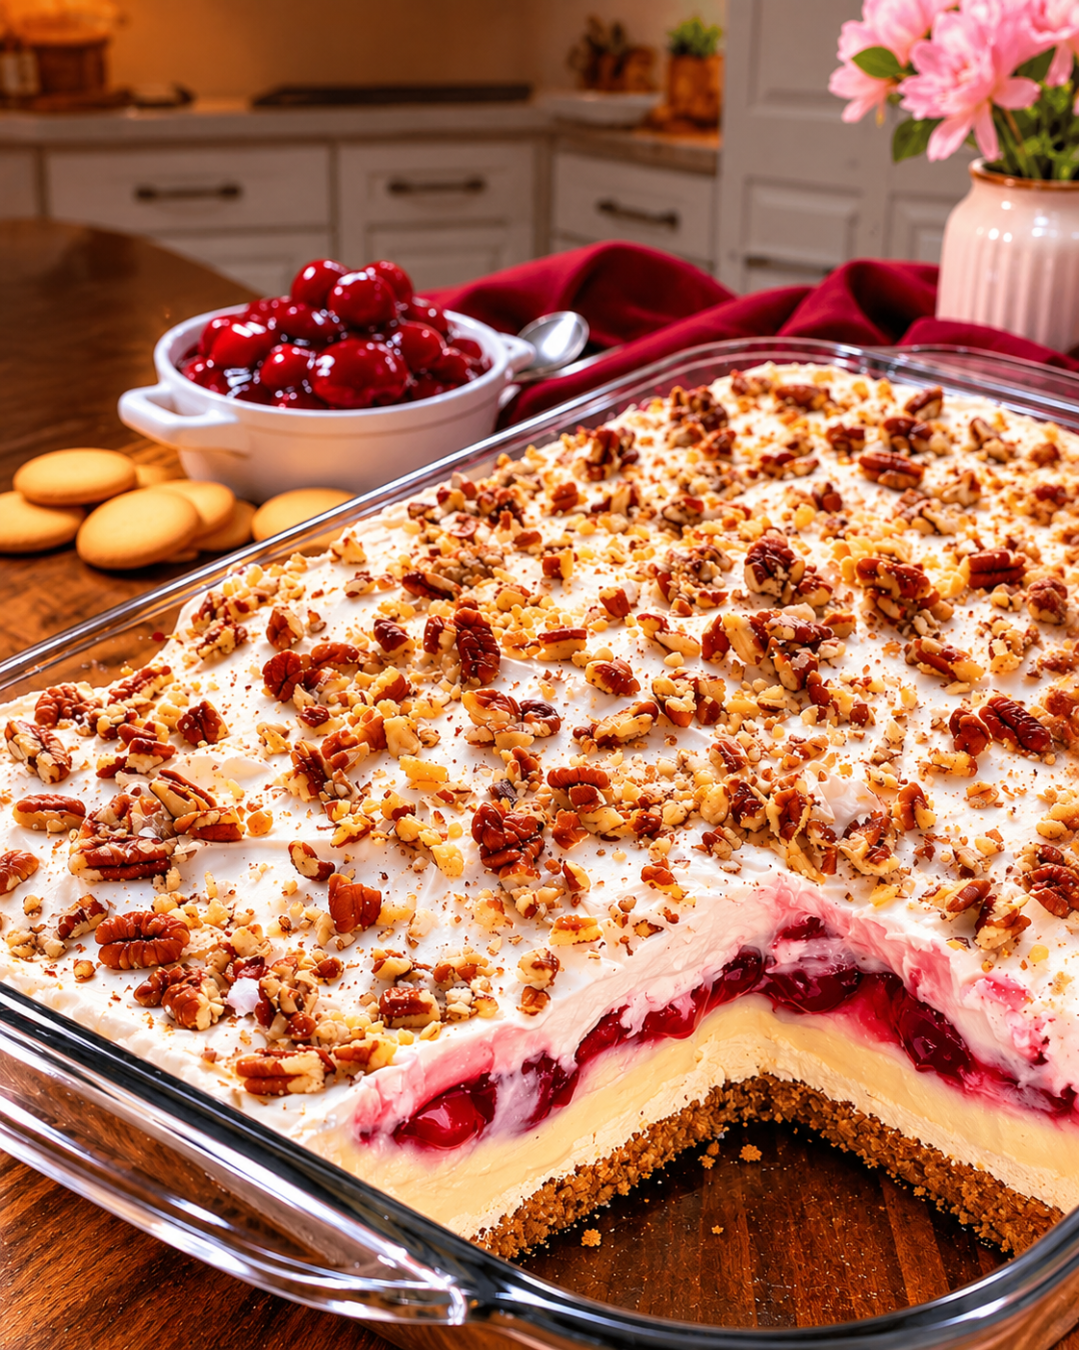
Introduction to Luxurious Cherry Cheesecake Lush Bliss
There’s something magical about desserts that bring back memories of family gatherings and celebrations. The Luxurious Cherry Cheesecake Lush Bliss is one of those treats that can instantly transport you to a time when life was simpler and sweets were a highlight of every occasion.
This no-bake delight is not just a quick solution for a busy day; it’s a showstopper that will impress your loved ones. With its creamy layers and vibrant cherry topping, it’s perfect for any gathering or just a sweet indulgence after a long week. Trust me, your taste buds will thank you!
Why You’ll Love This Luxurious Cherry Cheesecake Lush Bliss
This Luxurious Cherry Cheesecake Lush Bliss is a dessert that checks all the boxes.
It’s incredibly easy to whip up, making it perfect for those busy weeknights or last-minute gatherings.
The layers of creamy cheesecake and rich cherry topping create a flavor explosion that’s hard to resist.
Plus, it’s a no-bake recipe, so you can spend less time in the kitchen and more time enjoying the company of friends and family.
Ingredients for Luxurious Cherry Cheesecake Lush Bliss
Creating this Luxurious Cherry Cheesecake Lush Bliss is a breeze with the right ingredients. Here’s what you’ll need to bring this delightful dessert to life:
- Graham cracker crumbs: These form the base of your dessert, providing a sweet and crunchy texture.
- Unsalted butter: Melted butter binds the crumbs together, ensuring a firm crust that holds up beautifully.
- Granulated sugar: A touch of sweetness enhances the crust, balancing the flavors of the creamy layers.
- Cream cheese: The star of the cheesecake filling, it adds richness and a smooth texture.
- Powdered sugar: This sweetener dissolves easily, giving the filling a light and fluffy consistency.
- Vanilla extract: A splash of vanilla elevates the flavor profile, adding warmth and depth.
- Fresh lemon juice: This brightens the filling, cutting through the richness of the cream cheese.
- Whipped topping: Light and airy, it adds volume to the cheesecake filling and the final layer.
- Instant cheesecake-flavored pudding mix: This thickens the pudding layer and enhances the cheesecake flavor.
- Cold milk: Essential for preparing the pudding, it helps achieve the perfect creamy texture.
- Cherry pie filling: The luscious topping that brings a burst of fruity flavor and color to your dessert.
- Almond extract (optional): A hint of almond adds a delightful twist to the cherry topping.
- White chocolate shavings (optional): These make for a beautiful garnish, adding a touch of elegance.
- Fresh cherries (optional): For a fresh finish, they can be used as a garnish or mixed into the cherry layer.
For exact measurements, check the bottom of the article where you can find everything you need for printing. Enjoy the process of gathering these ingredients, as each one plays a vital role in creating this indulgent dessert!
How to Make Luxurious Cherry Cheesecake Lush Bliss
Creating this Luxurious Cherry Cheesecake Lush Bliss is a delightful journey. Each step is simple, yet it builds layers of flavor and texture that will leave everyone wanting more. Let’s dive into the process!
Step 1: Prepare the Crust
Start by grabbing a medium bowl.
Combine the graham cracker crumbs, melted butter, and granulated sugar.
Stir until the mixture resembles damp sand.
Press this mixture firmly into the bottom of a 9-by-13-inch baking dish.
This crust is the foundation of your dessert, so make sure it’s even.
Pop the dish in the refrigerator for about 15–20 minutes to help it firm up.
Step 2: Make the Cheesecake Filling
In a large mixing bowl, beat the softened cream cheese with an electric mixer until it’s smooth and creamy.
Add in the powdered sugar, vanilla extract, and fresh lemon juice.
Beat until everything is fully combined, scraping down the sides of the bowl as needed.
Now, gently fold in the whipped topping until the mixture is light and fluffy.
This filling is the heart of your Luxurious Cherry Cheesecake Lush Bliss, so take your time to get it just right.
Step 3: Assemble the Layers
Once your crust is chilled, carefully spread the cheesecake filling over it.
Make sure to reach all the edges for a beautiful presentation.
Use a spatula to smooth the surface, then return the dish to the refrigerator while you prepare the pudding layer.
This step is crucial for keeping those layers distinct and delicious.
Step 4: Prepare the Pudding Layer
In a separate bowl, whisk the instant cheesecake pudding mix with the cold milk for about 2 minutes.
You’ll notice it starting to thicken.
For an extra-light texture, gently fold in the optional whipped topping.
Let the pudding stand for 2–3 minutes until it thickens up nicely.
This layer adds a creamy richness that complements the cheesecake perfectly.
Step 5: Add the Cherry Topping
Spread the prepared pudding evenly over the cheesecake layer.
Be careful not to disturb the cream cheese filling underneath.
Now, if you want to elevate the cherry flavor, stir the almond extract into the cherry pie filling.
Spoon the cherry filling over the pudding layer, spreading it gently into an even layer.
This fruity topping is what makes this dessert truly luxurious.
Step 6: Final Touches and Chill
Spread the remaining whipped topping over the cherry layer.
You can also spoon it over the cherries in decorative swirls for a fun look.
Sprinkle with graham cracker crumbs and white chocolate shavings for that extra touch of elegance.
If you have fresh cherries, toss them on top for a beautiful finish.
Cover the dish and refrigerate for at least 4–6 hours, or overnight for the best flavor.
When you’re ready to serve, cut into squares with a sharp knife, wiping the blade between cuts for neat layers.
Enjoy this Luxurious Cherry Cheesecake Lush Bliss cold, and watch everyone’s faces light up with delight!
Tips for Success
- Chill the dessert overnight for the best flavor and texture.
- Ensure your cream cheese is softened to avoid lumps in the filling.
- Use a sharp knife to cut clean slices, wiping the blade between cuts.
- Feel free to customize toppings with your favorite fruits or chocolate.
- For a lighter dessert, fold in more whipped topping into the pudding layer.
Equipment Needed
- Mixing bowls: Use any size you have; just ensure they’re large enough for mixing.
- Electric mixer: A hand mixer works great, but a whisk can do the job too.
- 9-by-13-inch baking dish: Any similar-sized dish will work for layering.
- Spatula: A rubber spatula is perfect for spreading and smoothing layers.
- Whisk: Essential for mixing the pudding; a fork can also suffice.
Variations
- Chocolate Cherry Lush: Swap the vanilla pudding for chocolate pudding for a rich twist.
- Berry Bliss: Replace the cherry pie filling with mixed berry compote for a fruity explosion.
- Gluten-Free Option: Use gluten-free graham cracker crumbs to make the crust suitable for gluten-sensitive guests.
- Vegan Version: Substitute cream cheese with vegan cream cheese and use coconut whipped cream for a plant-based delight.
- Nutty Crunch: Add crushed nuts like pecans or almonds to the crust for an extra crunch and flavor.
Serving Suggestions
- Pair with a scoop of vanilla ice cream for a delightful contrast in temperature and texture.
- Serve alongside a fresh fruit salad to balance the richness of the dessert.
- For drinks, consider a chilled glass of sweet iced tea or a light sparkling wine.
- Garnish each slice with a sprig of mint for a pop of color and freshness.
- Present on a decorative platter to elevate the dessert’s visual appeal.
FAQs about Luxurious Cherry Cheesecake Lush Bliss
Can I make Luxurious Cherry Cheesecake Lush Bliss ahead of time?
Absolutely! In fact, chilling it overnight enhances the flavors and texture. Just cover it well to keep it fresh.
What can I substitute for cream cheese?
If you’re looking for a lighter option, you can use Greek yogurt or a vegan cream cheese alternative. Both will work well in the filling.
How do I store leftovers?
Store any leftovers in an airtight container in the refrigerator. It should stay fresh for up to 3 days, but trust me, it won’t last that long!
Can I use fresh cherries instead of cherry pie filling?
Yes! Fresh cherries can be a delightful alternative. Just make sure to pit and slice them before adding to the dessert.
Is this dessert suitable for a gluten-free diet?
Yes, simply use gluten-free graham cracker crumbs for the crust, and you’ll have a delicious gluten-free treat!
Final Thoughts
Creating the Luxurious Cherry Cheesecake Lush Bliss is more than just making a dessert; it’s about crafting a moment of joy.
Each layer tells a story, from the crunchy graham cracker crust to the creamy cheesecake filling and the vibrant cherry topping.
This dessert is perfect for sharing, whether at a family gathering or a cozy night in.
As you slice into this indulgent treat, you’ll see smiles all around.
So, gather your loved ones, serve up this delightful creation, and relish the sweet memories that come with every bite.
Your kitchen will become a haven of happiness!
PrintLuxurious Cherry Cheesecake Lush Bliss: A Must-Try Delight!
- Total Time: 4-6 hours (chill time)
- Yield: 12 servings
- Diet: Vegetarian
Description
Luxurious Cherry Cheesecake Lush Bliss is a delightful layered dessert featuring a graham cracker crust, creamy cheesecake filling, rich pudding layer, and a luscious cherry topping.
Ingredients
- 2 cups graham cracker crumbs
- 1/2 cup unsalted butter, melted
- 2 tablespoons granulated sugar
- 2 packages (8 oz each) cream cheese, softened
- 3/4 cup powdered sugar
- 1 teaspoon vanilla extract
- 1 tablespoon fresh lemon juice
- 1 container (8 oz) whipped topping, thawed
- 1 package (3.4 oz) instant cheesecake-flavored pudding mix
- 1 1/2 cups cold milk
- 1/2 cup whipped topping, optional
- 1 can (21 oz) cherry pie filling
- 1/2 teaspoon almond extract, optional
- 1 container (8 oz) whipped topping, thawed
- 1/4 cup graham cracker crumbs
- 2 tablespoons white chocolate shavings, optional
- Fresh cherries, optional
Instructions
- In a medium bowl, combine the graham cracker crumbs, melted butter, and granulated sugar. Stir until the crumbs are evenly moistened and resemble damp sand. Press the mixture firmly into the bottom of a 9-by-13-inch baking dish, creating an even layer. Place the dish in the refrigerator for 15–20 minutes to help the crust firm up.
- In a large mixing bowl, beat the softened cream cheese with an electric mixer until smooth and creamy. Add the powdered sugar, vanilla extract, and lemon juice. Beat until fully combined, scraping down the sides of the bowl as needed. Gently fold in the 8-ounce container of whipped topping until the mixture is light, fluffy, and evenly blended.
- Remove the chilled crust from the refrigerator. Carefully spread the cheesecake filling over the crust, reaching all the way to the edges. Use a spatula to smooth the surface. Return the dish to the refrigerator while preparing the pudding layer.
- In a separate bowl, whisk the instant cheesecake pudding mix with the cold milk for about 2 minutes, until the mixture begins to thicken. For an extra-light texture, gently fold in the optional 1/2 cup whipped topping. Allow the pudding to stand for 2–3 minutes until thickened.
- Spread the prepared pudding evenly over the cheesecake layer, being careful not to disturb the cream cheese filling underneath. Smooth the top with a spatula.
- If desired, stir the almond extract into the cherry pie filling for a subtle bakery-style flavor. Spoon the cherry filling over the pudding layer and spread it gently into an even layer. Distribute the cherries evenly so every serving gets plenty of fruit and glossy cherry sauce.
- Spread the remaining 8-ounce container of whipped topping over the cherry layer, or spoon it over the cherries in decorative swirls if you prefer to show some of the fruit. Sprinkle with graham cracker crumbs and white chocolate shavings. Add fresh cherries for an elegant finishing touch, if desired.
- Cover the dish and refrigerate for at least 4–6 hours. For the cleanest slices and best flavor, chill overnight. Cut into squares with a sharp knife, wiping the blade between cuts for neat layers. Serve cold and enjoy!
Notes
- For best results, chill overnight for improved flavor and texture.
- Feel free to customize the toppings with your favorite fruits or chocolate.
- Ensure the cream cheese is softened for easier mixing.
- Prep Time: 30 minutes
- Cook Time: 0 minutes
- Category: Dessert
- Method: No-bake
- Cuisine: American
Nutrition
- Serving Size: 1 square
- Calories: 350
- Sugar: 25g
- Sodium: 200mg
- Fat: 20g
- Saturated Fat: 10g
- Unsaturated Fat: 5g
- Trans Fat: 0g
- Carbohydrates: 35g
- Fiber: 1g
- Protein: 4g
- Cholesterol: 30mg