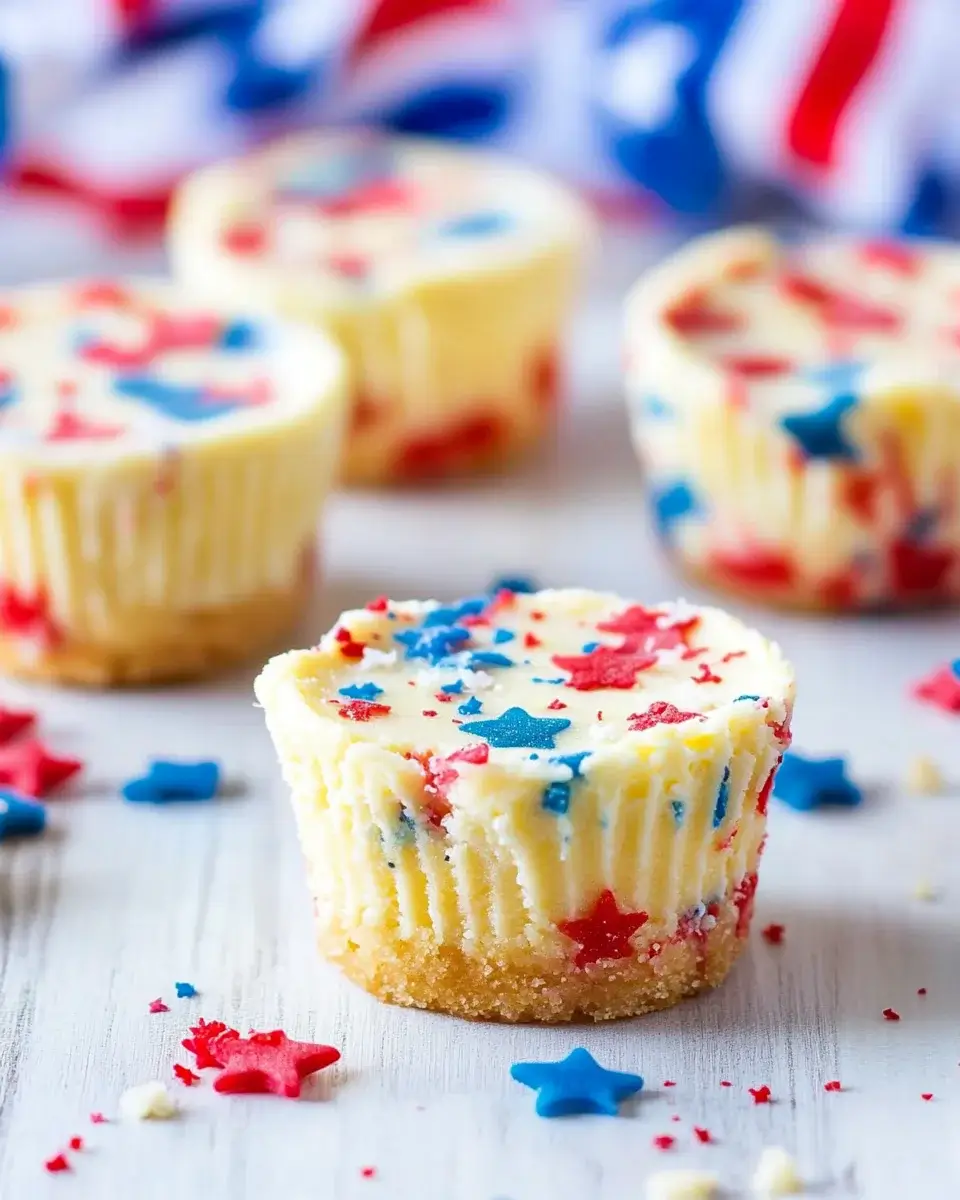
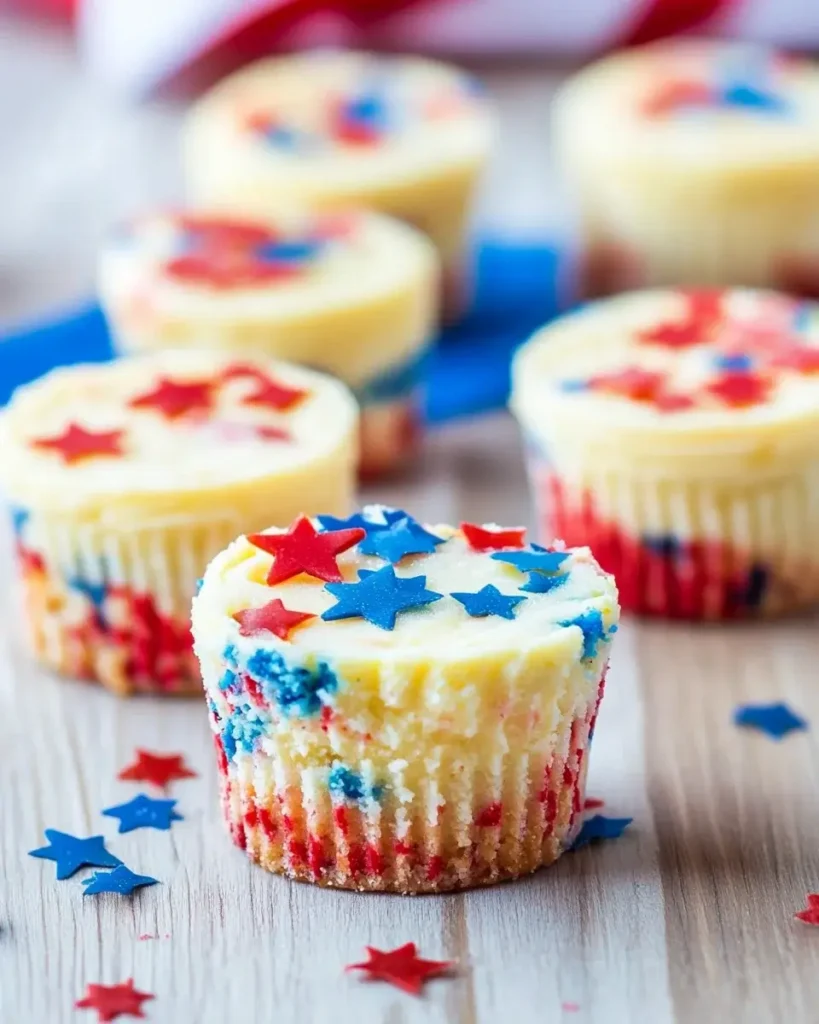
Introduction to Mini Patriotic Cheesecakes
There’s something magical about desserts that bring people together, especially when they look as delightful as Mini Patriotic Cheesecakes. These little gems are not just a feast for the eyes; they’re a quick solution for those busy days when you want to impress your friends or family. I remember the first time I made these for a Fourth of July barbecue. The smiles on everyone’s faces were priceless! With a creamy filling and a buttery crust, they’re perfect for any celebration. Let’s dive into this easy recipe that will surely become a favorite in your home!
Why You’ll Love This Mini Patriotic Cheesecakes
These Mini Patriotic Cheesecakes are a game-changer for any gathering. They’re incredibly easy to whip up, taking just 20 minutes of prep time. The creamy texture paired with the crunchy graham cracker crust creates a delightful contrast that will have everyone coming back for seconds. Plus, they’re portable! Perfect for picnics or potlucks, these treats are sure to impress without the stress. Who doesn’t love a dessert that’s both delicious and simple?
Ingredients for Mini Patriotic Cheesecakes
Gathering the right ingredients is the first step to creating these delightful Mini Patriotic Cheesecakes. Here’s what you’ll need:
- Graham cracker crumbs: These form the base of your crust, providing that classic crunch and sweetness.
- Unsalted butter: Melted butter binds the crumbs together, adding richness to the crust.
- Granulated sugar: A touch of sugar sweetens both the crust and the cheesecake filling.
- Cream cheese: The star of the show! Softened cream cheese gives the cheesecake its creamy texture.
- Vanilla extract: This adds a warm, aromatic flavor that enhances the overall taste.
- Eggs: Essential for binding the filling together, giving it that perfect cheesecake consistency.
- Sour cream: This ingredient adds a tangy flavor and creaminess to the filling.
- Fresh strawberries: Chopped strawberries provide a burst of color and sweetness on top.
- Fresh blueberries: These add a pop of flavor and a patriotic touch to your cheesecakes.
For those looking to mix things up, consider adding a bit of cocoa powder for a chocolate twist or swapping the fresh fruit for your favorite fruit preserves. The exact quantities for each ingredient are listed at the bottom of the article, ready for you to print and use!
How to Make Mini Patriotic Cheesecakes
Creating these Mini Patriotic Cheesecakes is a breeze! Follow these simple steps, and you’ll have a delicious dessert that’s sure to impress. Let’s get started!
Step 1: Preheat the Oven
First things first, preheat your oven to 325°F. This ensures even baking, which is key for that perfect cheesecake texture. Trust me, you don’t want to skip this step!
Step 2: Prepare the Muffin Tin
Next, line a muffin tin with paper liners. This makes for easy removal later on. Plus, it adds a nice touch to your presentation. Who doesn’t love a cute dessert?
Step 3: Make the Crust
In a medium bowl, combine graham cracker crumbs, melted butter, and sugar. Mix until everything is well combined. Now, press about a tablespoon of this mixture into the bottom of each muffin liner. This forms the crust, giving your cheesecakes that delightful crunch.
Step 4: Prepare the Cheesecake Filling
In a large mixing bowl, beat the softened cream cheese with sugar and vanilla extract until smooth and creamy. This is where the magic happens! Then, add the eggs one at a time, mixing well after each addition. Finally, mix in the sour cream until fully incorporated. Your filling should be velvety and luscious.
Step 5: Assemble the Cheesecakes
Spoon the cheesecake batter evenly over the crusts in the muffin tin. Fill each liner about ¾ full. Don’t worry if it looks a bit messy; it’ll all come together beautifully in the oven!
Step 6: Bake
Now, it’s time to bake! Place the muffin tin in the preheated oven and bake for 18-20 minutes. You want the edges to be set while the center remains slightly jiggly. This ensures a creamy texture that melts in your mouth.
Step 7: Cool and Refrigerate
Once baked, remove the cheesecakes from the oven and let them cool in the pan for about 10 minutes. Then, transfer them to a wire rack to cool completely. After that, refrigerate for at least 2 hours before serving. This chilling time is crucial for the flavors to meld.
Step 8: Add Toppings
Finally, it’s time to add the finishing touches! Top each mini cheesecake with fresh strawberries and blueberries for that festive, patriotic look. Not only do they add color, but they also bring a burst of freshness that complements the creamy filling perfectly.
Tips for Success
- Make sure your cream cheese is softened for easy mixing.
- Don’t overmix the batter; this keeps your cheesecakes light and fluffy.
- Use a cookie scoop for even filling distribution.
- Let the cheesecakes cool completely before refrigerating for best results.
- Experiment with different fruit toppings for a unique twist!
Equipment Needed
- Muffin tin: A standard muffin tin works great, but you can use a silicone mold for easy removal.
- Mixing bowls: Have a large bowl for the filling and a medium one for the crust.
- Electric mixer: A hand mixer is perfect, but a whisk will do if you’re feeling strong!
- Measuring cups and spoons: Essential for accurate ingredient amounts.
- Wire rack: This helps cool the cheesecakes evenly after baking.
Variations
- Chocolate Mini Cheesecakes: Add ¼ cup of cocoa powder to the cream cheese mixture for a rich chocolate flavor.
- Fruit Swirls: Blend fresh fruit like raspberries or peaches into the cheesecake batter for a fruity twist.
- Gluten-Free Option: Substitute graham cracker crumbs with gluten-free cookie crumbs for a gluten-free crust.
- Vegan Version: Use vegan cream cheese and replace eggs with flaxseed meal mixed with water for a plant-based alternative.
- Nutty Crust: Incorporate crushed nuts like almonds or pecans into the crust for added texture and flavor.
Serving Suggestions
- Pair these Mini Patriotic Cheesecakes with a refreshing glass of lemonade or iced tea for a perfect summer treat.
- Serve alongside a colorful fruit salad to enhance the festive vibe.
- For a fun presentation, arrange them on a red, white, and blue platter.
FAQs about Mini Patriotic Cheesecakes
Can I make Mini Patriotic Cheesecakes ahead of time?
Absolutely! These cheesecakes can be made a day in advance. Just store them in the refrigerator until you’re ready to serve. This actually allows the flavors to develop even more!
What can I use instead of cream cheese?
If you’re looking for a substitute, try using mascarpone cheese or a vegan cream cheese alternative. Both will give you a creamy texture, though the flavor may vary slightly.
How do I know when the cheesecakes are done baking?
Look for the edges to be set while the center remains slightly jiggly. This indicates they’re perfectly baked and will firm up as they cool.
Can I freeze Mini Patriotic Cheesecakes?
<pYes, you can freeze them! Just wrap each cheesecake tightly in plastic wrap and store them in an airtight container. They’ll keep well for up to two months. Thaw them in the fridge before serving.
What other toppings can I use?
While strawberries and blueberries are a classic choice, feel free to get creative! Try raspberries, blackberries, or even a drizzle of chocolate sauce for a delicious twist.
Final Thoughts
Making Mini Patriotic Cheesecakes is more than just baking; it’s about creating memories. Each bite is a celebration of flavor and festivity, perfect for gatherings or quiet evenings at home. The joy of seeing friends and family enjoy these treats is unmatched. Plus, the ease of preparation means you can focus on what truly matters—spending time with loved ones. Whether it’s a holiday or just a sunny weekend, these cheesecakes will surely bring smiles and satisfaction. So, roll up your sleeves and dive into this delightful recipe; your taste buds will thank you!
PrintMini Patriotic Cheesecakes: Delightful Treats for All!
- Total Time: 2 hours 40 minutes
- Yield: 12 servings
- Diet: Vegetarian
Description
Mini Patriotic Cheesecakes are delightful treats perfect for celebrations, featuring a creamy cheesecake filling on a graham cracker crust, topped with fresh strawberries and blueberries.
Ingredients
- 1 ½ cups graham cracker crumbs
- ½ cup unsalted butter, melted
- 2 tablespoons granulated sugar
- 16 ounces cream cheese, softened
- ½ cup granulated sugar
- 1 teaspoon vanilla extract
- 2 large eggs
- 1 cup sour cream
- ½ cup fresh strawberries, chopped
- ½ cup fresh blueberries
Instructions
- Preheat your oven to 325°F.
- Line a muffin tin with paper liners.
- In a medium bowl, combine graham cracker crumbs, melted butter, and 2 tablespoons of sugar. Mix until well combined.
- Press about 1 tablespoon of the mixture into the bottom of each muffin liner to form the crust.
- In a large mixing bowl, beat the softened cream cheese with ½ cup of sugar and vanilla extract until smooth and creamy.
- Add the eggs one at a time, mixing well after each addition.
- Mix in the sour cream until fully incorporated.
- Spoon the cheesecake batter evenly over the crusts in the muffin tin, filling each liner about ¾ full.
- Bake for 18-20 minutes, or until the edges are set but the center is slightly jiggly.
- Remove from the oven and let cool in the pan for 10 minutes, then transfer to a wire rack to cool completely.
- Refrigerate for at least 2 hours before serving.
- Top each mini cheesecake with chopped strawberries and blueberries for a festive look.
Notes
- For a chocolate twist, add ¼ cup of cocoa powder to the cream cheese mixture.
- You can substitute the fresh fruit toppings with your favorite fruit preserves for a different flavor.
- Prep Time: 20 minutes
- Cook Time: 20 minutes
- Category: Dessert
- Method: Baking
- Cuisine: American
Nutrition
- Serving Size: 1 cheesecake
- Calories: 210
- Sugar: 10g
- Fat: 16g
- Carbohydrates: 14g
- Protein: 3g