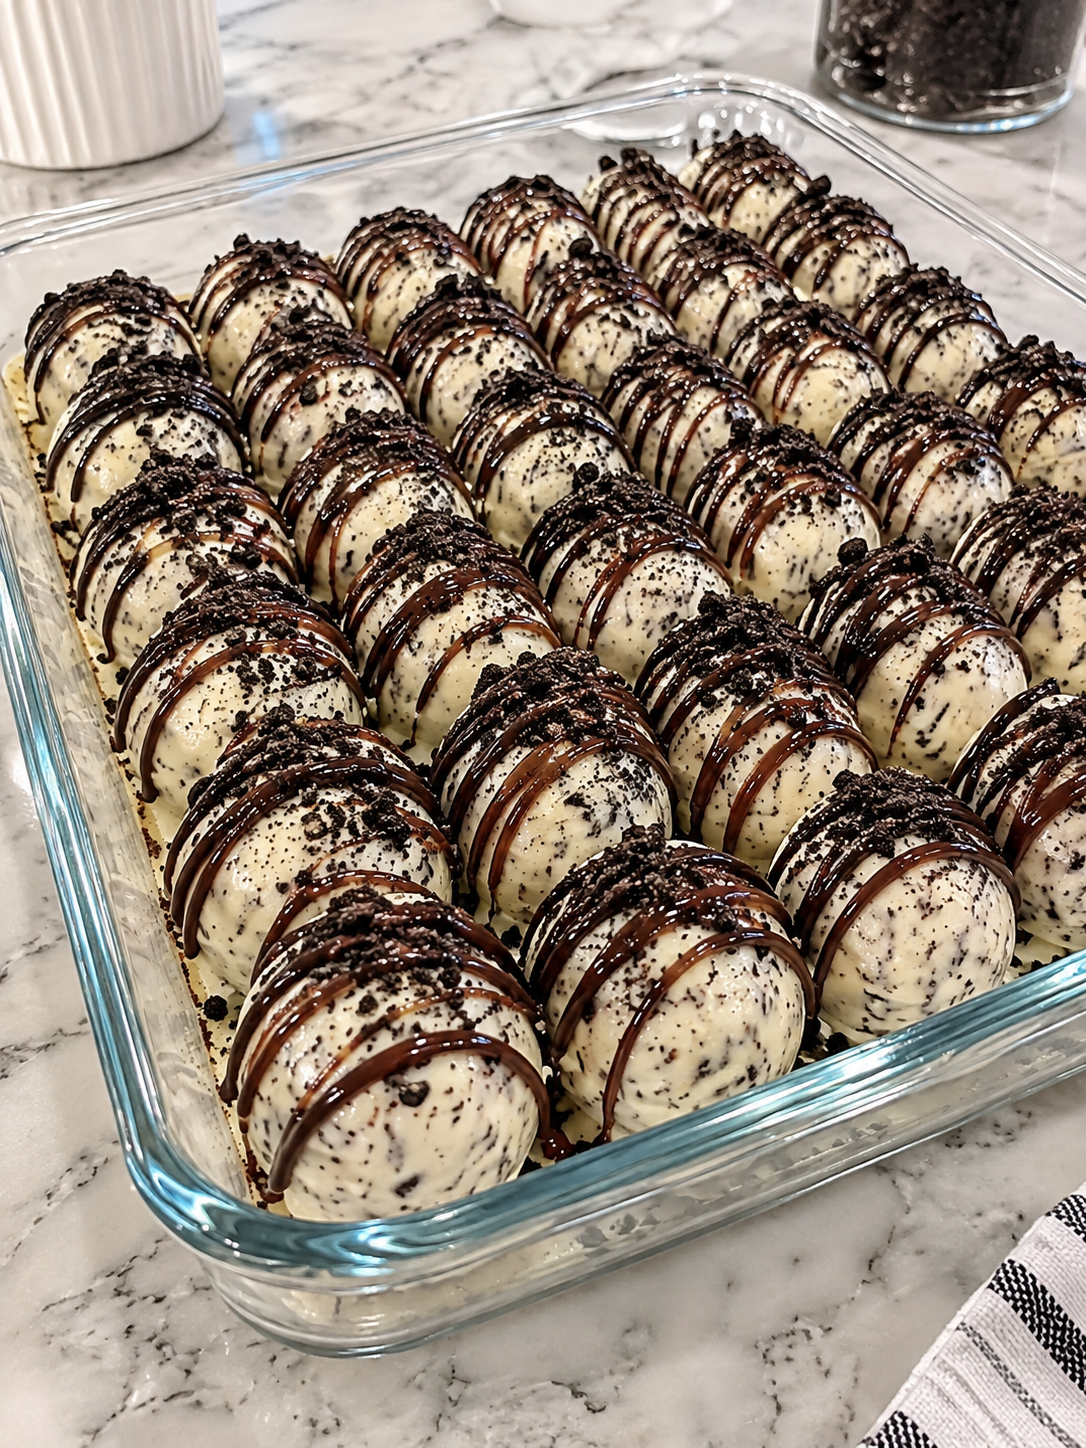
Introduction to Oreo Cheesecake Balls
There’s something magical about dessert that brings people together, and Oreo Cheesecake Balls are no exception. These little bites of joy combine the beloved crunch of Oreo cookies with the creamy richness of cheesecake. Perfect for a quick solution on a busy day or a delightful treat to impress your loved ones, they’re a crowd-pleaser for sure. I remember making these with my kids, their laughter filling the kitchen as we rolled the balls together. It’s a simple recipe that packs a punch, making it ideal for any occasion. Let’s dive into this delicious adventure!
Why You’ll Love This Oreo Cheesecake Balls
Oreo Cheesecake Balls are the ultimate dessert solution for anyone craving something sweet without the fuss. They’re incredibly easy to whip up, requiring no baking at all. In just under two hours, you can create a decadent treat that’s sure to impress. The combination of creamy cheesecake and crunchy Oreos is simply irresistible. Plus, they’re perfect for sharing at parties or enjoying during a cozy night in. Who wouldn’t love that?
Ingredients for Oreo Cheesecake Balls
Gathering the right ingredients is the first step to creating these delightful Oreo Cheesecake Balls. Here’s what you’ll need:
- Oreo cookies: The star of the show! These provide the signature flavor and crunch.
- Cream cheese: Softened to perfection, it gives the cheesecake its rich and creamy texture.
- Vanilla extract: A splash of this adds warmth and depth to the flavor profile.
- White chocolate melting wafers: These create a sweet, smooth coating that enhances the overall treat.
- Semi-sweet chocolate chips: For drizzling, they add a touch of richness and contrast.
- Coconut oil: This helps achieve a thinner chocolate coating, making it easier to dip.
- Crushed Oreos: A sprinkle of these on top adds a delightful crunch and visual appeal.
- Christmas sprinkles: Optional, but they bring a festive flair to your dessert.
- Melted white chocolate: Also optional, this can be drizzled on top for extra sweetness.
For exact measurements, check the bottom of the article where you can find everything listed for easy printing. Feel free to get creative with your ingredients! You can swap out the chocolate for dark chocolate or even use gluten-free Oreos if needed. The possibilities are endless!
How to Make Oreo Cheesecake Balls
Creating Oreo Cheesecake Balls is a fun and straightforward process. Follow these steps, and you’ll have a delicious treat ready to impress your friends and family!
Step 1: Crush the Oreos
Start by placing the Oreo cookies in a food processor. Pulse them until they turn into fine crumbs. This is where the magic begins! Remember to reserve a small amount of crumbs for decoration later. It adds a nice touch to your finished product.
Step 2: Prepare the Cheesecake Mixture
In a large mixing bowl, combine the softened cream cheese and vanilla extract. Beat them together until the mixture is smooth and creamy. Then, add the crushed Oreos and mix until everything is well combined. The aroma will make your mouth water!
Step 3: Shape the Balls
Now comes the fun part! Scoop about one tablespoon of the cheesecake mixture and roll it between your palms to form small balls. Place each ball on a parchment-lined baking sheet. Don’t worry if they aren’t perfect; they’ll taste amazing regardless!
Step 4: Chill
Refrigerate the Oreo balls for at least one hour. This step is crucial as it helps them firm up, making them easier to dip later. Plus, it builds anticipation for that first bite!
Step 5: Melt the White Chocolate
While the balls chill, it’s time to melt the white chocolate. Place the white chocolate melting wafers in a microwave-safe bowl. Heat them in 20-second intervals, stirring in between until smooth. If the chocolate seems too thick, add a little coconut oil to achieve a thinner consistency.
Step 6: Dip the Cheesecake Balls
Using a fork or a dipping tool, dip each chilled ball into the melted white chocolate. Make sure to let the excess chocolate drip off before placing them back on the parchment-lined tray. This ensures a nice, even coating!
Step 7: Prepare the Dark Chocolate
Next, melt the semi-sweet chocolate chips with the remaining coconut oil in the microwave. Again, use 20-second intervals and stir until smooth. This chocolate will add a rich contrast to the sweetness of the white chocolate.
Step 8: Decorate
Once the Oreo balls are coated, drizzle the melted dark chocolate over some of them. While the chocolate is still wet, sprinkle on the reserved crushed Oreos or festive Christmas sprinkles. This adds a delightful crunch and a pop of color!
Step 9: Set
Return the decorated balls to the refrigerator for another 15-20 minutes. This final chilling step allows the chocolate coating to firm up completely, ensuring your Oreo Cheesecake Balls are ready to shine.
Step 10: Serve
Arrange your beautiful Oreo Cheesecake Balls on a dessert platter. They’re best enjoyed chilled, so keep them in the fridge until you’re ready to serve. Watch as everyone dives in for a taste of these delightful treats!
Tips for Success
- Use room temperature cream cheese for a smoother mixture.
- Don’t skip the chilling step; it’s key for shaping and dipping.
- Experiment with different chocolate coatings for unique flavors.
- Keep your workspace clean to avoid sticky fingers!
- Store leftovers in an airtight container in the fridge for up to a week.
Equipment Needed
- Food processor: Essential for crushing Oreos. A zip-top bag and rolling pin work too!
- Mixing bowl: Any large bowl will do for mixing the cheesecake mixture.
- Parchment paper: Great for lining your baking sheet. Wax paper is a good substitute.
- Microwave-safe bowl: Needed for melting chocolate; a heatproof glass bowl works as well.
- Fork or dipping tool: Use a fork for dipping; a toothpick can work in a pinch!
Variations
- Peanut Butter Oreo Cheesecake Balls: Mix in some creamy peanut butter with the cheesecake mixture for a nutty twist.
- Mint Oreo Cheesecake Balls: Use Mint Oreos instead of regular ones for a refreshing flavor.
- Gluten-Free Option: Substitute regular Oreos with gluten-free Oreos to accommodate dietary needs.
- Dark Chocolate Coating: Swap the white chocolate for dark chocolate for a richer taste.
- Fruit-Infused: Add a tablespoon of raspberry or strawberry puree to the cheesecake mixture for a fruity kick.
Serving Suggestions
- Pair with a scoop of vanilla ice cream for a delightful contrast in texture.
- Serve alongside fresh berries for a pop of color and freshness.
- Drizzle with chocolate sauce for an extra indulgent touch.
- Present on a festive platter with colorful napkins for a cheerful display.
- Enjoy with a cup of coffee or hot cocoa for a cozy treat.
FAQs about Oreo Cheesecake Balls
Curious about Oreo Cheesecake Balls? Here are some common questions I often hear, along with answers to help you on your dessert journey!
Can I make Oreo Cheesecake Balls ahead of time?
Absolutely! These delightful treats can be made a day or two in advance. Just store them in an airtight container in the refrigerator until you’re ready to serve. They taste just as delicious after a day in the fridge!
What can I use instead of cream cheese?
If you’re looking for a lighter option, you can substitute cream cheese with Greek yogurt. It will give you a similar creamy texture while reducing the fat content. Just make sure to use plain Greek yogurt for the best results!
How do I store leftover Oreo Cheesecake Balls?
Leftovers can be stored in an airtight container in the fridge for up to a week. Just make sure they’re well-covered to keep them fresh and tasty!
Can I freeze Oreo Cheesecake Balls?
Yes, you can freeze them! Place the balls in a single layer on a baking sheet until frozen, then transfer them to a freezer-safe container. They can last up to three months in the freezer. Just thaw them in the fridge before serving!
What’s the best way to decorate Oreo Cheesecake Balls?
Get creative! You can drizzle melted chocolate, sprinkle crushed Oreos, or use colorful sprinkles. For a festive touch, consider using seasonal decorations like holiday-themed sprinkles. The options are endless!
Final Thoughts
Making Oreo Cheesecake Balls is more than just a recipe; it’s an experience filled with laughter and joy. Each bite is a delightful blend of creamy and crunchy, bringing back memories of family gatherings and celebrations. Whether you’re whipping them up for a party or just treating yourself, these little bites of happiness are sure to impress. The best part? They’re incredibly easy to make, allowing you to focus on what truly matters—sharing delicious moments with loved ones. So, roll up your sleeves and dive into this sweet adventure; you won’t regret it!
PrintOreo Cheesecake Balls: Discover a Decadent Delight!
- Total Time: 1 hour 50 minutes
- Yield: 24 balls
- Diet: Vegetarian
Description
Oreo Cheesecake Balls are a delightful treat made with crushed Oreo cookies and cream cheese, coated in chocolate and decorated for a festive touch.
Ingredients
- 36 Oreo cookies
- 8 oz cream cheese, softened
- 1 teaspoon vanilla extract
- 12 oz white chocolate melting wafers
- 8 oz semi-sweet chocolate chips
- 1 tablespoon coconut oil, divided if needed
- 4 Oreo cookies, crushed
- ¼ cup Christmas sprinkles
- 2 tablespoons melted white chocolate, optional
Instructions
- Crush the Oreos: Place the Oreo cookies in a food processor and pulse until they become fine crumbs. Reserve a little for decoration if desired.
- Prepare the Cheesecake Mixture: In a large mixing bowl, beat the softened cream cheese and vanilla extract until smooth. Add the crushed Oreos and mix until fully combined.
- Shape the Balls: Scoop about 1 tablespoon of the mixture and roll between your palms to form small balls. Place them on a parchment-lined baking sheet.
- Chill: Refrigerate the Oreo balls for at least 1 hour, or until firm. This helps them hold their shape during dipping.
- Melt the White Chocolate: Place the white chocolate melting wafers in a microwave-safe bowl. Heat in 20-second intervals, stirring between each, until smooth. Add a little coconut oil if needed for a thinner coating.
- Dip the Cheesecake Balls: Using a fork or dipping tool, dip each chilled ball into the melted white chocolate. Allow excess coating to drip off before returning it to the parchment-lined tray.
- Prepare the Dark Chocolate: Melt the semi-sweet chocolate chips with the remaining coconut oil in the microwave, using 20-second intervals and stirring until smooth.
- Decorate: Drizzle the melted dark chocolate over some of the balls. Sprinkle with crushed Oreos or Christmas sprinkles while the coating is still wet.
- Set: Refrigerate for 15–20 minutes, or until the chocolate coating is completely firm.
- Serve: Arrange on a dessert platter and enjoy chilled.
Notes
- For a thinner chocolate coating, add more coconut oil to the melted chocolate.
- These can be made ahead of time and stored in the refrigerator.
- Feel free to customize decorations based on the occasion.
- Prep Time: 30 minutes
- Cook Time: 20 minutes
- Category: Dessert
- Method: No-Bake
- Cuisine: American
Nutrition
- Serving Size: 1 ball
- Calories: 150
- Sugar: 10g
- Sodium: 50mg
- Fat: 8g
- Saturated Fat: 5g
- Unsaturated Fat: 2g
- Trans Fat: 0g
- Carbohydrates: 18g
- Fiber: 1g
- Protein: 2g
- Cholesterol: 15mg