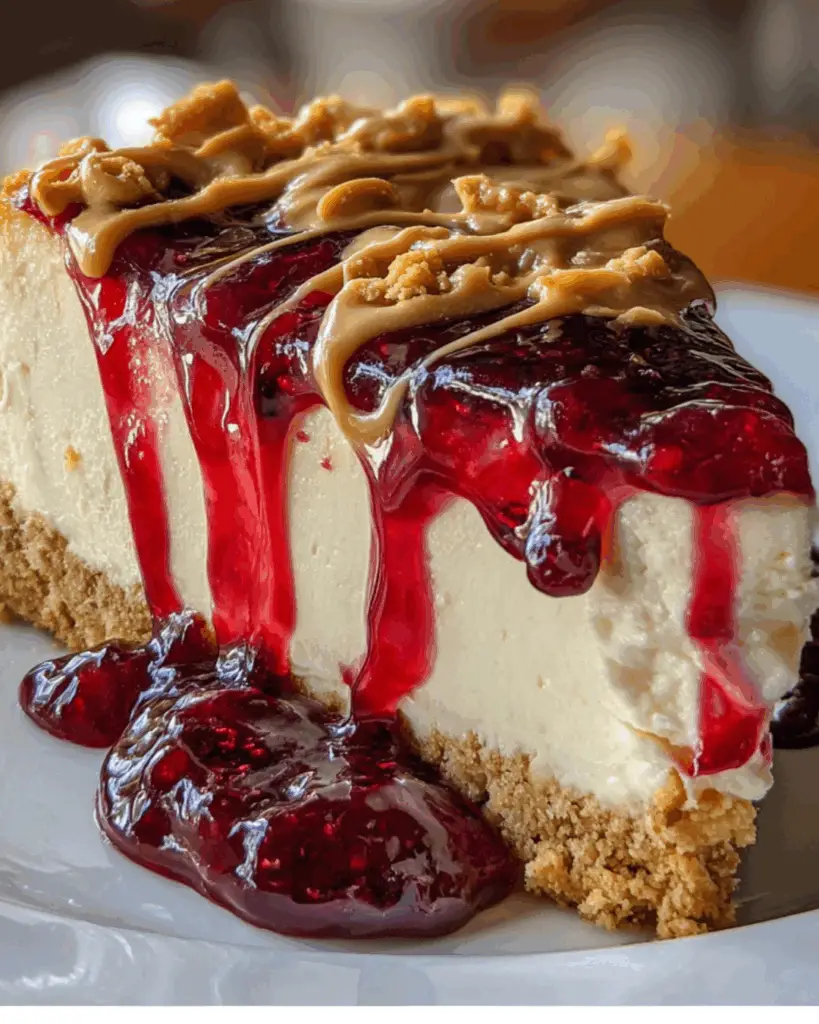
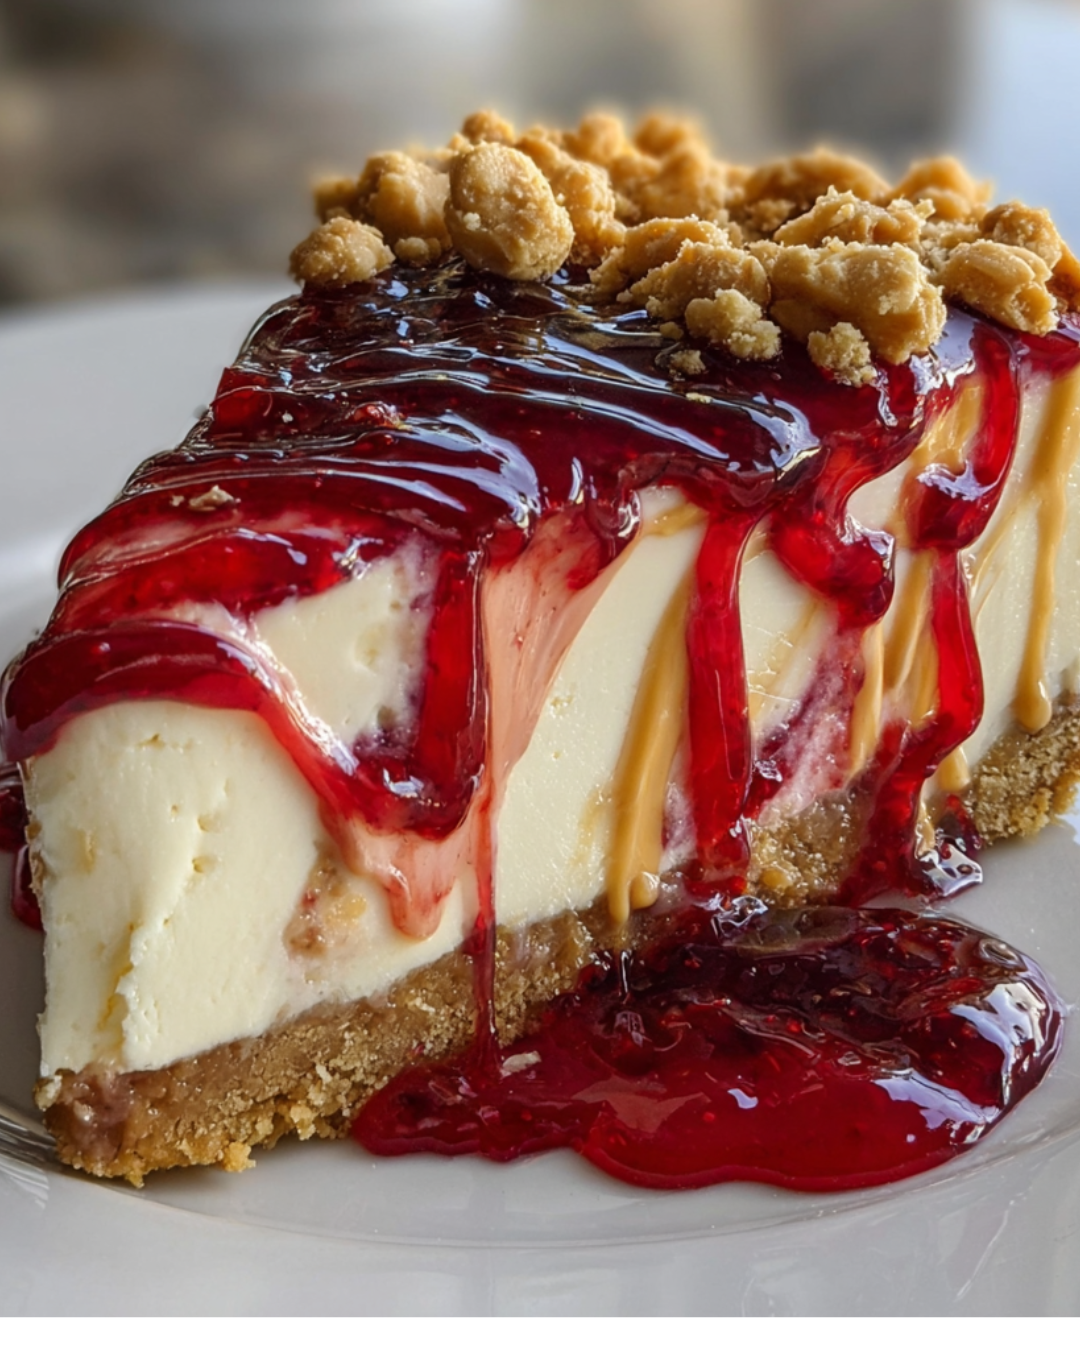
Introduction to Peanut Butter & Jelly Cheesecake
There’s something magical about the combination of peanut butter and jelly. It takes me back to my childhood, where lunchboxes were filled with those classic sandwiches. Now, I’ve transformed that nostalgia into a rich and creamy Peanut Butter & Jelly Cheesecake. This dessert is not just a treat; it’s a delightful way to impress your loved ones or simply indulge after a long day. With its luscious layers and familiar flavors, this cheesecake is a quick solution for busy days or special occasions. Trust me, once you try it, you’ll want to make it again and again!
Why You’ll Love This Peanut Butter & Jelly Cheesecake
This Peanut Butter & Jelly Cheesecake is a game-changer in the dessert world. It’s incredibly easy to whip up, making it perfect for those busy weeknights or last-minute gatherings. The rich, creamy texture paired with the sweet, fruity jelly creates a flavor explosion that will have everyone asking for seconds. Plus, it’s a nostalgic nod to childhood favorites, bringing joy to both young and old alike!
Ingredients for Peanut Butter & Jelly Cheesecake
Gathering the right ingredients is the first step to creating this delightful Peanut Butter & Jelly Cheesecake. Here’s what you’ll need:
- Graham cracker crumbs: These form the base of your cheesecake crust, providing a sweet and crunchy texture.
- Unsalted butter: Melted butter binds the crumbs together, ensuring a firm crust that holds its shape.
- Granulated sugar: A touch of sweetness enhances the crust and balances the flavors in the cheesecake.
- Cream cheese: The star of the show! It gives the cheesecake its rich and creamy texture.
- Creamy peanut butter: This adds that beloved nutty flavor, making every bite a nostalgic treat.
- Powdered sugar: Used for sweetness, it blends smoothly into the filling without any graininess.
- Vanilla extract: A splash of vanilla elevates the flavor profile, adding warmth and depth.
- Heavy whipping cream: Whipped to perfection, it lightens the filling and adds a luxurious mouthfeel.
- Fruit jelly: Choose between strawberry or grape for that classic PB&J taste, adding a fruity swirl to the cheesecake.
- Chopped peanuts (optional): For garnish, these add a delightful crunch and enhance the peanut flavor.
For those looking to mix things up, consider adding chocolate sauce or caramel instead of jelly for a different flavor twist. You can find the exact measurements for each ingredient at the bottom of the article, ready for printing!
How to Make Peanut Butter & Jelly Cheesecake
Creating this Peanut Butter & Jelly Cheesecake is a delightful journey. Each step brings you closer to a dessert that’s not only delicious but also a nostalgic treat. Let’s dive into the process!
Step 1: Preheat the Oven
Start by preheating your oven to 325°F (163°C). Preheating is crucial because it ensures that your cheesecake bakes evenly. If you skip this step, the crust may not set properly, leading to a soggy bottom. Trust me, no one wants that!
Step 2: Prepare the Crust
In a mixing bowl, combine graham cracker crumbs, melted butter, and granulated sugar. Mix until everything is well blended. The mixture should resemble wet sand. Now, press it firmly into the bottom of a 9-inch springform pan. This step is vital; a well-pressed crust holds the cheesecake together and provides that satisfying crunch.
Step 3: Bake the Crust
Pop the crust into the oven and bake for about 10 minutes. This short baking time helps to set the crust, giving it a nice golden color. Once done, remove it from the oven and let it cool completely. Patience is key here; a warm crust can affect the filling.
Step 4: Make the Peanut Butter Filling
In a large bowl, beat the softened cream cheese and creamy peanut butter together until smooth and creamy. This is where the magic begins! The combination creates a rich base that’s both decadent and comforting. Make sure there are no lumps for a silky texture.
Step 5: Add Sugar and Vanilla
Gradually add the powdered sugar and vanilla extract to the peanut butter mixture. Mixing gradually helps to avoid a grainy texture. You want everything to blend seamlessly, creating a luscious filling that’s sweet but not overpowering.
Step 6: Whip the Cream
In a separate bowl, whip the heavy cream until stiff peaks form. This means when you lift the whisk, the cream holds its shape. Achieving stiff peaks is essential; it adds lightness to the filling, making your cheesecake airy and delightful.
Step 7: Combine Mixtures
Gently fold the whipped cream into the peanut butter mixture. Use a spatula and a gentle motion to maintain the airiness. This step is crucial; you want to keep that fluffy texture intact. It’s like folding a warm hug into your dessert!
Step 8: Pour and Swirl
Pour the peanut butter cheesecake filling over the cooled crust, smoothing the top with a spatula. Now, spoon the fruit jelly over the filling. Use a knife or skewer to swirl it gently into the cheesecake. This creates beautiful marbled patterns that are as pleasing to the eye as they are to the palate.
Step 9: Refrigerate
Finally, refrigerate the cheesecake for at least 4 hours, or overnight if you can wait. Chilling is essential for the cheesecake to set properly. The flavors meld together beautifully during this time, making each bite a delightful experience.
Tips for Success
- Use room temperature cream cheese for a smoother filling.
- Don’t skip the chilling time; it’s crucial for the cheesecake to set properly.
- For a cleaner slice, use a hot knife to cut through the cheesecake.
- Experiment with different jellies or toppings to find your favorite flavor combination.
- Store leftovers in an airtight container in the fridge for up to five days.
Equipment Needed
- 9-inch springform pan: Essential for easy removal; a regular cake pan works too, but slicing will be trickier.
- Mixing bowls: Use a large bowl for the filling and a medium one for whipping cream.
- Electric mixer: A hand mixer is perfect; a whisk can work, but it’ll take longer.
- Spatula: A rubber spatula helps with folding and smoothing the filling.
- Knife or skewer: For swirling the jelly into the cheesecake.
Variations
- Chocolate Peanut Butter Cheesecake: Add 1/2 cup of cocoa powder to the peanut butter mixture for a rich chocolate twist.
- Nut-Free Option: Substitute peanut butter with sunflower seed butter for a nut-free version that’s just as delicious.
- Low-Sugar Version: Use a sugar substitute in place of granulated and powdered sugar to reduce sweetness without sacrificing flavor.
- Fruit Swirl Variations: Experiment with different fruit jellies like raspberry or blueberry for a unique flavor profile.
- Vegan Adaptation: Use vegan cream cheese and a plant-based whipped cream alternative to make this dessert vegan-friendly.
Serving Suggestions
- Pair with a dollop of whipped cream for an extra touch of indulgence.
- Serve alongside fresh berries for a refreshing contrast.
- Drizzle with chocolate sauce for a decadent finish.
- Enjoy with a cup of coffee or a glass of milk.
- Garnish with chopped peanuts for added crunch and visual appeal.
FAQs about Peanut Butter & Jelly Cheesecake
Can I make this Peanut Butter & Jelly Cheesecake ahead of time?
Absolutely! This cheesecake is perfect for making ahead. In fact, it tastes even better after chilling overnight. Just cover it well in the fridge to keep it fresh.
What can I substitute for cream cheese?
If you’re looking for a lighter option, you can use Greek yogurt or a vegan cream cheese alternative. Both will give you a creamy texture, though the flavor may vary slightly.
How do I store leftovers?
Store any leftover Peanut Butter & Jelly Cheesecake in an airtight container in the fridge. It should stay fresh for up to five days, but I doubt it will last that long!
Can I use a different type of jelly?
Definitely! While strawberry and grape are classic choices, feel free to experiment with raspberry, blueberry, or even a homemade fruit compote for a unique twist.
Is this cheesecake suitable for a gluten-free diet?
To make this cheesecake gluten-free, simply use gluten-free graham cracker crumbs for the crust. The rest of the ingredients are naturally gluten-free, making it a delicious option for everyone!
Final Thoughts
Creating this Peanut Butter & Jelly Cheesecake is more than just baking; it’s about reliving cherished memories and sharing joy with those you love. Each slice is a delightful blend of creamy peanut butter and sweet jelly, evoking the simple pleasures of childhood. Whether you’re celebrating a special occasion or just treating yourself after a long day, this cheesecake is sure to bring smiles all around. So, roll up your sleeves, gather your ingredients, and embark on this delicious adventure. Trust me, the happiness it brings is worth every moment spent in the kitchen!
PrintPeanut Butter & Jelly Cheesecake: A Decadent Delight!
- Total Time: 4 hours 30 minutes
- Yield: 10 servings
- Diet: Vegetarian
Description
A rich and creamy Peanut Butter & Jelly Cheesecake that combines the classic flavors of peanut butter and jelly in a decadent dessert.
Ingredients
- 2 cups graham cracker crumbs
- 1/2 cup unsalted butter, melted
- 1/4 cup granulated sugar
- 16 ounces cream cheese, softened
- 1 cup creamy peanut butter
- 1 cup powdered sugar
- 1 teaspoon vanilla extract
- 1 cup heavy whipping cream
- 1/2 cup fruit jelly (strawberry or grape)
- 1/4 cup chopped peanuts (optional, for garnish)
Instructions
- Preheat the oven to 325°F (163°C).
- In a mixing bowl, combine the graham cracker crumbs, melted butter, and granulated sugar. Mix until well combined.
- Press the mixture firmly into the bottom of a 9-inch springform pan to form the crust. Bake for 10 minutes, then remove from the oven and let cool.
- In a large bowl, beat the softened cream cheese and peanut butter together until smooth and creamy.
- Gradually add the powdered sugar and vanilla extract, mixing until fully incorporated.
- In a separate bowl, whip the heavy cream until stiff peaks form. Gently fold the whipped cream into the peanut butter mixture until combined.
- Pour the peanut butter cheesecake filling over the cooled crust and smooth the top with a spatula.
- Spoon the fruit jelly over the cheesecake filling and use a knife or skewer to swirl it gently into the filling.
- Refrigerate the cheesecake for at least 4 hours, or overnight, until set.
- Before serving, garnish with chopped peanuts if desired.
Notes
- For a chocolate twist, add 1/2 cup of cocoa powder to the peanut butter mixture.
- Substitute the fruit jelly with chocolate sauce or caramel for a different flavor profile.
- Prep Time: 20 minutes
- Cook Time: 10 minutes
- Category: Dessert
- Method: Baking and Refrigeration
- Cuisine: American
Nutrition
- Serving Size: 1 slice
- Calories: 350
- Sugar: 15g
- Sodium: 200mg
- Fat: 26g
- Saturated Fat: 10g
- Unsaturated Fat: 16g
- Trans Fat: 0g
- Carbohydrates: 25g
- Fiber: 1g
- Protein: 8g
- Cholesterol: 50mg