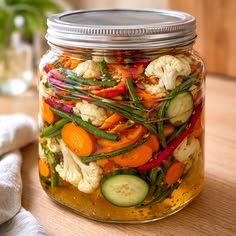
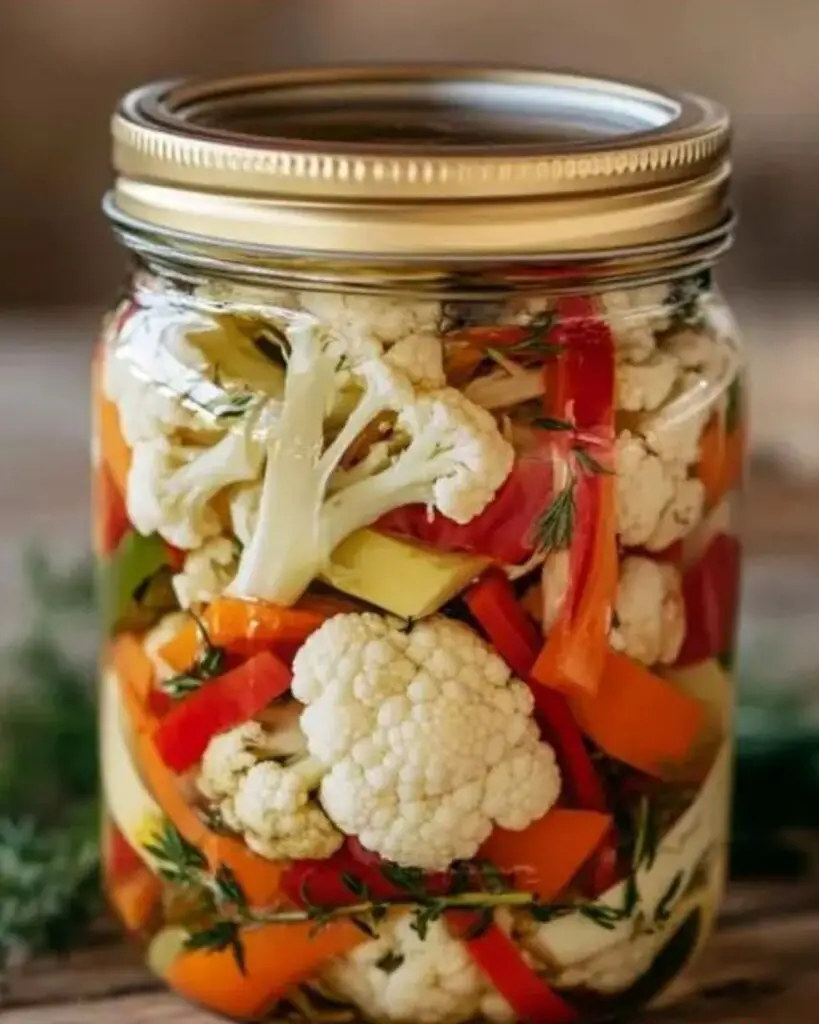
Introduction to Refrigerator Pickled Vegetables
There’s something magical about the crunch of a freshly pickled vegetable. It takes me back to summer picnics, where my grandmother would serve her famous pickles alongside sandwiches. Refrigerator pickled vegetables are a quick solution for busy days, offering a burst of flavor that can elevate any meal. Whether you’re looking to impress your friends at a barbecue or simply want a healthy snack, this recipe is your go-to. With just a few ingredients and minimal effort, you can create a vibrant jar of goodness that’s ready to enjoy in no time.
Why You’ll Love This Refrigerator Pickled Vegetables
Refrigerator pickled vegetables are a game-changer in the kitchen. They’re incredibly easy to make, taking just a few minutes of your time. The best part? You can customize them to suit your taste buds. Whether you prefer a tangy crunch or a spicy kick, these quick pickles deliver flavor without the fuss. Plus, they last for weeks in the fridge, making them a perfect addition to any meal or snack.
Ingredients for Refrigerator Pickled Vegetables
Gathering the right ingredients is the first step to creating your own refrigerator pickled vegetables. Here’s what you’ll need:
- Carrots: These add a sweet crunch. Cut them into thin sticks for even pickling.
- Cucumber: A classic choice, cucumbers bring a refreshing bite. Slicing them enhances their texture.
- Red Onion: Thinly sliced, they add a beautiful color and a mild, sweet flavor.
- Bell Pepper: Choose your favorite color for a pop of sweetness and crunch.
- Cauliflower: These florets soak up the brine beautifully, adding a unique texture.
- Garlic: Sliced garlic infuses the pickles with a savory depth.
- Jalapeño (optional): For those who like a bit of heat, sliced jalapeños can spice things up.
- White Vinegar: This is the base of your brine, providing that tangy flavor.
- Water: Balances the acidity of the vinegar for a well-rounded taste.
- Granulated Sugar: Just a touch of sweetness helps balance the tanginess.
- Salt: Essential for flavor and preservation, it enhances the overall taste.
- Black Peppercorns: These add a subtle warmth and complexity to the brine.
- Mustard Seeds: They contribute a slight crunch and a hint of spice.
- Dried Oregano: This herb adds an aromatic touch, enhancing the flavor profile.
- Bay Leaf: A single leaf infuses the brine with a fragrant depth.
For those looking to experiment, consider using rice vinegar for a milder flavor or adding fresh dill for a classic pickle taste. You can find all the exact quantities for these ingredients at the bottom of the article, ready for printing!
How to Make Refrigerator Pickled Vegetables
Creating your own refrigerator pickled vegetables is a straightforward process that anyone can master. Follow these simple steps, and you’ll have a jar of vibrant, tangy goodness ready to enjoy in no time.
Step 1: Prepare the Vegetables
Start by washing all your vegetables thoroughly. This step is crucial for removing any dirt or pesticides. Once clean, cut the carrots into thin sticks, slice the cucumbers, and thinly slice the red onion and bell pepper. For the cauliflower, break it into bite-sized florets. Pack these colorful veggies tightly into a clean glass jar or jars. The tighter they are, the better they’ll pickle!
Step 2: Make the Brine
In a medium saucepan, combine the white vinegar, water, granulated sugar, salt, black peppercorns, mustard seeds, dried oregano, and bay leaf. This mixture is your brine, and it’s what gives the pickles their signature flavor. Stir everything together until the sugar and salt are well mixed.
Step 3: Heat the Mixture
Place the saucepan over medium heat and bring the brine to a gentle simmer. As it heats, stir occasionally to help dissolve the sugar and salt completely. You want to see small bubbles forming, but don’t let it boil vigorously. Once everything is dissolved, remove the saucepan from the heat.
Step 4: Pour Over the Vegetables
Carefully pour the hot brine over the packed vegetables in the jars. Make sure the vegetables are completely submerged in the liquid. Leave about 1–2 cm of space at the top of the jar to allow for expansion. This step is key to ensuring your pickles soak up all that delicious flavor!
Step 5: Cool the Jars
Let the jars cool uncovered at room temperature for about 30 to 60 minutes. This cooling period is important because it allows the brine to settle and the flavors to meld. Plus, it prevents the glass from cracking when you refrigerate them.
Step 6: Refrigerate
Once the jars have cooled, seal them tightly with lids and place them in the refrigerator. For the best flavor, let them sit for at least 24 hours before diving in. If you can wait a couple of days, the flavors will deepen even more, making your refrigerator pickled vegetables even tastier!
Step 7: Serve
Now comes the fun part! Enjoy your pickled vegetables as a crunchy side dish, on sandwiches, or tossed into salads. They also make a fantastic topping for grilled meats or a zesty snack on their own. The possibilities are endless!
Tips for Success
- Use fresh, crisp vegetables for the best texture and flavor.
- Don’t skip the cooling step; it helps the flavors develop.
- Experiment with spices like dill or chili flakes for a unique twist.
- Keep the vegetables submerged under the brine to ensure even pickling.
- Label your jars with the date to track freshness.
Equipment Needed
- Glass Jars: Use mason jars or any clean glass container with a tight seal.
- Medium Saucepan: A regular saucepan works perfectly for making the brine.
- Cutting Board and Knife: Essential for chopping your vegetables.
- Measuring Cups: Handy for accurate liquid measurements.
- Mixing Spoon: A wooden or silicone spoon is great for stirring.
Variations
- Spicy Kick: Add sliced fresh jalapeños or a pinch of red pepper flakes for a fiery twist.
- Herb Infusion: Toss in fresh dill, thyme, or basil for an aromatic flavor boost.
- Sweet and Sour: Substitute half the sugar with honey or maple syrup for a unique sweetness.
- Asian Flair: Use rice vinegar and add sesame seeds or ginger for an Asian-inspired pickle.
- Low-Sodium Option: Reduce the salt or use a salt substitute for a healthier version.
Serving Suggestions
- Pair your pickled vegetables with grilled meats for a refreshing contrast.
- Serve them on a charcuterie board alongside cheeses and crackers.
- Top your favorite sandwiches or burgers for an extra crunch.
- Mix them into salads for a zesty twist.
- Enjoy as a standalone snack with your favorite dip.
FAQs about Refrigerator Pickled Vegetables
As you embark on your journey of making refrigerator pickled vegetables, you might have a few questions. Here are some common queries that can help you along the way:
How long do refrigerator pickled vegetables last?
When stored properly in the fridge, your pickled vegetables can last for up to 2-4 weeks. Just make sure to use clean utensils when serving to keep them fresh!
Can I use different vegetables for pickling?
Absolutely! Feel free to experiment with your favorite veggies. Radishes, green beans, or even asparagus can make delightful refrigerator pickled vegetables.
What if I don’t have white vinegar?
No worries! You can substitute with apple cider vinegar or rice vinegar. Each will give your pickles a unique flavor profile.
Can I make these pickles spicy?
Definitely! Adding sliced jalapeños or a sprinkle of red pepper flakes will give your pickles a nice kick. Adjust the heat to your liking!
Is it necessary to heat the brine?
Heating the brine helps dissolve the sugar and salt, ensuring a well-balanced flavor. It also helps the vegetables absorb the brine better. So, it’s a step you don’t want to skip!
Final Thoughts
Creating refrigerator pickled vegetables is more than just a cooking task; it’s a delightful experience that brings joy to your kitchen. The vibrant colors and tangy flavors can brighten up any meal, making even the simplest dishes feel special. Plus, the satisfaction of crafting something delicious from scratch is hard to beat. Whether you’re enjoying them as a snack or adding them to your favorite recipes, these pickles are sure to become a staple in your home. So grab those veggies, unleash your creativity, and relish the crunch of your homemade pickles!
PrintRefrigerator Pickled Vegetables: Your Quick Guide to Flavor
- Total Time: At least 24 hours (including pickling time)
- Yield: About 1 litre
- Diet: Vegetarian
Description
A quick and easy guide to making refrigerator pickled vegetables that are flavorful and versatile.
Ingredients
- 200 g carrots, cut into thin sticks
- 200 g cucumber, sliced
- 150 g red onion, thinly sliced
- 150 g bell pepper, sliced
- 100 g cauliflower florets
- 2 cloves garlic, sliced
- 1 small jalapeño, sliced (optional)
- 240 ml white vinegar
- 240 ml water
- 2 tbsp granulated sugar
- 1½ tbsp salt
- 1 tsp black peppercorns
- 1 tsp mustard seeds
- ½ tsp dried oregano
- 1 bay leaf
Instructions
- Prepare the vegetables: Wash and cut all the vegetables into bite-sized pieces. Pack them fairly tightly into a clean glass jar or jars.
- Make the brine: Add the vinegar, water, sugar, salt, peppercorns, mustard seeds, oregano, and bay leaf to a saucepan.
- Heat: Bring the mixture to a gentle simmer over medium heat, stirring until the sugar and salt dissolve. Remove from the heat.
- Pour over the vegetables: Carefully pour the hot brine into the jars, making sure the vegetables are completely submerged. Leave about 1–2 cm of space at the top.
- Cool: Allow the jars to cool uncovered at room temperature for about 30–60 minutes.
- Refrigerate: Seal the jars and refrigerate for at least 24 hours before eating. For stronger flavor, wait 2–3 days.
- Serve: Enjoy the pickled vegetables as a side dish, on sandwiches, with grilled meats, in salads, or as a crunchy snack.
Notes
- Use rice vinegar for a milder, slightly sweeter pickle.
- Add fresh dill, coriander seeds, chili flakes, or ginger for different flavors.
- For extra-crunchy pickles, don’t overcook the vegetables.
- Keep the vegetables submerged under the brine.
- Store in the refrigerator and use clean utensils when serving.
- Prep Time: 15 minutes
- Cook Time: N/A
- Category: Condiment
- Method: Refrigeration
- Cuisine: Various
Nutrition
- Serving Size: 1/2 cup
- Calories: 50
- Sugar: 2 g
- Sodium: 300 mg
- Fat: 0 g
- Saturated Fat: 0 g
- Unsaturated Fat: 0 g
- Trans Fat: 0 g
- Carbohydrates: 12 g
- Fiber: 2 g
- Protein: 1 g
- Cholesterol: 0 mg