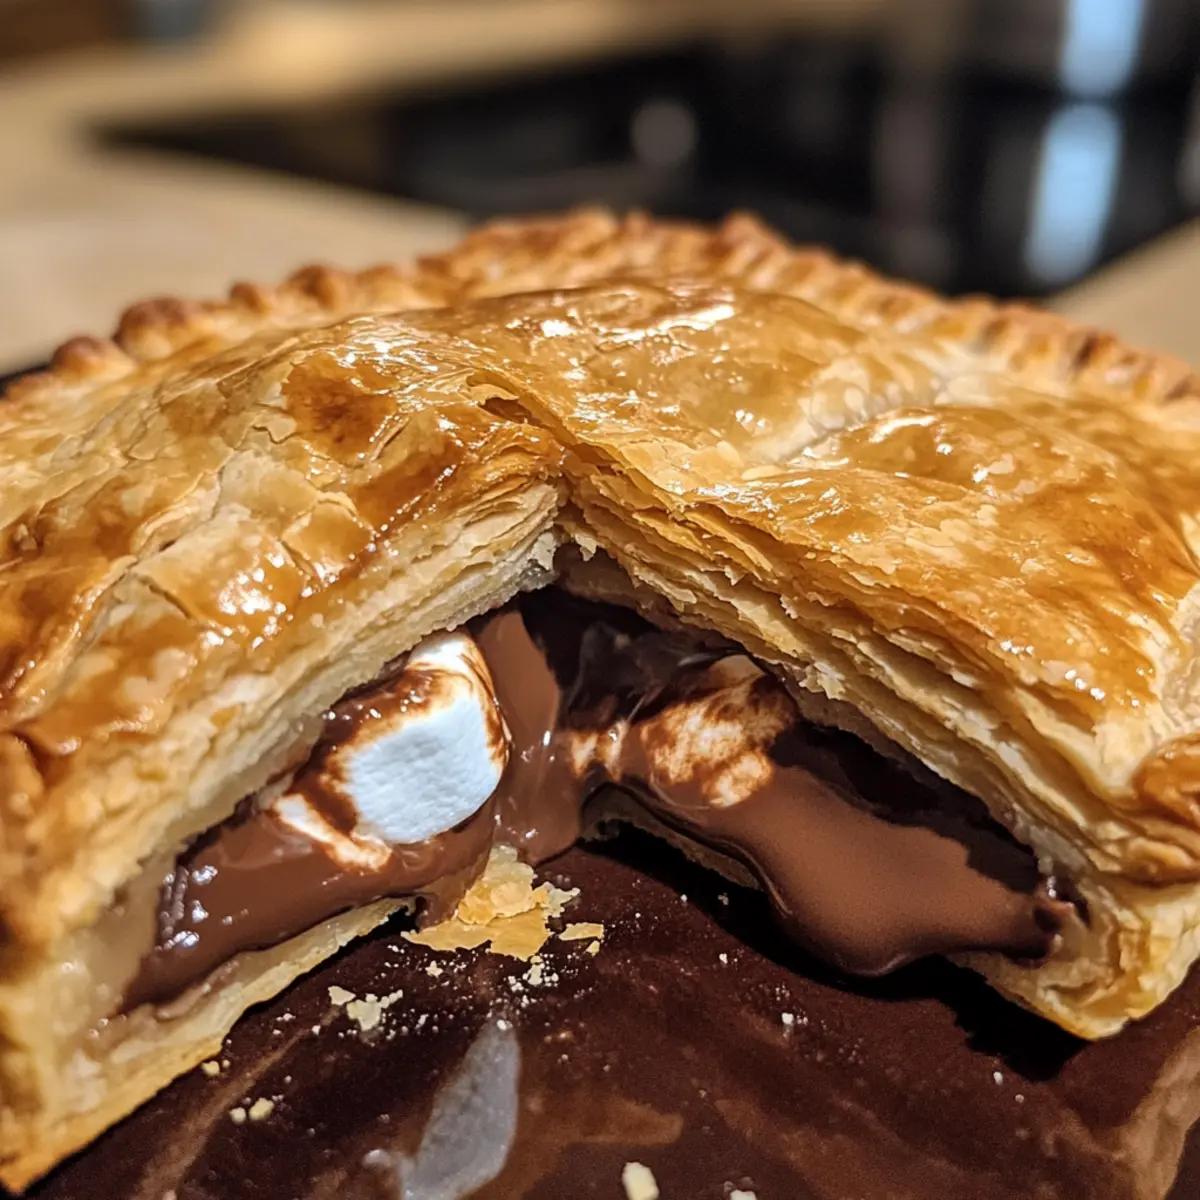
Walking through a cozy kitchen, the enticing aroma of warm pie fills the air, transporting me back to carefree campfire nights. That feeling of nostalgia inspired my latest delight: Easy S’mores Hand Pies. This fun dessert captures the essence of summer s’mores with its crispy, golden-brown crust enclosing rich chocolate and gooey marshmallows. Not only are these hand pies incredibly simple to whip up, but they also make for a make-ahead treat, allowing you to freeze them for future cravings. Whether you’re hosting a gathering or enjoying a quiet night at home, these delightful bites will surely charm friends and family alike. Ready to indulge in a taste of nostalgia? Let’s dive into the sweet simplicity of this comforting recipe!

Why are S’mores Hand Pies so special?
Irresistible Nostalgia: These hand pies are a playful twist on the beloved campfire classic, bringing back memories of summer nights.
Effortlessly Delicious: The straightforward preparation means that even beginner bakers will achieve mouthwatering results.
Make-Ahead Magic: You can prepare these in advance and freeze them, so you have a treat ready for unexpected guests or sweet cravings.
Customizable Flavors: Use any type of chocolate or add your favorite fruit for a unique spin!
Crowd-Pleasing Delight: Perfect for parties or family gatherings, these hand pies are sure to impress. Ready to explore more make-ahead treats? Check out our guide on freezer-friendly desserts!
S’mores Hand Pies Ingredients
For the Pie Crust
• Pie Crust – You can use store-bought refrigerated biscuit dough for a quicker option.
For the Filling
• Chocolate Bars – Choose any chocolate type you love, like dark or milk chocolate, to enhance your S’mores Hand Pies.
• Marshmallows – Mini marshmallows melt beautifully and distribute evenly throughout the pie.
For the Finish
• Egg Wash (optional) – Brushing the tops adds a lovely golden hue and shine to the baked treats.
Step‑by‑Step Instructions for S’mores Hand Pies
Step 1: Preheat the Oven
Begin by preheating your oven to 350°F (175°C). This is an essential step to ensure that your S’mores Hand Pies bake evenly and develop that perfect golden-brown crust. While the oven is heating, prepare your workspace by organizing your ingredients and gathering the necessary equipment such as a rolling pin, a round cutter, and a baking sheet lined with parchment paper.
Step 2: Roll Out the Pie Crust
Take your pie crust and place it on a lightly floured surface. Using a rolling pin, gently roll out the dough until it’s about 1/8 inch thick. Then, use a round cutter, approximately 4 to 5 inches in diameter, to cut out as many circles as you can. Aim for uniform shapes to ensure even baking, as this will help your S’mores Hand Pies maintain their delightful structure.
Step 3: Assemble the Filling
Next, take half of the circles and place them on the prepared baking sheet. In the center of each circle, add a few pieces of your chosen chocolate and a handful of mini marshmallows. Be generous, but leave a small border around the edges to make sealing easier later. This is the moment your S’mores Hand Pies start to come to life with that yummy gooey filling.
Step 4: Seal the Hand Pies
After filling the circles, take the remaining circle cutouts and place them on top of the filled halves. Carefully press the edges together to seal them. For a secure closure, use a fork to crimp the edges, creating charming little ridges. This step not only locks in the delicious filling but also adds a rustic touch to your S’mores Hand Pies’ appearance.
Step 5: Brush with Egg Wash
If you want your S’mores Hand Pies to have a beautiful glossy finish, whisk an egg in a small bowl to create an egg wash. Using a pastry brush, gently coat the tops of each pie with the egg wash. This optional step enhances the crust’s color and adds an appealing shine once baked, making your desserts even more inviting.
Step 6: Bake Until Golden Brown
Carefully place your baking sheet in the preheated oven and bake the S’mores Hand Pies for about 15 to 20 minutes. Keep an eye on them as they bake; you’re looking for a lovely golden-brown hue that indicates they are perfectly done. The aroma will be irresistible, signaling that your delicious treat is almost ready to enjoy.
Step 7: Cool Before Serving
Once baked, remove the S’mores Hand Pies from the oven and let them cool on the baking sheet for a few minutes. This resting time allows the filling to set slightly, ensuring you won’t burn your mouth on the hot chocolate or marshmallow inside. After cooling, transfer them to a wire rack to cool completely before diving in.
Make Ahead Options
These Easy S’mores Hand Pies are perfect for busy home cooks looking to save time! You can assemble the hand pies up to 24 hours in advance by following the recipe up to the sealing step. Simply place them on a baking sheet, cover with plastic wrap, and refrigerate until you’re ready to bake. This not only keeps the crust fresh but also ensures that the flavors meld beautifully. When you’re ready to serve, simply brush with egg wash (if using) and bake as directed for a delectable dessert that’s just as delicious as freshly made. This make-ahead option makes entertaining a breeze or provides a quick sweet treat for family nights!
Expert Tips for S’mores Hand Pies
Watch Your Bake Time: Overbaking can dry out your hand pies, so keep a close watch during the last few minutes for the perfect golden crust.
Crust Choice Matters: For a flaky texture, avoid using an air fryer; the oven will give you that crispy, golden-brown finish.
Seal It Right: Make sure to crimp the edges well with a fork to prevent any gooey chocolate and marshmallows from escaping during baking.
Prep Ahead: You can assemble these S’mores Hand Pies up to 24 hours in advance and refrigerate them before baking for added convenience.
Try New Chocolates: Don’t hesitate to experiment with different types of chocolate or even add fruits to create a unique flavor burst in your hand pies!
What to Serve with Easy S’mores Hand Pies
The sweet aroma of freshly baked hand pies beckons for delightful pairings that elevate your dessert experience.
- Vanilla Ice Cream: A scoop of creamy vanilla ice cream perfectly balances the warm, gooey filling while adding a comforting chill.
- Fresh Berries: Juicy strawberries or raspberries add a burst of freshness that complements the richness of the s’mores flavors.
- Chocolate Sauce: Drizzling warm chocolate sauce over the hand pies enhances the indulgent chocolate experience and makes for a decadent treat.
- Whipped Cream: Light and fluffy, a dollop of whipped cream brings a delightful texture contrast and adds a touch of elegance.
- Caramel Sauce: The sweet, buttery flavor of caramel creates an irresistible contrast to the chocolate, bringing a whimsical twist to your dessert.
- Mint Tea: A refreshing cup of mint tea cuts through the sweetness, providing a soothing finish to a delightful treat.
- Hot Cocoa: Sip on rich hot cocoa beside your hand pies for a cozy, nostalgic experience reminiscent of campfire nights.
- Milk: A classic pairing, an ice-cold glass of milk is the perfect companion, enhancing the nostalgic flavors of s’mores hand pies.
- Fruit Salad: A light, vibrant fruit salad adds a refreshing touch, balancing the richness while offering a healthy option.
- Coffee: Enjoy a warm cup of coffee to contrast the sweetness of the hand pies, perfect for elevating your dessert time ritual.
Storage Tips for S’mores Hand Pies
Fridge: Store baked S’mores Hand Pies in an airtight container for up to 3 days. This keeps them fresh while maintaining that delightful gooey filling.
Freezer: Unbaked hand pies can be frozen for up to 3 months. Assemble them, then wrap tightly in plastic wrap before placing in a freezer bag. Bake directly from frozen, adjusting the time as needed.
Reheating: For the best results, reheat baked pies in a preheated oven at 350°F (175°C) for about 10 minutes to rejuvenate the crispy crust and warm the filling.
Make-Ahead: Feel free to prepare the filling ahead of time and store it separately, so you can whip up these delightful S’mores Hand Pies whenever the craving strikes!
S’mores Hand Pies Variations & Substitutions
Feel free to get creative with these hand pies, enhancing each bite with your own unique flair!
- Chocolate Variety: Try using dark, milk, or even white chocolate for a sweeter or richer twist. Each chocolate brings its own delightful flavor to the mix!
- Nutty Goodness: Substitute chocolate with creamy peanut butter or Nutella for a deliciously different take on flavors. Guaranteed to please any chocolate lover!
- Berry Infusion: Add a handful of fresh raspberries or strawberries into the filling for a fruity and refreshing pop. The balance of sweet and tart elevates the experience!
- Flavor Essence: A splash of vanilla extract or almond extract in your marshmallow mixture can add a delightful depth to the classic s’mores taste. It’s a simple touch that makes a huge difference!
- Different Fillings: Consider swapping out marshmallows for a layer of mini chocolate chips or caramel sauce for a gooey surprise! The options are almost endless!
- Spicy Kick: Feeling adventurous? A dash of cayenne pepper in the chocolate can introduce a surprising and delightful heat. It’s the perfect match for those who love their desserts with a bit of spice!
- Graham Cracker Crust: If you’re looking for a more authentic s’mores experience, use crushed graham crackers mixed with melted butter as a crust instead of traditional pie crust. It’ll add that classic crunchy texture!
- Gluten-Free Option: For a gluten-free version, use a gluten-free pie crust or biscuit dough, ensuring everyone can enjoy this homestyle treat!
Looking for more exciting dessert ideas? Check our collection of make-ahead desserts for sweet inspiration!

S’mores Hand Pies Recipe FAQs
What type of chocolate should I use for S’mores Hand Pies?
Absolutely! You can use any type of chocolate you love, whether it’s dark, milk, or even a flavored variety like caramel or orange chocolate. Each choice will bring a unique taste to your hand pies, so feel free to experiment based on your preferences!
How should I store leftover S’mores Hand Pies?
Baked S’mores Hand Pies can be stored in an airtight container in the fridge for up to 3 days. This helps maintain their delightful gooey filling. Whenever you’re ready to indulge, simply reheat them in a preheated oven at 350°F (175°C) for about 10 minutes to restore that crispy crust.
Can I freeze S’mores Hand Pies?
Yes, you can! Assemble the uncooked hand pies and wrap them tightly in plastic wrap before placing them in a freezer bag. They can be frozen for up to 3 months. When you’re ready to bake, simply preheat your oven and bake them directly from frozen, adjusting the baking time by a few extra minutes until they’re golden brown.
What if the filling leaks out during baking?
No worries! If you’ve crimped the edges well with a fork, leakage shouldn’t occur, but it can happen if the filling is overstuffed. For best results, leave about a 1/4-inch border around the edges of the dough when filling, and ensure the edges are well sealed. This will keep all that delicious gooeyness inside.
Can I use different fillings for S’mores Hand Pies?
Very much so! You can mix things up by adding fresh berries, nut butter like peanut or almond, or adjusting the type of chocolate. Just keep in mind that if you opt for fresh fruit, you may want to reduce the amount of chocolate slightly to prevent spills while baking. It’s all about what flavors you love!
Is it safe to give these hand pies to pets?
Definitely avoid sharing S’mores Hand Pies with your pets. Ingredients like chocolate and marshmallows can be harmful to them. Always opt for pet-friendly treats instead to keep your furry friends healthy and happy!

S’mores Hand Pies: Irresistibly Gooey and Homemade Delights
Ingredients
Equipment
Method
- Preheat your oven to 350°F (175°C). Prepare your workspace with ingredients and equipment.
- Roll out the pie crust to about 1/8 inch thick and cut out circles using a round cutter.
- Assemble by placing chocolate and marshmallows in the center of half the circles, leaving a small border.
- Seal the pies by placing remaining circles on top and crimping the edges with a fork.
- Brush tops with egg wash for a glossy finish.
- Bake the pies for about 15 to 20 minutes until golden brown.
- Let the pies cool on the baking sheet for a few minutes before transferring to a wire rack.