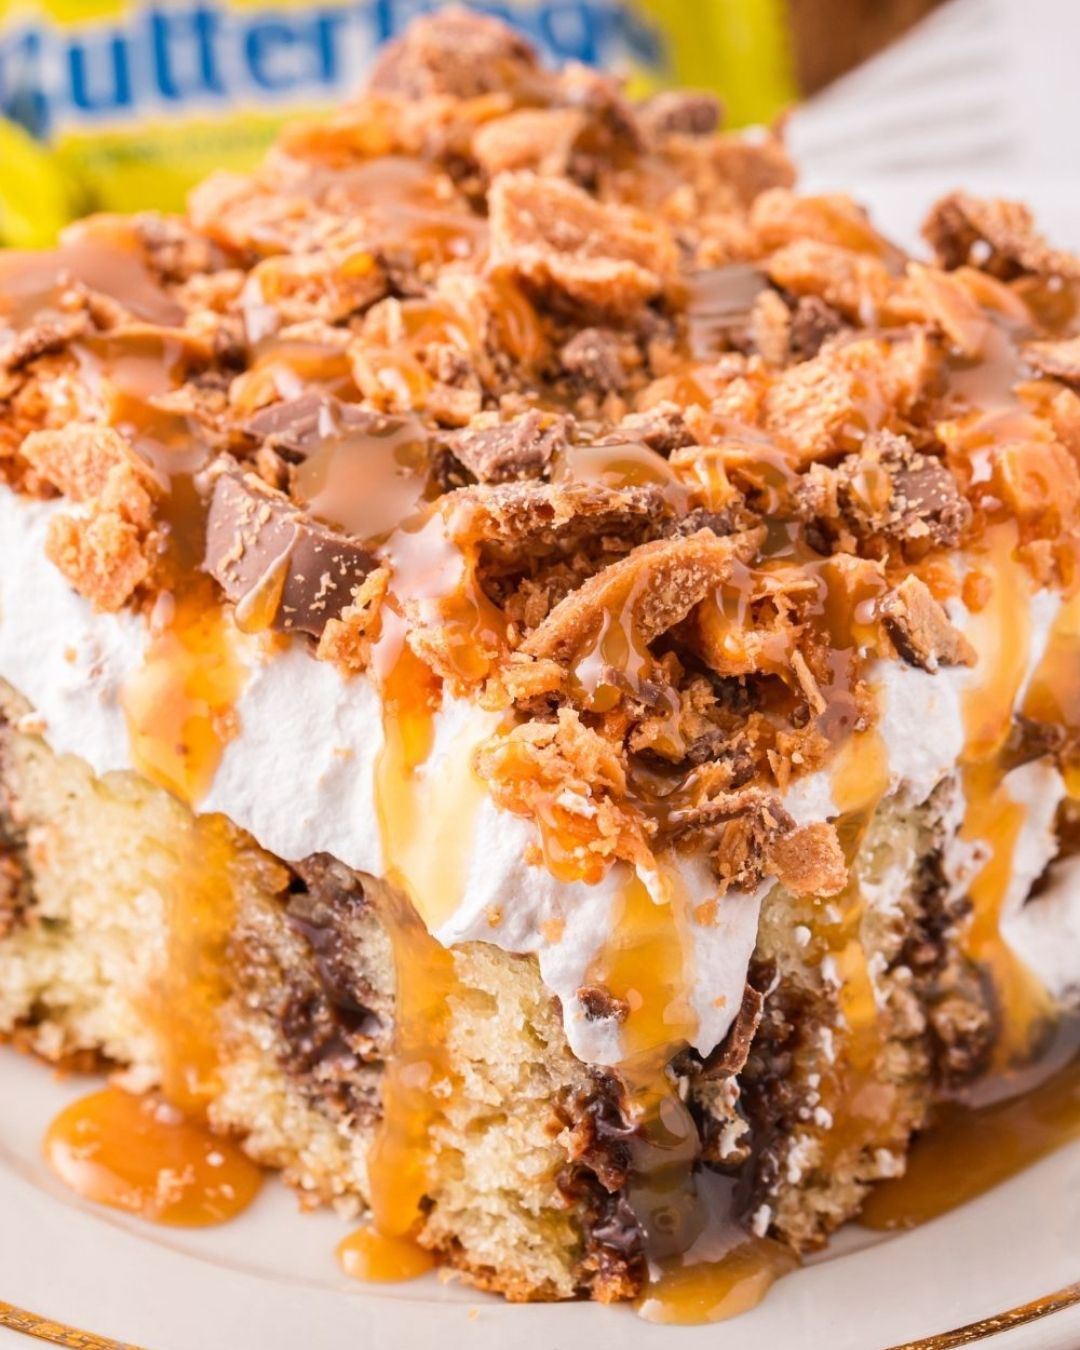
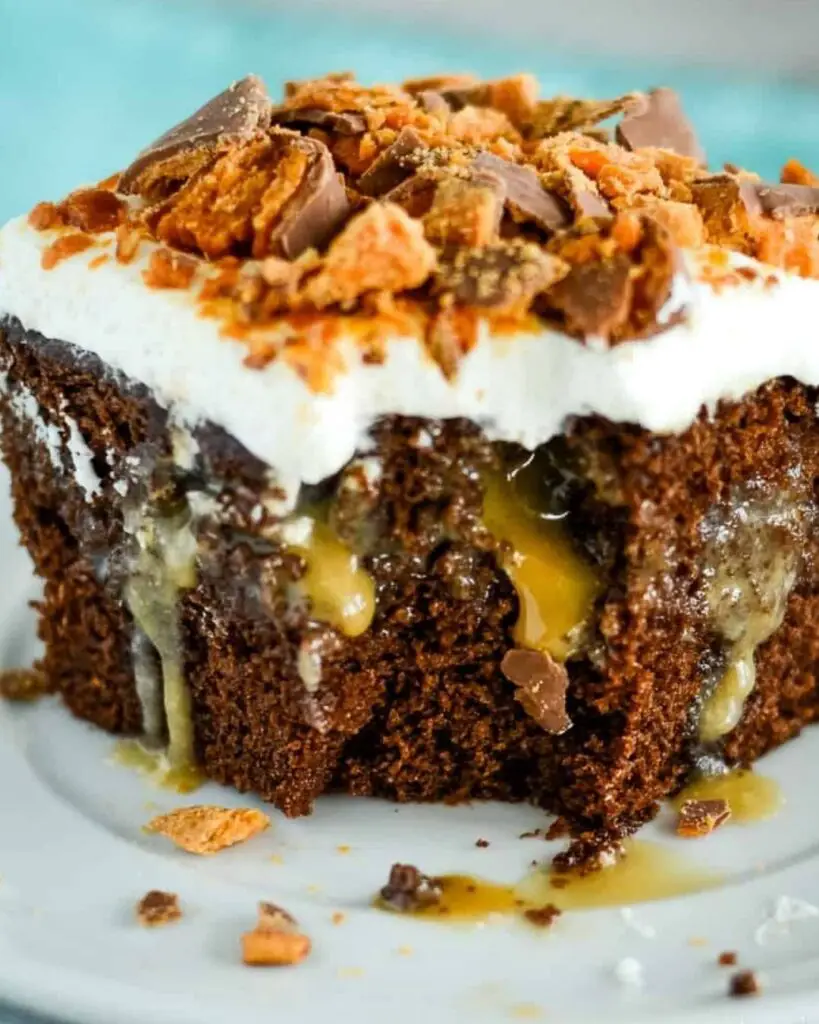
Introduction to Chocolate Butterfinger Poke Cake
There’s something magical about a dessert that combines rich chocolate with the crunch of Butterfinger bars. The Chocolate Butterfinger Poke Cake is just that—a delightful treat that brings back memories of childhood candy bars and family gatherings. This recipe is perfect for those busy days when you want to impress your loved ones without spending hours in the kitchen. With its creamy caramel peanut butter sauce and fluffy whipped cream topping, this cake is sure to be a hit at any gathering. Trust me, your friends and family will be begging for seconds!
Why You’ll Love This Chocolate Butterfinger Poke Cake
This Chocolate Butterfinger Poke Cake is a game-changer for dessert lovers. It’s incredibly easy to make, requiring minimal effort while delivering maximum flavor. The combination of chocolate, caramel, and peanut butter creates a taste explosion that will leave your taste buds dancing. Plus, it’s perfect for any occasion—be it a family dinner or a casual get-together. You’ll impress everyone without breaking a sweat!
Ingredients for Chocolate Butterfinger Poke Cake
Gathering the right ingredients is the first step to creating this indulgent Chocolate Butterfinger Poke Cake. Here’s what you’ll need:
- Chocolate or Devil’s Food Cake Mix: This is the base of your cake, providing that rich chocolate flavor. You can use any brand you prefer.
- Water, Vegetable Oil, and Eggs: These are the essentials for preparing the cake mix. Follow the package directions for the right amounts.
- Sweetened Condensed Milk: This creamy ingredient adds sweetness and moisture, making the cake irresistibly rich.
- Caramel Sauce: A drizzle of caramel brings a luscious sweetness that pairs perfectly with chocolate.
- Creamy Peanut Butter: This adds a nutty flavor and a smooth texture to the sauce, enhancing the overall taste.
- Cold Heavy Whipping Cream: Essential for making the fluffy whipped topping that crowns your cake.
- Powdered Sugar: This sweetens the whipped cream and helps it hold its shape.
- Vanilla Extract: A splash of vanilla elevates the flavor of the whipped cream, making it even more delightful.
- Fun-size Butterfinger Bars: These crunchy, chocolatey treats are the star topping, adding texture and a nostalgic flavor.
For those looking to customize, consider adding a pinch of sea salt to the caramel sauce for a sweet-salty twist. You can find all the exact measurements at the bottom of the article, ready for printing!
How to Make Chocolate Butterfinger Poke Cake
Creating this Chocolate Butterfinger Poke Cake is a delightful journey that’s as easy as it is rewarding. Follow these simple steps, and you’ll have a show-stopping dessert that everyone will love.
Step 1: Prepare the Cake
Start by preheating your oven according to the instructions on the cake mix box. In a large mixing bowl, combine the chocolate cake mix with water, vegetable oil, and eggs as directed. Mix until smooth, then pour the batter into a greased 23 × 33 cm baking pan. Bake it for about 30 minutes or until a toothpick inserted in the center comes out clean. Once baked, let the cake cool completely in the pan. This cooling time is crucial for the next steps!
Step 2: Poke Holes
Once the cake has cooled, it’s time to create those signature holes. Grab the handle of a wooden spoon and gently poke holes all over the cake, spacing them about 2–3 cm apart. Be careful not to poke all the way through to the bottom; you want the sauce to soak in, not leak out!
Step 3: Make the Sauce
In a medium bowl, whisk together the sweetened condensed milk, caramel sauce, and creamy peanut butter until the mixture is smooth and well combined. This sauce is the heart of your poke cake, adding that rich, indulgent flavor that pairs perfectly with chocolate.
Step 4: Pour the Sauce
Now, slowly pour the caramel-peanut butter mixture over the cake, ensuring it seeps into all those lovely holes. Take your time with this step; you want every bite to be filled with that delicious sauce. Watch as it flows into the cake, creating a beautiful marbled effect!
Step 5: Prepare the Whipped Cream
In a separate bowl, beat the cold heavy whipping cream until soft peaks form. This usually takes a few minutes. Once you see those peaks, add the powdered sugar and vanilla extract. Continue beating until the whipped cream is smooth and fluffy. This will be the light, airy topping that balances the richness of the cake.
Step 6: Assemble the Cake
Spread the whipped cream evenly over the cooled cake, covering it completely. This fluffy layer is what makes the cake so inviting. After spreading, cover the cake with plastic wrap and refrigerate it for at least one hour. This allows the flavors to meld and the sauce to soak in even more.
Step 7: Add the Topping
Just before serving, sprinkle the crushed Butterfinger pieces generously over the top of the whipped cream. This adds a delightful crunch and a burst of chocolatey goodness. Your Chocolate Butterfinger Poke Cake is now ready to impress!
Tips for Success
- Make sure your cake is completely cool before poking holes; this prevents the sauce from leaking out.
- Use a sturdy wooden spoon handle for poking; it creates the perfect size holes for soaking.
- For a richer flavor, let the cake chill overnight before serving.
- Feel free to customize the toppings with other candies or nuts for a unique twist.
- Keep leftovers covered in the fridge for up to three days—if there are any!
Equipment Needed
- Mixing Bowls: A set of various sizes will help you mix ingredients easily. Glass or stainless steel works best.
- Baking Pan: A 23 × 33 cm baking pan is ideal, but any similar-sized pan will do.
- Whisk: A hand whisk or electric mixer will make whipping cream a breeze.
- Wooden Spoon: Essential for poking holes in the cake; any sturdy spoon will suffice.
- Measuring Cups and Spoons: For accurate ingredient measurements, especially if you’re customizing!
Variations
- Peanut Butter Lovers: Swap the creamy peanut butter for crunchy peanut butter to add extra texture and flavor.
- Chocolate Overload: Use chocolate fudge sauce instead of caramel for a double chocolate experience that’s sure to satisfy any chocoholic.
- Healthier Option: Substitute the cake mix with a low-sugar or gluten-free cake mix to cater to dietary preferences without sacrificing taste.
- Nutty Twist: Add chopped nuts, like pecans or walnuts, to the whipped cream for a delightful crunch and added flavor.
- Seasonal Flavors: Incorporate seasonal ingredients, like pumpkin spice or peppermint extract, to give your poke cake a festive flair.
Serving Suggestions
- Pair with Coffee: A warm cup of coffee complements the rich flavors of the cake beautifully.
- Ice Cream Delight: Serve with a scoop of vanilla or chocolate ice cream for an extra indulgent treat.
- Garnish: Add fresh berries or a drizzle of chocolate sauce for a pop of color and flavor.
- Presentation: Use a cake stand to elevate your dessert and make it the centerpiece of your table.
FAQs about Chocolate Butterfinger Poke Cake
Curious about this decadent dessert? Here are some frequently asked questions that might help you on your baking journey!
Can I make Chocolate Butterfinger Poke Cake ahead of time?
Absolutely! This cake actually tastes better when made a day in advance. Just cover it well and refrigerate. The flavors meld beautifully overnight.
What can I substitute for the sweetened condensed milk?
If you’re looking for a dairy-free option, try using coconut cream or a homemade cashew cream. Both will add a creamy texture without the dairy.
How do I store leftovers?
Keep any leftover Chocolate Butterfinger Poke Cake covered in the refrigerator. It should stay fresh for up to three days—if it lasts that long!
Can I use a different cake mix flavor?
Of course! While chocolate is a classic choice, vanilla or even red velvet cake mix can create a unique twist on this poke cake.
Is it possible to make this cake gluten-free?
Yes! Just swap the regular cake mix for a gluten-free version. The rest of the ingredients remain the same, ensuring you still get that delicious flavor.
Final Thoughts
Creating a Chocolate Butterfinger Poke Cake is more than just baking; it’s about crafting memories and sharing joy. Each slice is a delightful blend of flavors and textures that transports you back to simpler times, where dessert was the highlight of the day. The combination of rich chocolate, creamy peanut butter, and crunchy Butterfinger pieces makes every bite a celebration. Whether you’re serving it at a family gathering or enjoying a quiet evening at home, this cake is sure to bring smiles and satisfaction. So, roll up your sleeves and dive into this delicious adventure—you won’t regret it!
PrintChocolate Butterfinger Poke Cake: A Decadent Treat Awaits!
- Total Time: About 2 hours 25 minutes
- Yield: 15 servings
- Diet: Vegetarian
Description
A rich and indulgent Chocolate Butterfinger Poke Cake that combines chocolate cake with a creamy caramel peanut butter sauce and is topped with whipped cream and crushed Butterfinger bars.
Ingredients
- 1 box (about 432 g) chocolate or Devil’s Food cake mix
- Water, vegetable oil, and eggs according to the cake-mix package directions
- 1 can (397 g) sweetened condensed milk
- 120 g caramel sauce
- 85 g creamy peanut butter
- 240 ml cold heavy whipping cream
- 40 g powdered sugar
- ½ tsp vanilla extract
- 8 fun-size Butterfinger bars, chopped/crushed (about 150 g)
Instructions
- Prepare the chocolate cake mix according to the package directions. Bake in a 23 × 33 cm baking pan. Let the cake cool completely.
- Using the handle of a wooden spoon, poke holes approximately 2–3 cm apart all over the cake. Don’t poke completely through the bottom.
- In a bowl, whisk together the sweetened condensed milk, caramel sauce, and peanut butter until smooth.
- Slowly pour the caramel-peanut butter mixture over the cake, making sure it flows into the holes.
- Beat the cold whipping cream until soft peaks form. Add powdered sugar and vanilla, then continue beating until smooth and fluffy.
- Spread the whipped cream evenly over the cooled cake.
- Cover and refrigerate for at least 1 hour so the sauce can soak into the cake and the topping can set.
- Just before serving, generously sprinkle the crushed Butterfinger pieces over the top.
Notes
- For an even more indulgent cake, drizzle a little extra caramel sauce and melted peanut butter over the whipped cream before adding the Butterfinger pieces.
- Prep Time: 25 minutes
- Cook Time: 30 minutes
- Category: Dessert
- Method: Baking
- Cuisine: American
Nutrition
- Serving Size: 1 slice
- Calories: Approximately 300
- Sugar: 25 g
- Sodium: 150 mg
- Fat: 15 g
- Saturated Fat: 7 g
- Unsaturated Fat: 8 g
- Trans Fat: 0 g
- Carbohydrates: 40 g
- Fiber: 1 g
- Protein: 4 g
- Cholesterol: 30 mg