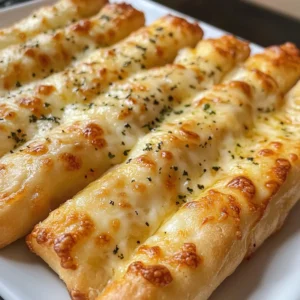
As the oven begins to preheat, the delicious scent of garlic dances through the air, wrapping around me like a warm hug. Today, I’m excited to share my recipe for Gluten-Free Garlic Breadsticks, a simple yet scrumptious breadstick that’s perfect for any occasion. These aren’t just any breadsticks; they’re soft, chewy, and topped with a gooey layer of cheese, making them an irresistible addition to any meal or a delightful snack on their own. With minimal fuss and maximum flavor, this easy recipe lets you savor every moment of home cooking without the stress. Whether you’re living a gluten-free lifestyle or just craving a homemade treat, these breadsticks will have your family coming back for seconds. So, who’s ready to turn their kitchen into a garlic bread haven?
Why Are These Breadsticks So Irresistible?
Simplicity at its finest: These gluten-free garlic breadsticks come together with minimal ingredients and steps, making them perfect for home cooks.
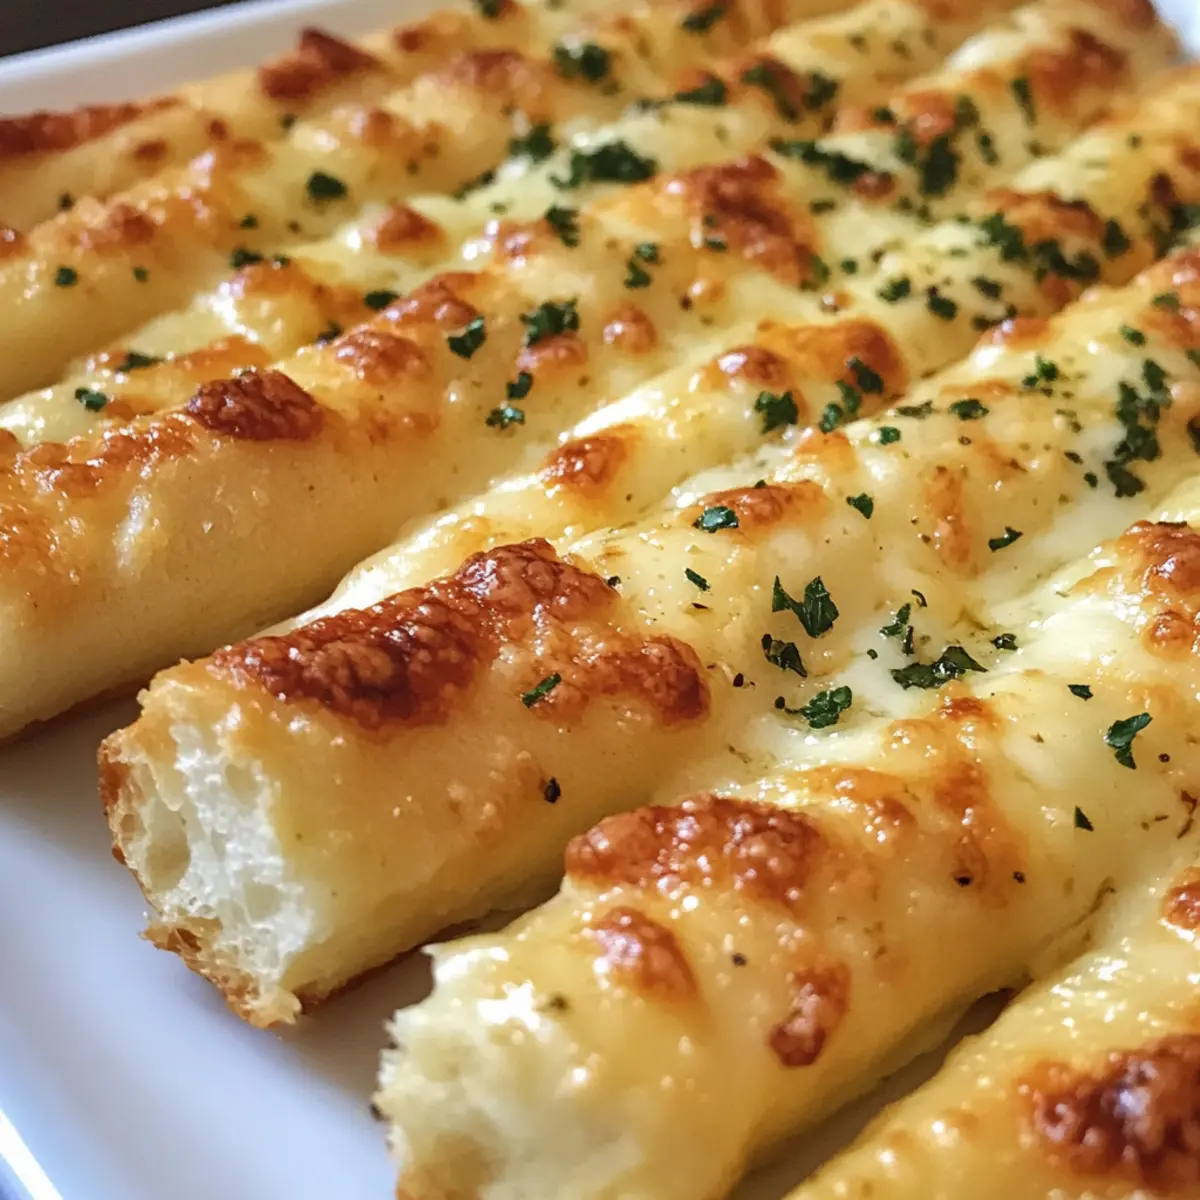
Melt-in-your-mouth texture: Enjoy a delightful combination of chewy interiors and crispy exteriors that mimic traditional breadsticks.
Cheesy goodness is a guarantee: Topped with gooey cheese, each bite is a savory explosion of flavor that will please everyone at the table.
Versatile pairing options: Serve alongside pasta, soups, or enjoy solo as a snack. They’re truly a crowd-pleaser!
Aromatherapy in your kitchen: The whiff of garlic and herbs baking will have your family hovering at the oven, eager for a taste.
For a quick and delicious twist, consider pairing them with Air Fryer Garlic or even as an appetizer at your next gathering!
Gluten-Free Garlic Breadsticks Ingredients
For the Dough
• Gluten-Free Flour Blend – Provides structure in the absence of gluten; opt for a store-bought mix or create your own!
• Yeast – Helps the dough rise and gives the breadsticks a light, airy texture; active dry yeast works beautifully.
• Salt – Balances and enhances flavors; feel free to adjust based on your taste preferences.
For the Flavor
• Garlic – Adds that aromatic punch; fresh garlic is heavenly, but you can also use granulated or powder as substitutes.
• Butter – Brings richness and depth; consider vegan butter for a dairy-free alternative.
• Herbs (like Italian seasoning or parsley) – Boosts the aroma and flavor; fresh is best, but dried works too in smaller amounts.
For the Topping
• Cheese (e.g., Mozzarella) – Melts beautifully, adding cheesy goodness to each breadstick; feel free to experiment with Parmesan or your favorite mix!
With these gluten-free garlic breadsticks ingredients, you’re set to impress your family and friends with this flavorful treat that everyone can enjoy!
Step‑by‑Step Instructions for Gluten Free Garlic Breadsticks
Step 1: Prep the Dough
In a large mixing bowl, combine gluten-free flour blend, active dry yeast, and salt. Stir thoroughly to ensure even distribution of the ingredients, creating a well-structured base for your gluten-free garlic breadsticks. This step typically takes around 5 minutes, setting the foundation for delicious, fluffy sticks.
Step 2: Add Wet Ingredients
Pour in warm water (around 110°F or 43°C) and melted butter into the dry mixture. Use a wooden spoon or spatula to mix until a sticky dough forms, ensuring no dry flour is left. The dough’s texture should be moist and slightly tacky but still manageable. This may take about 3-5 minutes.
Step 3: Add Flavorings
Fold in the minced garlic and your choice of herbs such as Italian seasoning or parsley for added flavor. Mix until the garlic and herbs are evenly dispersed throughout the dough. You will recognize it’s ready when the aroma fills the air, taking about 2 minutes for even mixing.
Step 4: Form the Breadsticks
Oil your hands to prevent sticking, and portion out the dough into equal pieces, forming them into stick-shaped pieces. Aim for about 4–6 inches in length and 1 inch in thickness. This shaping should take around 10 minutes, allowing you to create uniform breadsticks that will bake evenly.
Step 5: First Rise
Place the formed breadsticks on a greased or parchment-lined baking sheet, making sure they are spaced apart. Cover them with a clean kitchen towel and let them rise in a warm environment for approximately 30–45 minutes until they have doubled in size. A warm kitchen will help with the rising process.
Step 6: Preheat Oven
While the dough is rising, preheat your oven to 400°F (200°C). This ensures your oven is hot and ready to give your gluten-free garlic breadsticks a perfect bake. This step takes about 10-15 minutes, and you should see the oven indicator light show that it’s preheating effectively.
Step 7: Add Cheese
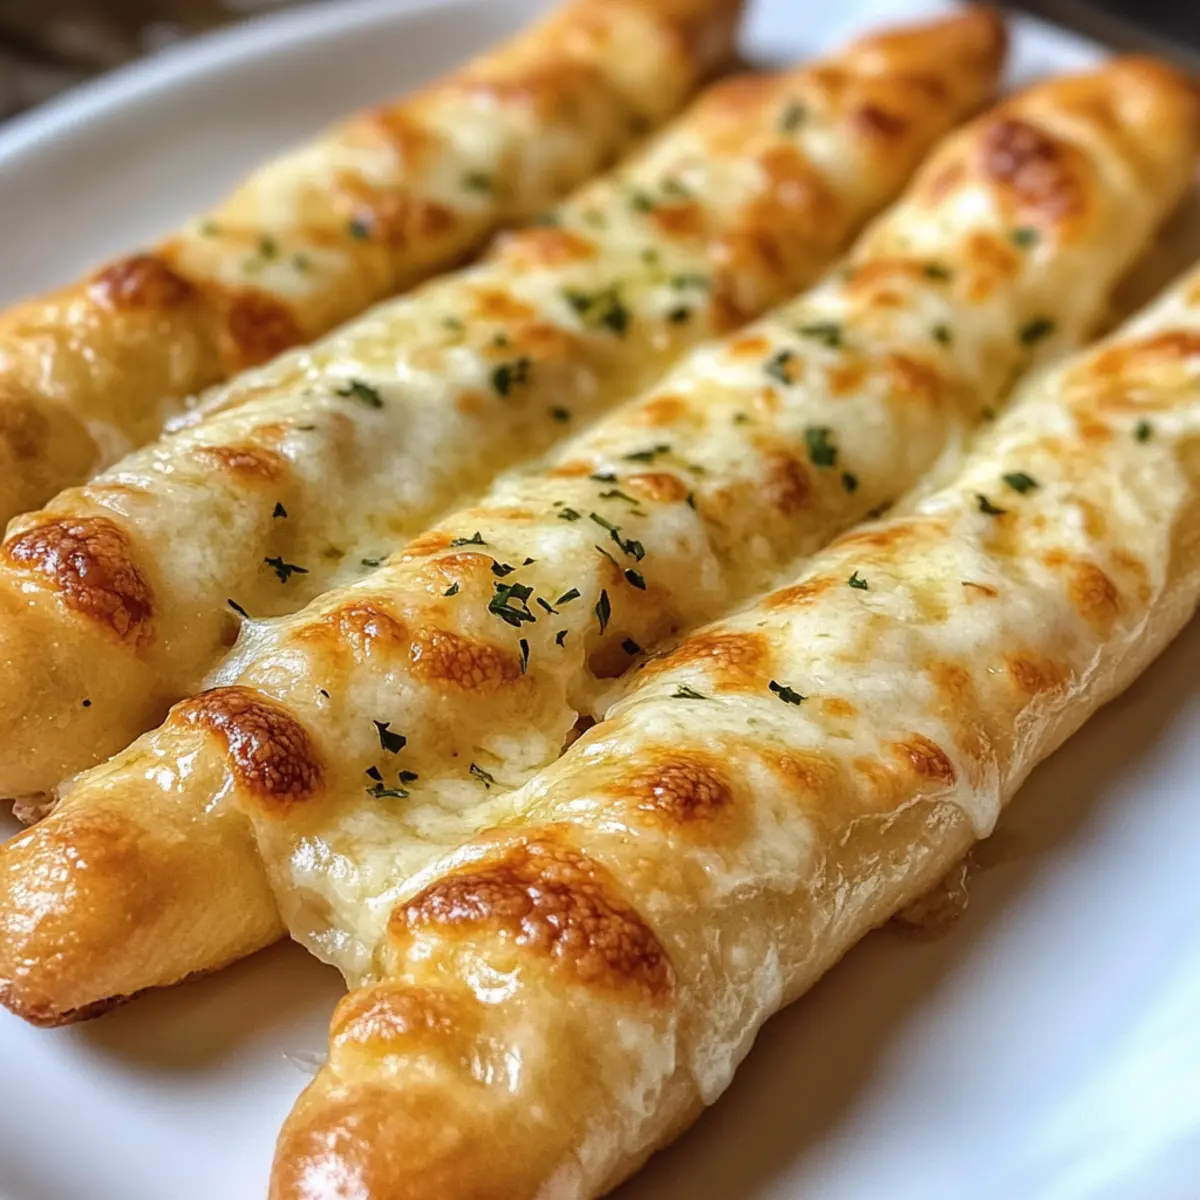
Once the dough has risen, carefully remove the towel and sprinkle the top generously with shredded cheese. Mozzarella works wonderfully, but feel free to mix in other varieties for extra flavor. This step should only take about 5 minutes but adds an irresistible cheesy layer to each stick.
Step 8: Bake
Place the baking sheet in the preheated oven and bake for 15-20 minutes, or until the cheese is melted and the breadsticks are golden brown. Keep an eye on them, as the perfect doneness is achieved with a crisp exterior and gooey cheese.
Step 9: Cool & Serve
Once baked, remove the breadsticks from the oven and let them cool slightly on the baking sheet for about 5 minutes. This cooling period allows the cheese to set a bit, making them easier to handle. Serve warm for the best taste, and watch your family savor these delightful gluten-free garlic breadsticks!
Expert Tips for Gluten-Free Garlic Breadsticks
-
Choose the Right Flour: Use a gluten-free flour blend with xanthan gum for the best texture. If your blend doesn’t include it, add about ½ teaspoon per 2½ cups.
-
Handle with Care: The dough will be stickier than traditional recipes. Lightly oil your hands to prevent sticking while forming the breadsticks.
-
Trust the Rise: Allow the dough to rise fully—at least 30–45 minutes. A warm, draft-free spot helps it double in size, ensuring a fluffy texture.
-
Monitor the Bake: Keep a close eye on the breadsticks in the oven. Remove them when they’re golden brown and the cheese is bubbly for that perfect finish.
-
Storage Solutions: For leftovers, freeze the breadsticks individually and warm them in the oven for a crispy treat later.
With these tips, you’ll create delicious gluten-free garlic breadsticks that your family will love!
What to Serve with Easy Gluten-Free Garlic Breadsticks
As you prepare these delightful, warm breadsticks, think about the pairing options that will elevate your meal to new heights.
-
Creamy Tomato Soup: This classic pairing offers a rich, savory complement to the fluffy breadsticks, perfect for scooping.
-
Fresh Garden Salad: Crisp greens and vibrant veggies add a refreshing contrast to the warm, cheesy garlic breadsticks, balancing your meal beautifully.
-
Savory Pasta Dishes: Whether it’s marinara or Alfredo, pasta sauce clings perfectly to these breadsticks, making every bite utterly scrumptious.
-
Herbed Olive Oil Dip: A drizzle of herby olive oil invites your breadsticks to soak up extra flavor, enhancing every cheesy bite.
-
Colder Bite: Serve with a chilled bruschetta topping for added freshness and a burst of flavor that pairs delightfully with the warm breadsticks.
-
Wine: A glass of light white wine or a refreshing sparkling water cleanses the palate and complements the garlic without overpowering it.
Indulging in these suggestions will turn your comfort food into a memorable feast!
Gluten Free Garlic Breadsticks Variations
Feel free to add your own spin to these delightful breadsticks, enhancing flavor and texture to suit your taste!
-
Dairy-Free: Substitute cheese with a dairy-free alternative, like vegan mozzarella, for a delicious lactose-free option. Your taste buds won’t notice the difference!
-
Herb-Infused: Experiment with fresh herbs like rosemary or thyme mixed into the dough for a fragrant twist. The aromas will transport you to an Italian herb garden.
-
Spicy Kick: Add a pinch of red pepper flakes to the dough for those who crave a bit of heat. It’s a fantastic way to elevate the flavor profile.
-
Pesto Swirl: Swirl in some pesto before baking for a vibrant burst of flavor. This twist will transform your breadsticks into a gourmet treat!
-
Cheese Variety: Try different cheese combinations, such as Gruyère, cheddar, or a spicy pepper jack, for a fun flavor explore. Each bite will tell a new savory story!
-
Sweet Garlic: For a subtle twist, mix in a bit of honey along with the garlic for a sweet-savory contrast. It harmonizes beautifully, creating a unique flavor experience.
-
Top with Seeds: Before baking, sprinkle your breadsticks with sesame or poppy seeds for added texture and a delightful crunch. This also makes for an appealing presentation!
For an even more mouthwatering treat, don’t forget to pair your breadsticks with Air Fryer Garlic bread next time you’re in the mood for something crispy and delicious!
How to Store and Freeze Gluten-Free Garlic Breadsticks
Fridge: Store leftover gluten-free garlic breadsticks in an airtight container for up to 3 days. This keeps them moist while protecting them from other flavors in the fridge.
Freezer: For longer storage, individually wrap the breadsticks and freeze for up to 3 months. This allows you to enjoy homemade goodness whenever the craving strikes.
Reheating: To reheat, pop the frozen breadsticks in a preheated oven at 350°F (175°C) for about 10-15 minutes until heated through and the cheese is melty again.
Cooling: Always allow the breadsticks to cool completely before storing. This helps maintain their texture and prevents them from becoming soggy.
Make Ahead Options
These delicious Gluten-Free Garlic Breadsticks are perfect for meal prep, saving you time on busy weeknights! You can prepare the dough up to 24 hours in advance by following steps 1-3, then cover it tightly and refrigerate it. This slows down the rising process, allowing the flavors to meld beautifully. When you’re ready to bake, simply remove the dough from the refrigerator, shape it into sticks, and let it rise for about 30-45 minutes at room temperature before proceeding with the remaining steps. To keep the quality just as delightful, avoid excessive handling, and bake them fresh for a gooey, cheesy bliss your family will love!
Gluten-Free Garlic Breadsticks Recipe FAQs
How do I choose the right gluten-free flour blend?
Absolutely! When selecting a gluten-free flour blend, look for one that contains xanthan gum, as this helps mimic the texture of gluten. If your blend doesn’t include it, add about ½ teaspoon of xanthan gum per 2½ cups of flour to ensure a wonderful structure and chew in your garlic breadsticks.
What’s the best way to store leftover breadsticks?
Very! Keep leftover gluten-free garlic breadsticks in an airtight container in the fridge for up to 3 days. This method keeps them fresh and moist. If you prefer, you can wrap them individually and freeze for up to 3 months for even longer storage.
Can I freeze these garlic breadsticks? How?
Absolutely! To freeze, allow the breadsticks to cool completely. Then, individually wrap each one in plastic wrap and place them in a freezer-safe bag or container. They’ll stay delicious for up to 3 months. When you’re ready to enjoy, simply reheat from frozen in a preheated oven at 350°F (175°C) for about 10-15 minutes, until warmed through and the cheese is melty.
What if my dough is too sticky or dry?
Not to worry! If your dough is too sticky, try lightly oiling your hands to help shape it, and ensure that you’re measuring the flour accurately. On the other hand, if your dough is too dry, add a little warm water (1 tablespoon at a time) until you achieve a sticky but manageable consistency. Don’t be afraid to perfect it!
Are there any dietary restrictions I should consider?
Definitely! These gluten-free garlic breadsticks are perfect for those avoiding gluten, but keep in mind any dairy restrictions as well. You can easily substitute butter with vegan butter and use a dairy-free cheese for those following a dairy-free diet. Always check ingredient labels if you’re mindful of allergens!
How can I make these breadsticks even more flavorful?
The more the merrier! To amp up the flavor, consider mixing in additional herbs like rosemary or thyme, or even adding a sprinkle of crushed red pepper for a kick. If you love cheesy goodness, try combining different types of cheese, such as Parmesan or cheddar, to make your garlic breadsticks truly irresistible!

Melt-in-Your-Mouth Gluten Free Garlic Breadsticks to Crave
Ingredients
Equipment
Method
- In a large mixing bowl, combine gluten-free flour blend, active dry yeast, and salt. Stir thoroughly for even distribution.
- Pour in warm water and melted butter into the dry mixture. Mix until a sticky dough forms, ensuring no dry flour is left.
- Fold in minced garlic and herbs. Mix until they are evenly dispersed throughout the dough.
- Oil your hands and portion the dough into stick-shaped pieces, about 4–6 inches long.
- Place the formed breadsticks on a greased baking sheet, cover with a towel, and let rise in a warm environment for 30–45 minutes.
- Preheat your oven to 400°F (200°C).
- Once risen, sprinkle the top with shredded cheese.
- Bake for 15-20 minutes, or until the cheese is melted and the breadsticks are golden brown.
- Remove from oven, let cool slightly, then serve warm.