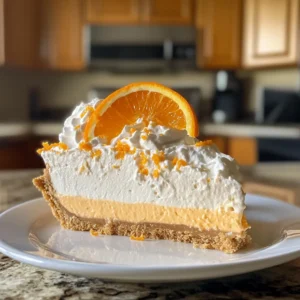
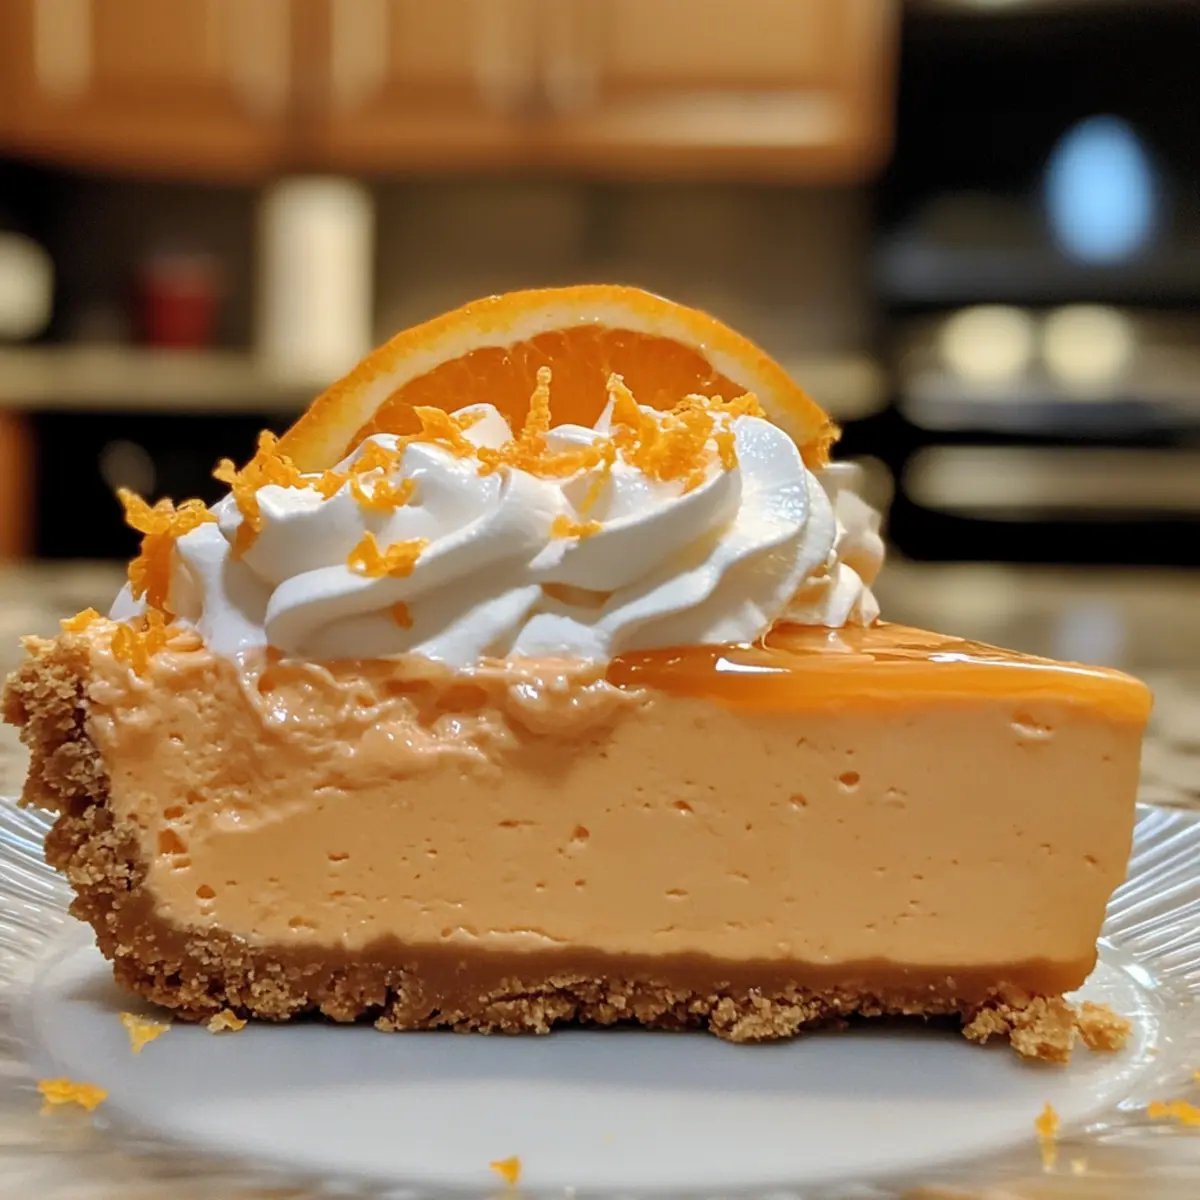
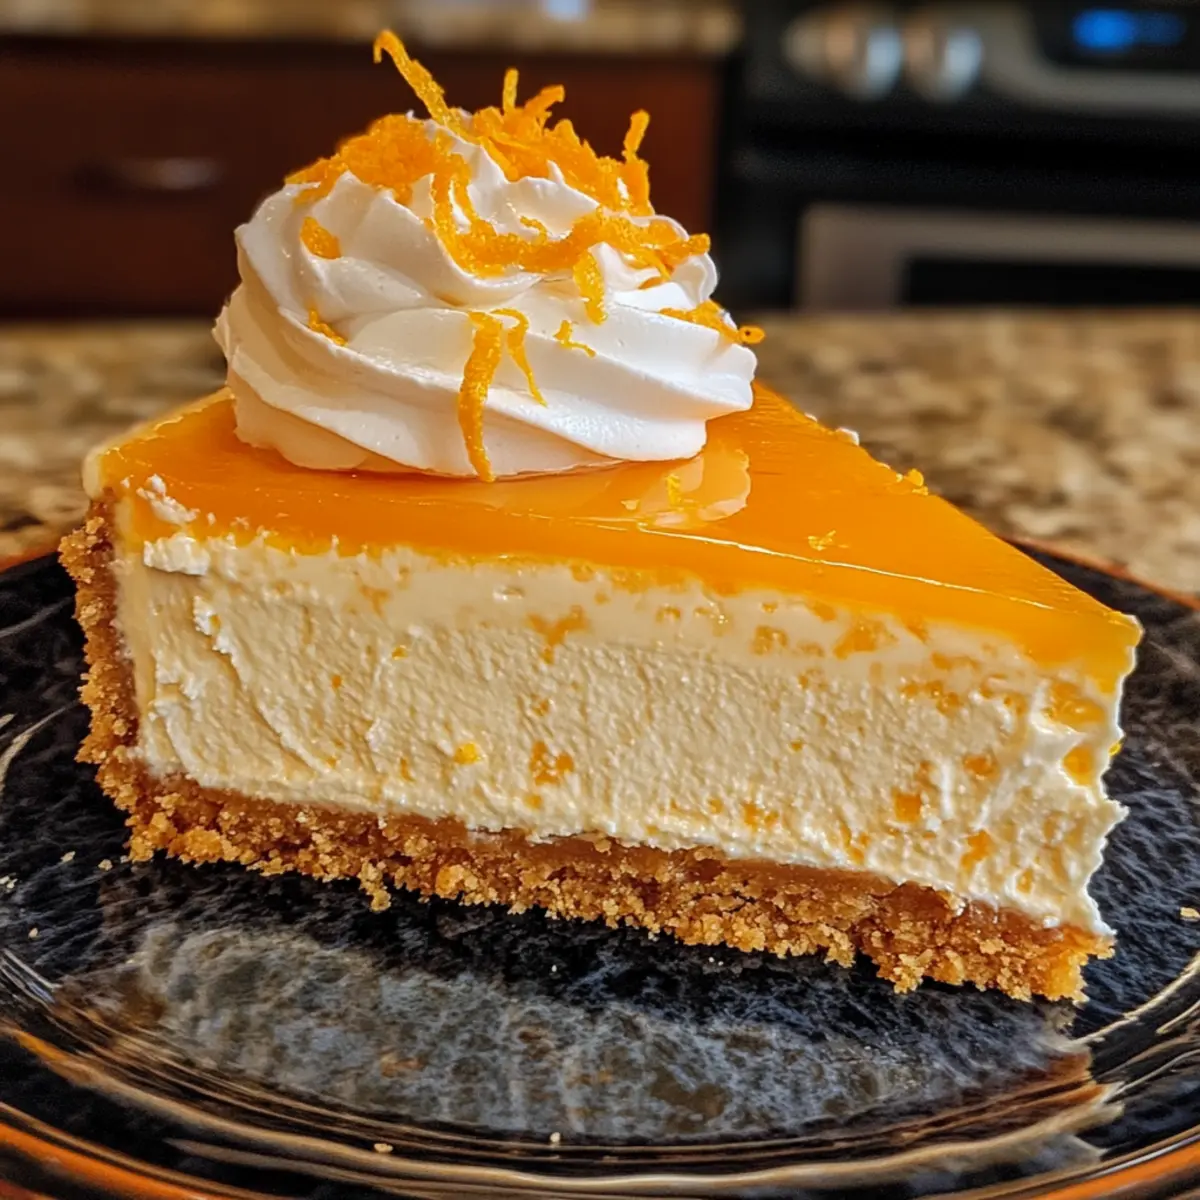
As I whisked together the cream cheese and powdered sugar, a wave of nostalgia hit me, transporting me back to sun-drenched summer days filled with frozen treats. This No-Bake Orange Creamsicle Cheesecake is not just a dessert; it’s a refreshing reminder of those carefree moments. With its easy preparation, this delightful cheesecake is perfect for warm weather when you want something light and hassle-free. It melds the rich creaminess of cheesecake with the zesty brightness of orange, making it a true crowd-pleaser. Plus, you’ll find it’s a fantastic no-bake option that cuts down on kitchen time while still wowing your guests. Curious to see how such a nostalgic dessert can come together in just a few simple steps? Let’s dive in!
Why is this Cheesecake a Must-Try?
Refreshing, Nostalgic Twist: This No-Bake Orange Creamsicle Cheesecake captures childhood memories while being a delightful treat for adults and kids alike.
Quick and Easy: With simple ingredients and just a few steps, you can whip up this cheesecake in no time—perfect for busy summer days!
No Baking Required: Ideal for those who want a delicious dessert without the heat of the oven; it’s the ultimate hassle-free recipe.
Crowd-Pleasing Flavor: Guests can’t resist its creamy texture and zesty orange flavor, making it the star of any gathering!
Versatile Serving Options: Serve it in individual cups for a fun twist, or opt for the classic slice presentation. Either way, it’s sure to impress!
Check out my Sugar Cookie Cheesecake for another crowd-pleaser!
No-Bake Orange Creamsicle Cheesecake Ingredients
• You won’t believe how easy it is!
For the Crust
- Graham Cracker Crumbs – Creates a crunchy base; about 14 sheets yield 2 cups.
- Unsalted Butter – Binds the crust together and adds richness; melted for easy mixing.
- Salt – A pinch enhances the flavor of the crust.
For the Filling
- Cream Cheese – Main ingredient for that creamy texture; ensure it’s softened for easy blending; Greek yogurt can be used for a lighter version.
- Powdered Sugar – Divided into two portions to sweeten the filling at different stages.
- Orange Jello – Provides vibrant color and flavor; be sure it’s fully dissolved in boiling water.
- Boiling Water – Activates the flavor of the jello, giving the cheesecake that refreshing zing.
- Heavy Whipping Cream – Whipped into soft peaks, it adds a light, fluffy texture to the filling.
- Vanilla Extract – Optional but recommended for depth of flavor.
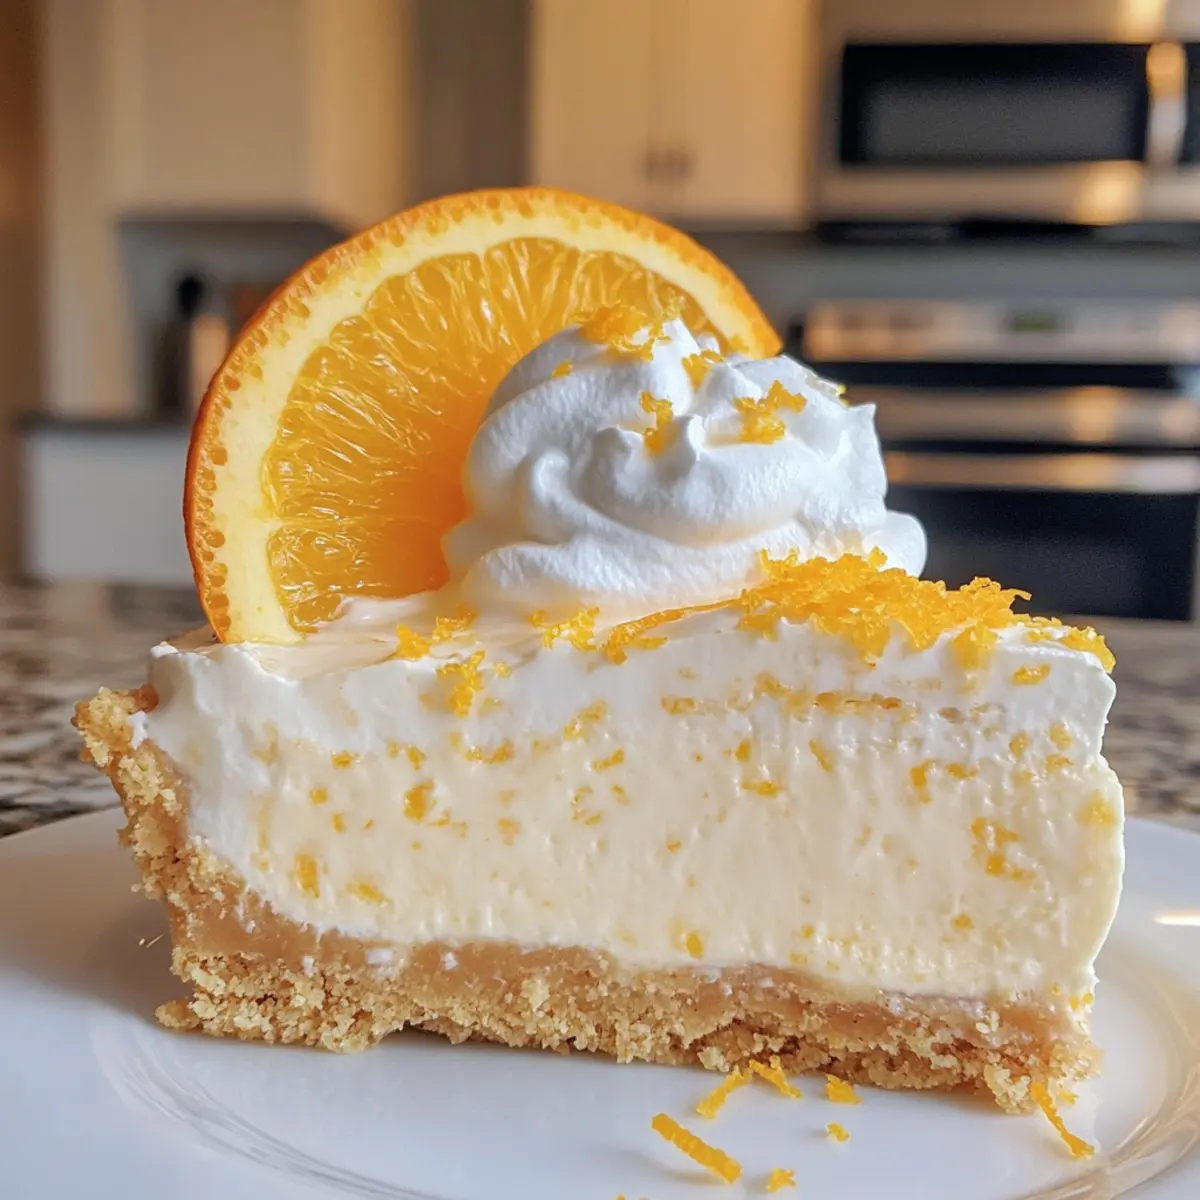
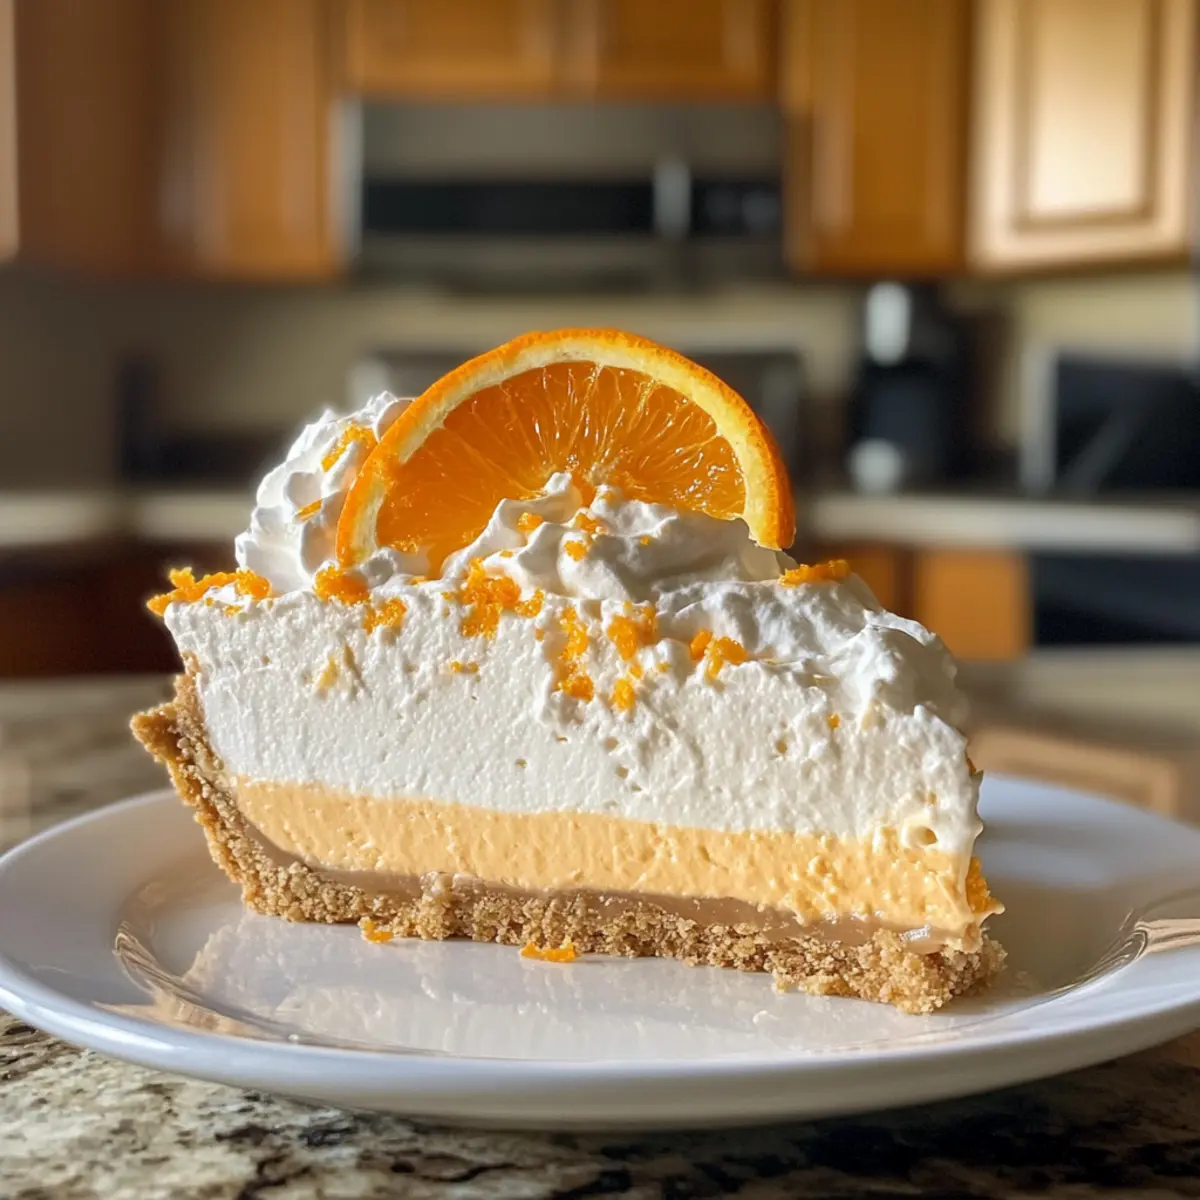
- Zest of 1 Orange – Freshens the citrus flavor; optional but a lovely touch to the cheesecake!
This No-Bake Orange Creamsicle Cheesecake is not only a fantastic dessert but also a joyful way to connect with sweet summer memories!
Step‑by‑Step Instructions for No-Bake Orange Creamsicle Cheesecake
Step 1: Prepare the Crust
In a medium bowl, mix together 2 cups of graham cracker crumbs, ½ cup of melted unsalted butter, and a pinch of salt until it resembles wet sand. Using the bottom of a measuring cup, firmly press the mixture into the bottom of a 9-inch springform pan, ensuring an even layer. Place the crust in the refrigerator to chill for at least 15 minutes while you prepare the filling.
Step 2: Make the Jello
Boil 1 cup of water in a small pot and then add one package of orange jello, stirring until it completely dissolves. Remove from heat and allow the mixture to cool slightly, about 10 minutes. This step is crucial to avoid adding hot jello to the cream cheese mixture, which could affect the texture of your No-Bake Orange Creamsicle Cheesecake.
Step 3: Mix the Filling
In a large mixing bowl, beat 16 ounces of softened cream cheese with 1 cup of powdered sugar using an electric mixer on medium speed until smooth and creamy, about 2 minutes. Gradually pour in the cooled jello mixture along with 1 teaspoon of vanilla extract, continuing to mix until fully incorporated. Optional: add the zest of 1 orange for an extra burst of flavor.
Step 4: Whip the Cream
In another mixing bowl, pour 1 cup of heavy whipping cream and add the remaining ½ cup of powdered sugar. Beat with an electric mixer on high speed until soft peaks form, which typically takes about 4-5 minutes. Be careful not to over-whip the cream, as you want it to remain light and fluffy for the cheesecake mixture.
Step 5: Combine Mixtures
Gently fold the whipped cream into the cream cheese and jello mixture using a spatula. This step requires a gentle touch to maintain the lightness of the whipped cream, creating a creamy and luscious filling for the No-Bake Orange Creamsicle Cheesecake. Ensure that no streaks remain, and the mixture is uniform and well-combined.
Step 6: Assemble the Cheesecake
Carefully pour the creamy filling over the chilled crust in the springform pan, using a spatula to spread it evenly. Once the filling is smooth on top, cover the cheesecake with plastic wrap and place it in the refrigerator. Allow it to set for at least 4 hours, or preferably overnight, for the best texture and flavor.
Step 7: Serve
Once set, remove the No-Bake Orange Creamsicle Cheesecake from the springform pan. Slice it into wedges and serve chilled, optionally garnishing with whipped cream and additional orange zest for a decorative touch. This delightful cheesecake is sure to bring a smile to everyone at your gathering!
How to Store and Freeze No-Bake Orange Creamsicle Cheesecake
- Fridge: Store covered in the refrigerator for up to 3-5 days. Use an airtight container or wrap tightly to keep it fresh and prevent it from absorbing odors.
- Freezer: Individual slices can be wrapped in plastic wrap and aluminum foil, then frozen for up to 2 months. Thaw in the fridge overnight before serving for the best texture.
- Reheating: This cheesecake is served chilled, so simply slice and enjoy straight from the fridge. No need for reheating; it’s perfect as is!
- Separate Components: For optimal freshness, consider making the crust and filling separately, refrigerating them, and assembling just before serving. This keeps the crust crispy and the filling fresh.
No-Bake Orange Creamsicle Cheesecake Variations
Feel free to have fun and customize this delightful cheesecake with these fresh twists tailored to your taste!
-
Greek Yogurt: Swap out cream cheese for Greek yogurt for a tangy and lighter version. It’s a delicious way to add a healthy flair!
-
Gluten-Free Crust: Use gluten-free graham cracker crumbs to create a crust that everyone can enjoy. You’ll still have that wonderful crunch without the gluten!
-
Extra Zest: Elevate the orange flavor by adding more zest to the filling. This small change packs a fruity punch that brightens each bite!
-
Layer of Orange Fluff: Consider mixing a layer of whipped topping and orange zest to create an orange fluff layer beneath the cheesecake. It adds delightful texture and an unexpected surprise.
-
Citrus Medley: Blend in some lemon or lime zest for a citrus medley explosion. The combination will enhance the flavor profile and bring an exciting twist.
-
Chocolate Drizzle: Drizzle melted chocolate over the cheesecake before serving. It adds a decadent touch and makes it a showstopper for the dessert table.
-
Tropical Flavor: For a fun tropical twist, mix in crushed pineapple to the filling. This combination transports you straight to a sunny beach!
-
Cinnamon Spice: Add a sprinkle of cinnamon on top or in the crust for a warm, spicy contrast to the creamy filling. It’s a wonderful way to introduce a comforting note to this refreshing treat.
For more delicious inspiration, try my Caramel Brownie Cheesecake for a rich twist on dessert!
Expert Tips for No-Bake Orange Creamsicle Cheesecake
- Room Temperature Cheese: Ensure your cream cheese is at room temperature before mixing to achieve a smooth, lump-free filling that’s perfect for your No-Bake Orange Creamsicle Cheesecake.
- Gentle Whipping: Whip the cream to soft peaks without overdoing it, as over-whipped cream can make the filling grainy. You want that delightful fluffy texture!
- Cool Jello: Allow your dissolved jello to cool before adding it to the cream mixture; this helps maintain the integrity of your filling and prevents melting the cheese.
- Chill Time: For the best flavor and texture, let the cheesecake chill overnight. Waiting just a little longer enhances the refreshing citrus flavor.
- Proper Storage: Store any leftovers covered in the refrigerator for 3-5 days. This ensures optimal freshness for your delicious No-Bake Orange Creamsicle Cheesecake.
What to Serve with No-Bake Orange Creamsicle Cheesecake
Imagine a sunlit picnic or a lively gathering around your dining table as you complement this delightful dessert with simple yet divine pairings.
- Fresh Berries: Bursting with flavor and freshness, strawberries, blueberries, or raspberries offer a perfect contrast to the creamy cheesecake.
- Whipped Cream: A dollop of lightly sweetened whipped cream adds an airy touch, enhancing the cheesecake’s lusciousness while maintaining a light profile.
- Mint Leaves: A few sprigs of mint not only add a pop of color but also a refreshing aroma that beautifully rounds out the dessert experience.
For the warmer months, consider serving your cheesecake chilled with a fruity twist on the side. Fresh fruit salad drizzled with honey can create a delightful balance and tickle the taste buds!
- Iced Tea or Lemonade: A glass of refreshing iced tea or lemonade complements the bright citrus notes of the cheesecake and keeps everyone cool and hydrated.
- Chocolate Drizzle: A light drizzle of chocolate sauce can add a rich contrast, creating a sumptuous contrast with the orange flavors.
By mixing these vibrant elements together, you’ll create a memorable affair that goes hand in hand with the nostalgic vibes of your No-Bake Orange Creamsicle Cheesecake!
Make Ahead Options
This No-Bake Orange Creamsicle Cheesecake is the perfect solution for busy home cooks looking to save time! You can prepare the crust up to 24 hours in advance—just press the graham cracker mixture into your springform pan and refrigerate. Additionally, you may mix the cheesecake filling a day ahead and store it separately in the refrigerator to maintain its fluffy texture. When you’re ready to serve, simply pour the filling over the chilled crust, smooth the top, and let it set in the fridge for a minimum of 4 hours or ideally overnight for optimal flavor. This way, you can create a delicious dessert with minimal last-minute effort, ensuring that your No-Bake Orange Creamsicle Cheesecake is just as delightful as ever!
No-Bake Orange Creamsicle Cheesecake Recipe FAQs
What type of oranges should I use for zest?
Absolutely! For zest, I recommend using fresh navel oranges as they are sweet and juicy, giving a delightful flavor to your cheesecake. Ensure the oranges are ripe, with vibrant skin and a pleasant aroma. If you can’t find fresh oranges, you can use organic orange zest from a jar, but fresh is always best for that vibrant taste!
How should I store any leftover cheesecake?
Very simple! Once you’ve enjoyed your No-Bake Orange Creamsicle Cheesecake, cover it with plastic wrap or transfer it to an airtight container. Store it in the refrigerator for up to 3 to 5 days. Just make sure it’s tightly sealed to prevent drying out or absorbing any odors from other foods.
Can I freeze No-Bake Orange Creamsicle Cheesecake?
Absolutely! If you want to make it ahead, slice it into individual portions and wrap each slice in plastic wrap, then pop them into an airtight container or freezer bag. This will keep it fresh for up to 2 months. When you’re ready to enjoy it again, simply thaw in the refrigerator overnight for the best texture.
What should I do if my filling is too runny?
If your filling turns out runny, it may be due to not letting the jello cool enough before mixing or over-folding the whipped cream. Don’t worry! Try refrigerating the cheesecake for a bit longer—sometimes it just needs extra chill time to firm up. If it’s still too soft after a few hours, consider whipping up more heavy cream and gently folding it in to add stability.
Is this cheesecake suitable for those with dietary restrictions?
Yes! You can easily modify this No-Bake Orange Creamsicle Cheesecake to suit various dietary needs. For a gluten-free version, use gluten-free graham cracker crumbs. If you need a lower-fat option, swap cream cheese for Greek yogurt; it’ll still taste creamy but with fewer calories. Remember to check for allergies with all ingredients, especially with powdered sugars and jellos; some may contain unlisted allergens.
How long does it take for the cheesecake to set?
Typically, your No-Bake Orange Creamsicle Cheesecake should set for at least 4 hours in the fridge. For the best results, I often recommend letting it chill overnight. This extra time allows the flavors to meld and the filling to firm up beautifully, ensuring that each slice maintains its shape when served!
No-Bake Orange Creamsicle Cheesecake That Melts in Your Mouth
Ingredients
Equipment
Method
- In a medium bowl, mix together graham cracker crumbs, melted butter, and salt until it resembles wet sand. Press into the bottom of a 9-inch springform pan and chill for at least 15 minutes.
- Boil water and add orange jello. Stir until fully dissolved. Allow to cool slightly.
- In a large mixing bowl, beat softened cream cheese with powdered sugar until smooth. Gradually mix in cooled jello mixture and vanilla extract.
- In another bowl, whip heavy cream with remaining powdered sugar until soft peaks form.
- Gently fold whipped cream into cream cheese mixture until combined.
- Pour the filling over the chilled crust and spread evenly. Cover with plastic wrap and refrigerate for at least 4 hours.
- Once set, remove from pan, slice, and serve chilled.