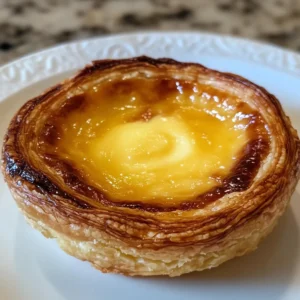
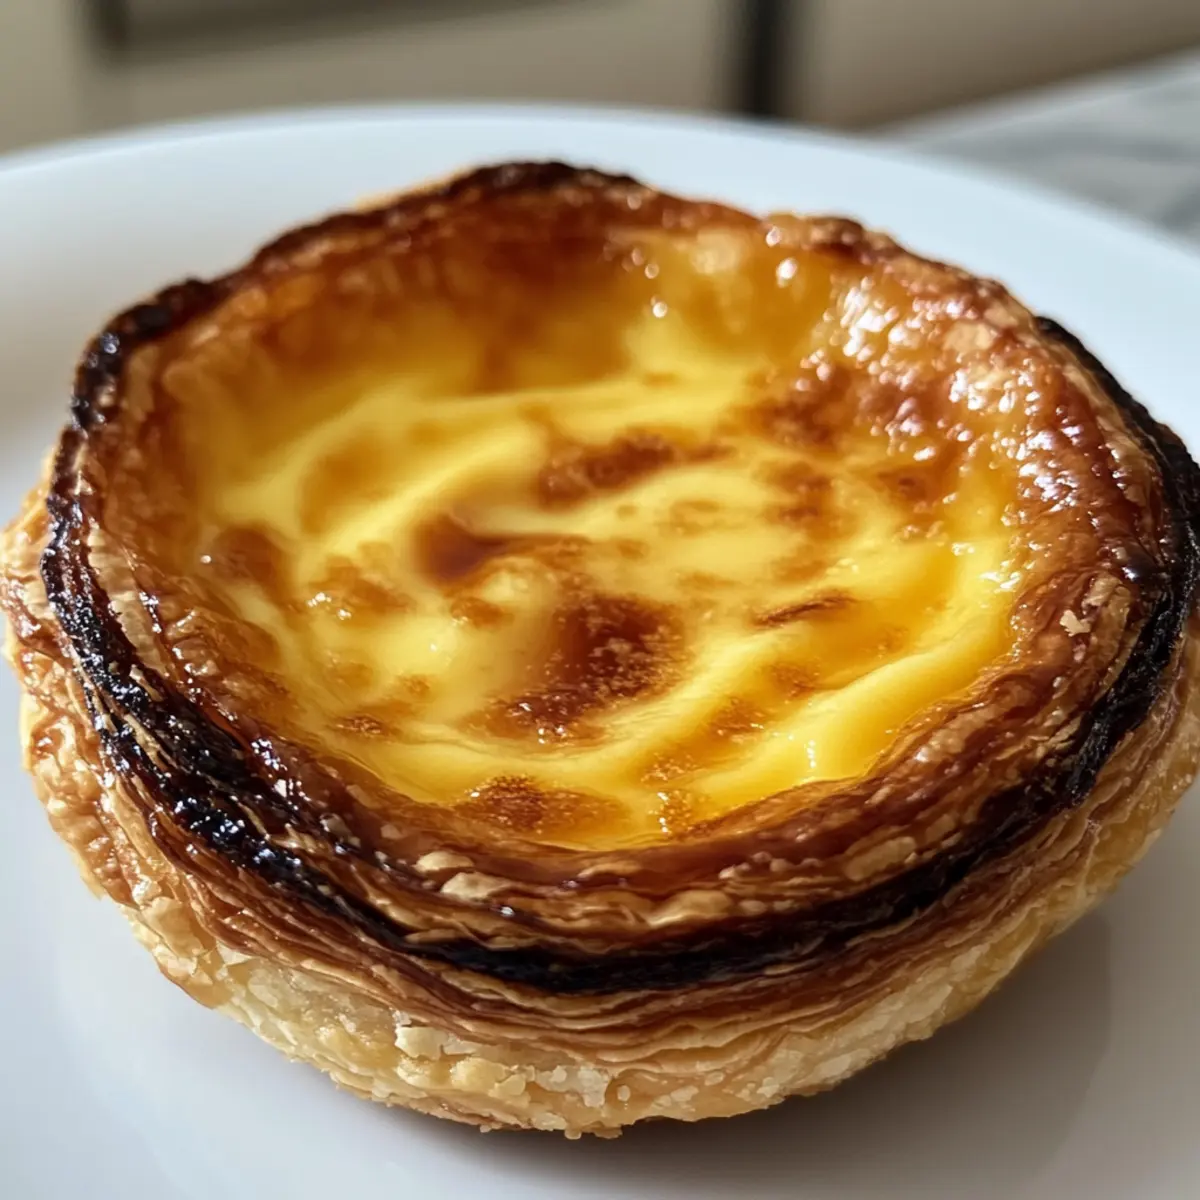
As I stood in my kitchen, the warm scent of cinnamon wafting through the air, I was transported to a bustling café in Lisbon, where the vibrant atmosphere buzzes with laughter and the sweet allure of freshly baked goods. This is the magic of making Pastel de Nata, the authentic Portuguese custard tarts that capture hearts and taste buds alike. With a golden, flaky puff pastry enveloping a creamy custard and delicately caramelized top, these tarts are not just a treat but a delightful experience. What I love about this recipe is how simple it is—perfect for quick prep and an absolute crowd-pleaser. Plus, they can be enjoyed at any time of the day, whether as a breakfast indulgence or a sweet snack. Curious about how to bring this little piece of Portugal into your home? Let’s get started!
Why is Pastel de Nata a must-try?
Irresistible Delight: The Pastel de Nata boasts an enchanting blend of flaky pastry and a creamy custard that simply melts in your mouth.
Quick & Easy: With a straightforward process that any home cook can master, you’ll whip up these delightful tarts in no time!
Versatile Treat: Perfect for breakfast, dessert, or an afternoon snack, these tarts seamlessly fit into any occasion.
Crowd Pleaser: Bring everyone together with this beloved Portuguese delight, sure to impress friends and family alike.
Cultural Connection: Enjoy a taste of Portugal right at home; it’s like taking a mini-vacation with every bite. Whether you’re hosting a brunch or looking to transform dessert time, these tarts deliver!
Pastel de Nata Ingredients
Curiosity-Boosting Tip: Gather these simple ingredients for an unforgettable Pastel de Nata experience!
For the Pastry Shells
- All-butter puff pastry – Provides a flaky and buttery structure for the tart shells; substitute with regular puff pastry if needed.
For the Custard Filling
- Whole milk – Adds creaminess; can be replaced with non-dairy milk, though it may alter flavor and texture.
- Granulated sugar – Sweetens the custard and aids in caramelization during baking; alternatives may affect texture.
- Water – Needed to dissolve the sugar for the syrup; no substitutes necessary.
- Cinnamon stick – Infuses warm spice notes; can be replaced with ground cinnamon if on hand.
- Lemon peel – Adds citrus brightness to the custard; substitute with orange peel or omit if desired.
- All-purpose flour – Thickens the custard mixture; gluten-free flour can work as a substitute with adjustments.
- Large egg yolks – Provide richness and stability; egg substitutes can be considered for a vegan twist.
- Vanilla extract – Enhances flavor depth; could swap with almond extract for a different experience.
Feel free to dive into this delectable world of Pastel de Nata—you won’t regret it!
Step‑by‑Step Instructions for Pastel de Nata
Step 1: Prepare the Syrup
In a medium saucepan, combine granulated sugar, water, a cinnamon stick, and a strip of lemon peel. Bring the mixture to a simmer over medium heat, stirring until the sugar is completely dissolved, about 5 minutes. Once dissolved, remove the pan from the heat and let the syrup infuse for an additional 10 minutes, allowing the flavors to meld beautifully.
Step 2: Make the Custard Base
In a separate bowl, whisk together a bit of all-purpose flour with a splash of the whole milk until smooth to form a paste. In a saucepan, heat the remaining milk over medium heat until hot but not boiling. Gradually stir the flour mixture into the warm milk, cooking while whisking consistently until thickened, about 5-7 minutes, then remove from heat. Combine this thick custard base with the infused syrup while whisking gently, and allow it to cool.
Step 3: Temper the Eggs
In a bowl, whisk together the large egg yolks and vanilla extract until combined. To prevent the eggs from cooking, gradually pour the warm custard mixture into the yolks while whisking continuously. This step is crucial for achieving a creamy custard in your Pastel de Nata. Once fully combined, strain the mixture through a fine-mesh sieve into a pitcher to ensure a silky texture, and set aside.
Step 4: Prepare the Pastry Shells
Preheat your oven to a blazing 550°F (290°C) to achieve those perfectly crispy tarts. Take your all-butter puff pastry and roll it out into a log about 1½ inches in diameter. Cut the log into 12 equal pieces, and then shape each piece into a round disk. Press each disk into the wells of a greased muffin tin, creating a tall edge to hold the custard.
Step 5: Bake the Tarts
Fill each pastry shell with the cooled custard mixture, filling almost to the top but avoiding overflow. Carefully place the muffin tin on the upper rack of your preheated oven. Bake the Pastel de Nata for 12-17 minutes, or until the custard is bubbling and the tops are beautifully dark caramelized. Keep an eye on them as they bake to achieve the perfect golden color.
Step 6: Cool and Serve
Once baked, carefully remove the tarts from the oven and allow them to cool slightly in the muffin tin for about 5 minutes. Then, gently transfer the Pastel de Nata to a wire rack to cool completely. They are best enjoyed warm, possibly dusted with powdered sugar and cinnamon. Enjoy your homemade taste of Portugal!

Make Ahead Options
These Pastel de Nata are perfect for busy home cooks looking to save time while still enjoying delicious homemade treats! You can prepare the custard mixture up to 24 hours in advance; store it in the refrigerator in an airtight container to maintain its creamy texture. Additionally, you can shape the puff pastry shells and keep them in the fridge for up to 3 days. When you’re ready to bake, simply fill the pastry shells with the chilled custard and pop them in a preheated oven for about 12-17 minutes until they reach that beautiful golden-brown finish. This way, you’ll have fresh, delightful tarts ready to enjoy with minimal effort!
Expert Tips for Pastel de Nata
-
Keep It Cold: Handle puff pastry minimally and keep it chilled to ensure a flaky texture. Warm pastry can become gummy and lose its crispy qualities.
-
Hot Oven Essential: Bake at a high temperature (550°F/290°C) to achieve the characteristic caramelized top. Position your muffin tin on the upper rack for optimal results.
-
Strain Custard Mixture: Never skip straining the custard after combining it with the egg yolks. This step guarantees a smooth and silky texture, free from any lumps.
-
Watch Baking Time: Pay attention to your tarts while they bake! Baking for too long can lead to overly dark tops or dry custard. Aim for a golden brown finish.
-
Flavor Variations: Feel free to experiment by adding spices like nutmeg or cardamom to the custard for a unique twist on the classic Pastel de Nata.
What to Serve with Authentic Pastel de Nata
There’s something magical about pairing these charming tarts with delightful accompaniments that elevate your experience.
- Espresso: The boldness of a rich espresso perfectly complements the sweetness of the Pastel de Nata, enhancing the overall flavor experience.
- Fresh Berries: A medley of ripe strawberries, blueberries, or raspberries provides a refreshing contrast to the creamy custard, adding brightness to every bite.
- Cinnamon Sugar Dusting: A light sprinkle of cinnamon sugar on top not only looks enticing but also brings a warm spice that harmonizes beautifully with the tart’s flavors.
- Whipped Cream: A dollop of lightly sweetened whipped cream adds a soft, airy texture that balances the richness of the custard. It’s simply indulgent!
- Mint Tea: For a soothing pairing, serve with a cup of mint tea. Its refreshing notes cleanse your palate, making each Pastel de Nata feel like a new adventure.
- Chocolate Sauce: Drizzling a bit of warm chocolate sauce over the tarts creates a delightful fusion of flavors, perfect for those with a sweet tooth craving.
- Roasted Nuts: A handful of roasted almonds or hazelnuts provides a satisfying crunch and a nutty depth that lifts your dessert experience.
- Fruit Salad: A light, colorful fruit salad adds a vibrant and healthy contrast to the richness of the tart, creating a balanced indulgent treat.
- Port Wine: A glass of sweet port wine enhances the luxurious experience, bringing out the richness of the custard while adding a hint of warmth to your meal.
Pastel de Nata Variations & Substitutions
Feel free to explore different flavor profiles and ingredient swaps to make this Pastel de Nata uniquely yours!
-
Dairy-Free: Use almond or oat milk instead of whole milk for a creamy version, making this treat accessible for those avoiding dairy.
-
Sweetener Swap: Try using honey or maple syrup in place of granulated sugar for a more natural sweetness; just remember to adjust the liquid ratio if needed.
-
Spice It Up: Add a pinch of nutmeg or cardamom to the custard for a warming twist that dances on your palate, perfect for chilly days.
-
Gluten-Free: Substitute all-purpose flour with a gluten-free blend, ensuring you can enjoy this classic treat if you’re sensitive to gluten.
-
Citrus Twist: Switch the lemon peel for orange or lime peel to brighten up the custard with a different zest, adding a refreshing flavor dimension.
-
Chocolate Lovers: Incorporate a tablespoon of cocoa powder into the custard mixture for a luscious chocolatey version that sweethearts will adore.
-
Nutty Finish: Sprinkle crushed pistachios or almonds on top before baking for an added crunch and a touch of nuttiness to complement the custard.
-
Extra Caramelization: For a richer flavor, sprinkle a little extra sugar on top of the custard before baking to create a more delectable caramel crust.
With these variations, you can tailor your Pastel de Nata to suit any occasion or taste, making it a truly personal and delightful dessert! If you’re interested, you might also enjoy serving these tarts alongside a hot cup of Portuguese coffee for a quintessential treat!
Storage Tips for Pastel de Nata
-
Room Temperature: Pastel de Nata can be stored in an airtight container at room temperature for up to 2 days. This helps maintain the pastry’s delightful crispiness.
-
Fridge: If you need to keep them longer, place the tarts in the fridge, but note they may lose some crispness and should be consumed within 3 days.
-
Freezer: For extended storage, freeze your Pastel de Nata individually wrapped in plastic wrap and then placed in an airtight container for up to 2 months.
-
Reheating: To reheat, simply pop the tarts in a preheated oven at 350°F (175°C) for about 10 minutes to restore their flaky quality and warm custard, enjoying the best of your Pastel de Nata again!

Pastel de Nata Recipe FAQs
How do I select the best puff pastry for Pastel de Nata?
Absolutely! Always go for an all-butter puff pastry for the richest flavor and flakiest texture. When choosing, check the packaging for high butter content, and avoid any with added preservatives. If you can’t find all-butter, regular puff pastry will work as a substitute, but it may not provide the same deliciously flaky result.
What’s the best storage method for Pastel de Nata?
I often recommend storing Pastel de Nata in an airtight container at room temperature for up to 2 days. This keeps the pastry crisp. If you need to store them longer, you can refrigerate them for up to 3 days, but be aware that the texture will change slightly, becoming less crispy.
Can I freeze Pastel de Nata?
Absolutely! To freeze, wrap each tart individually in plastic wrap and place them in a freezer-safe airtight container. They can be frozen for up to 2 months. When you’re ready to enjoy them, thaw in the fridge overnight, then reheat in a preheated oven at 350°F (175°C) for about 10 minutes to restore their delightful texture.
What if my custard is lumpy after cooking?
If you find your custard lumpy, don’t worry! First, ensure you strain the mixture through a fine-mesh sieve after combining it with the egg yolks. This extra step is crucial for a smooth texture. If you still encounter lumps, try blending it gently with an immersion blender, being careful not to overheat it, to ensure it remains creamy.
Are there any common allergies related to Pastel de Nata?
Very! Given that the pastry contains gluten and dairy, individuals allergic to these ingredients should opt for gluten-free flour in the custard and use a non-dairy milk alternative for the recipe. Avoiding egg yolks may be challenging as they add essential richness, but you could explore egg substitutes designed for custards if desired.
Can pets eat Pastel de Nata?
No, it’s best to keep Pastel de Nata away from pets. The high sugar and dairy content can upset their stomachs, leading to potential health issues. Enjoy these treats yourself, and maybe share with your furry friend a pet-safe snack instead!

Delicious Pastel de Nata: A Taste of Portugal at Home
Ingredients
Equipment
Method
- Prepare the syrup by combining granulated sugar, water, a cinnamon stick, and a strip of lemon peel in a medium saucepan. Bring to a simmer over medium heat, stirring until dissolved, about 5 minutes. Remove from heat and let infuse for 10 minutes.
- Make the custard base by whisking a bit of flour with a splash of milk until smooth. Heat the remaining milk in a saucepan until hot but not boiling. Gradually stir in the flour mixture, cooking while whisking until thickened, about 5-7 minutes. Remove from heat and combine with the infused syrup, allowing to cool.
- Temper the eggs by whisking together the yolks and vanilla extract. Gradually pour the warm custard mixture into the yolks while whisking continuously to prevent cooking. Strain through a fine-mesh sieve into a pitcher.
- Prepare the pastry shells by preheating the oven to 550°F (290°C). Roll out the puff pastry into a log, cut into 12 pieces, and shape into round disks. Press each disk into a greased muffin tin.
- Bake the tarts by filling each shell with the cooled custard, filling almost to the top. Place the muffin tin on the upper rack of the oven and bake for 12-17 minutes until bubbling and dark caramelized.
- Cool and serve by allowing the tarts to cool in the muffin tin for about 5 minutes before transferring to a wire rack. Best enjoyed warm, optionally dusted with powdered sugar and cinnamon.