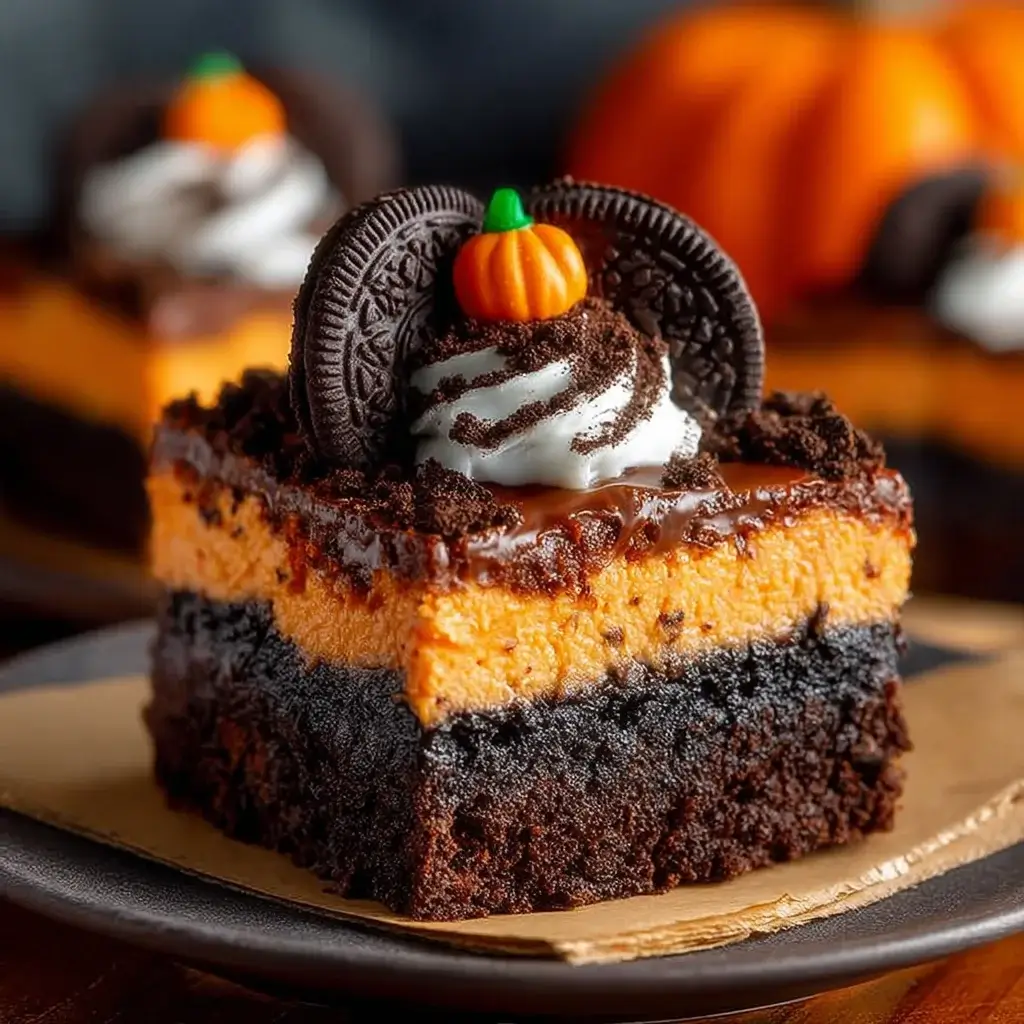
Introduction to Oreo Layered Halloween Brownies
As the leaves turn and the air gets crisp, I can’t help but think of Halloween treats. Oreo Layered Halloween Brownies are my go-to for this festive season. They’re not just delicious; they’re a delightful way to bring a little spooky fun to your gatherings. Whether you’re hosting a party or just want to impress your family, these brownies are a quick solution that requires minimal effort but delivers maximum flavor. Trust me, the combination of rich brownie, creamy filling, and crunchy Oreos will have everyone coming back for seconds. Let’s dive into this sweet adventure!
Why You’ll Love This Oreo Layered Halloween Brownies
These Oreo Layered Halloween Brownies are a game-changer for any dessert lover. They’re incredibly easy to whip up, making them perfect for busy weeknights or last-minute gatherings. The rich chocolate flavor pairs beautifully with the creamy, tangy filling, creating a taste sensation that’s hard to resist. Plus, the festive sprinkles and marshmallows add a fun touch that will delight both kids and adults alike. You’ll be the star of any Halloween celebration!
Ingredients for Oreo Layered Halloween Brownies
Gathering the right ingredients is the first step to creating these delightful Oreo Layered Halloween Brownies. Here’s what you’ll need:
- Unsalted butter: This adds richness and moisture to the brownies.
- Granulated sugar: Sweetens the batter and helps create that perfect chewy texture.
- Vanilla extract: A splash of this enhances the overall flavor, making it more aromatic.
- Large eggs: They bind the ingredients together and provide structure.
- All-purpose flour: This is the base for your brownies, giving them body.
- Unsweetened cocoa powder: For that deep chocolate flavor that makes brownies irresistible.
- Baking powder: A leavening agent that helps the brownies rise slightly.
- Salt: Just a pinch enhances the sweetness and balances flavors.
- Crushed Oreo cookies: These add a delightful crunch and a burst of flavor.
- Mini marshmallows: They create a gooey, fun texture on top of the brownies.
- Halloween-themed sprinkles: These add a festive touch, perfect for the spooky season.
- Cream cheese: This provides a creamy layer that contrasts beautifully with the brownies.
- Powdered sugar: Sweetens the cream cheese layer, making it smooth and delicious.
For exact measurements, check the bottom of the article where you can find everything listed for easy printing. Feel free to get creative! You can swap out the Oreos for any sandwich cookie you love, or even add a layer of chocolate ganache for an extra indulgent treat.
How to Make Oreo Layered Halloween Brownies
Now that you have your ingredients ready, let’s get to the fun part—making these Oreo Layered Halloween Brownies! Follow these simple steps, and you’ll have a spooky treat that’s sure to impress.
Step 1: Preheat and Prepare
First things first, preheat your oven to 350°F (175°C). This ensures your brownies bake evenly. While the oven warms up, grease a 9×13-inch baking pan. You can use butter or non-stick spray. This step is crucial; it prevents your brownies from sticking and makes cleanup a breeze.
Step 2: Mix the Wet Ingredients
In a large mixing bowl, combine the melted butter, granulated sugar, and vanilla extract. Stir until everything is well blended. Then, add the eggs one at a time, mixing thoroughly after each addition. This helps create a smooth batter that’s rich and delicious.
Step 3: Combine Dry Ingredients
In a separate bowl, whisk together the all-purpose flour, cocoa powder, baking powder, and salt. This step is essential for evenly distributing the dry ingredients. It also helps to avoid any clumps of cocoa powder in your brownies, ensuring a rich chocolate flavor throughout.
Step 4: Combine Wet and Dry Mixtures
Gradually add the dry ingredients to the wet mixture. Stir gently until just combined; overmixing can lead to dense brownies. Now, fold in the crushed Oreo cookies. This is where the magic happens! The Oreos will add a delightful crunch and flavor to your brownies.
Step 5: Layer the Brownie Batter
Pour half of the brownie batter into the prepared baking pan. Spread it evenly across the bottom. Next, prepare the cream cheese layer. In another bowl, beat together the softened cream cheese, powdered sugar, and vanilla extract until smooth. Spread this creamy mixture over the brownie layer in the pan.
Step 6: Add the Final Layer
Now, pour the remaining brownie batter on top of the cream cheese layer. Gently spread it to cover the cream cheese completely. This creates a beautiful layered effect that will be a showstopper when you cut into the brownies.
Step 7: Top with Marshmallows and Sprinkles
To make these brownies even more festive, sprinkle mini marshmallows and Halloween-themed sprinkles on top. This adds a fun, colorful touch that’s perfect for the spooky season. Plus, who doesn’t love a little extra sweetness?
Step 8: Bake and Cool
Finally, bake your brownies in the preheated oven for 30-35 minutes. Keep an eye on them! You want a toothpick inserted into the center to come out with a few moist crumbs. Once baked, allow the brownies to cool in the pan for at least 30 minutes. For the best texture, chill them in the refrigerator for an hour before cutting into squares.
Tips for Success
- Use room temperature ingredients for a smoother batter.
- Don’t overmix the batter; it can lead to dense brownies.
- For a fudgier texture, slightly underbake the brownies.
- Let the brownies cool completely before cutting for clean edges.
- Experiment with different cookie flavors for a unique twist!
Equipment Needed
- 9×13-inch baking pan: A standard size for brownies; you can use a glass or metal pan.
- Mixing bowls: A set of various sizes will help with mixing wet and dry ingredients.
- Whisk: Perfect for combining dry ingredients; a fork works in a pinch.
- Spatula: Great for spreading batter evenly; a wooden spoon can also do the job.
- Measuring cups and spoons: Essential for accurate ingredient measurements.
Variations
- For a gluten-free option, substitute all-purpose flour with a gluten-free flour blend.
- Add a layer of peanut butter or Nutella for a rich, nutty flavor that pairs well with chocolate.
- Incorporate crushed candy corn or pumpkin spice for a seasonal twist that enhances the Halloween theme.
- Use flavored cream cheese, like pumpkin or chocolate, to add an extra layer of taste.
- For a dairy-free version, swap out the butter and cream cheese for plant-based alternatives.
Serving Suggestions
- Pair these brownies with a scoop of vanilla ice cream for a delightful contrast.
- Serve with a glass of cold milk or a warm cup of coffee to enhance the chocolate flavor.
- For a spooky touch, plate them on a Halloween-themed platter.
- Garnish with extra crushed Oreos or a drizzle of chocolate sauce for added flair.
FAQs about Oreo Layered Halloween Brownies
Can I make these brownies ahead of time?
Absolutely! You can prepare the Oreo Layered Halloween Brownies a day in advance. Just store them in an airtight container in the refrigerator. This allows the flavors to meld beautifully, making them even more delicious!
What can I substitute for Oreos?
If you’re not a fan of Oreos, feel free to use any sandwich cookie you like. Chocolate or vanilla cream-filled cookies work wonderfully, adding a unique twist to your brownies.
How do I store leftover brownies?
To keep your brownies fresh, store them in an airtight container at room temperature for up to three days. If you want to keep them longer, refrigerate them for up to a week.
Can I freeze these brownies?
Yes! These brownies freeze well. Just wrap them tightly in plastic wrap and place them in a freezer-safe container. They can last up to three months in the freezer. Thaw them in the fridge before serving.
What’s the best way to cut brownies for clean edges?
For clean cuts, use a sharp knife and wipe it with a damp cloth between cuts. This prevents the brownie edges from sticking to the knife, giving you those perfect squares!
Final Thoughts
Creating these Oreo Layered Halloween Brownies is more than just baking; it’s about crafting memories. The joy of mixing, layering, and finally indulging in these rich, chocolatey treats brings a sense of accomplishment. Each bite is a celebration of flavors, from the creamy filling to the crunchy Oreos. Whether you’re sharing them at a Halloween party or enjoying them with family, these brownies are sure to spark smiles and laughter. So, roll up your sleeves, embrace the spirit of the season, and let these delightful brownies be the highlight of your Halloween festivities!
PrintOreo Layered Halloween Brownies: A Spooky Delight!
- Total Time: 55 minutes
- Yield: 12 servings
- Diet: Vegetarian
Description
Oreo Layered Halloween Brownies are a delicious and festive treat perfect for Halloween celebrations, featuring layers of rich brownie, cream cheese, and crushed Oreo cookies.
Ingredients
- 1 cup unsalted butter, melted
- 1 ½ cups granulated sugar
- 1 teaspoon vanilla extract
- 4 large eggs
- 1 cup all-purpose flour
- 1 cup unsweetened cocoa powder
- ½ teaspoon baking powder
- ½ teaspoon salt
- 1 cup crushed Oreo cookies (about 10 cookies)
- 1 cup mini marshmallows
- ½ cup Halloween-themed sprinkles
- 8 ounces cream cheese, softened
- ½ cup powdered sugar
- 1 teaspoon vanilla extract
Instructions
- Preheat the oven to 350°F (175°C). Grease a 9×13-inch baking pan.
- In a large mixing bowl, combine the melted butter, granulated sugar, and vanilla extract. Mix until well combined.
- Add the eggs one at a time, mixing well after each addition.
- In a separate bowl, whisk together the flour, cocoa powder, baking powder, and salt.
- Gradually add the dry ingredients to the wet mixture, stirring until just combined. Fold in the crushed Oreo cookies.
- Pour half of the brownie batter into the prepared baking pan and spread it evenly.
- In another bowl, beat together the softened cream cheese, powdered sugar, and vanilla extract until smooth. Spread the cream cheese mixture over the brownie layer in the pan.
- Pour the remaining brownie batter on top and gently spread it to cover the cream cheese layer.
- Sprinkle mini marshmallows and Halloween-themed sprinkles over the top of the brownies.
- Bake in the preheated oven for 30-35 minutes, or until a toothpick inserted into the center comes out with a few moist crumbs.
- Allow the brownies to cool in the pan for at least 30 minutes before cutting into squares. For best results, chill in the refrigerator for an hour before serving.
Notes
- For a richer flavor, consider adding a layer of chocolate ganache on top after the brownies have cooled.
- You can substitute the Oreo cookies with any other sandwich cookie for a different taste.
- Prep Time: 20 minutes
- Cook Time: 35 minutes
- Category: Dessert
- Method: Baking
- Cuisine: American
Nutrition
- Serving Size: 1 brownie
- Calories: 250
- Sugar: 20g
- Sodium: 150mg
- Fat: 12g
- Saturated Fat: 7g
- Unsaturated Fat: 3g
- Trans Fat: 0g
- Carbohydrates: 30g
- Fiber: 1g
- Protein: 3g
- Cholesterol: 70mg