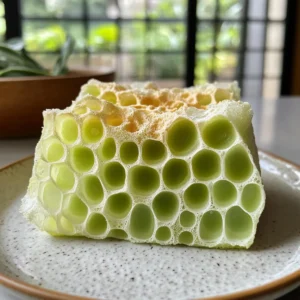
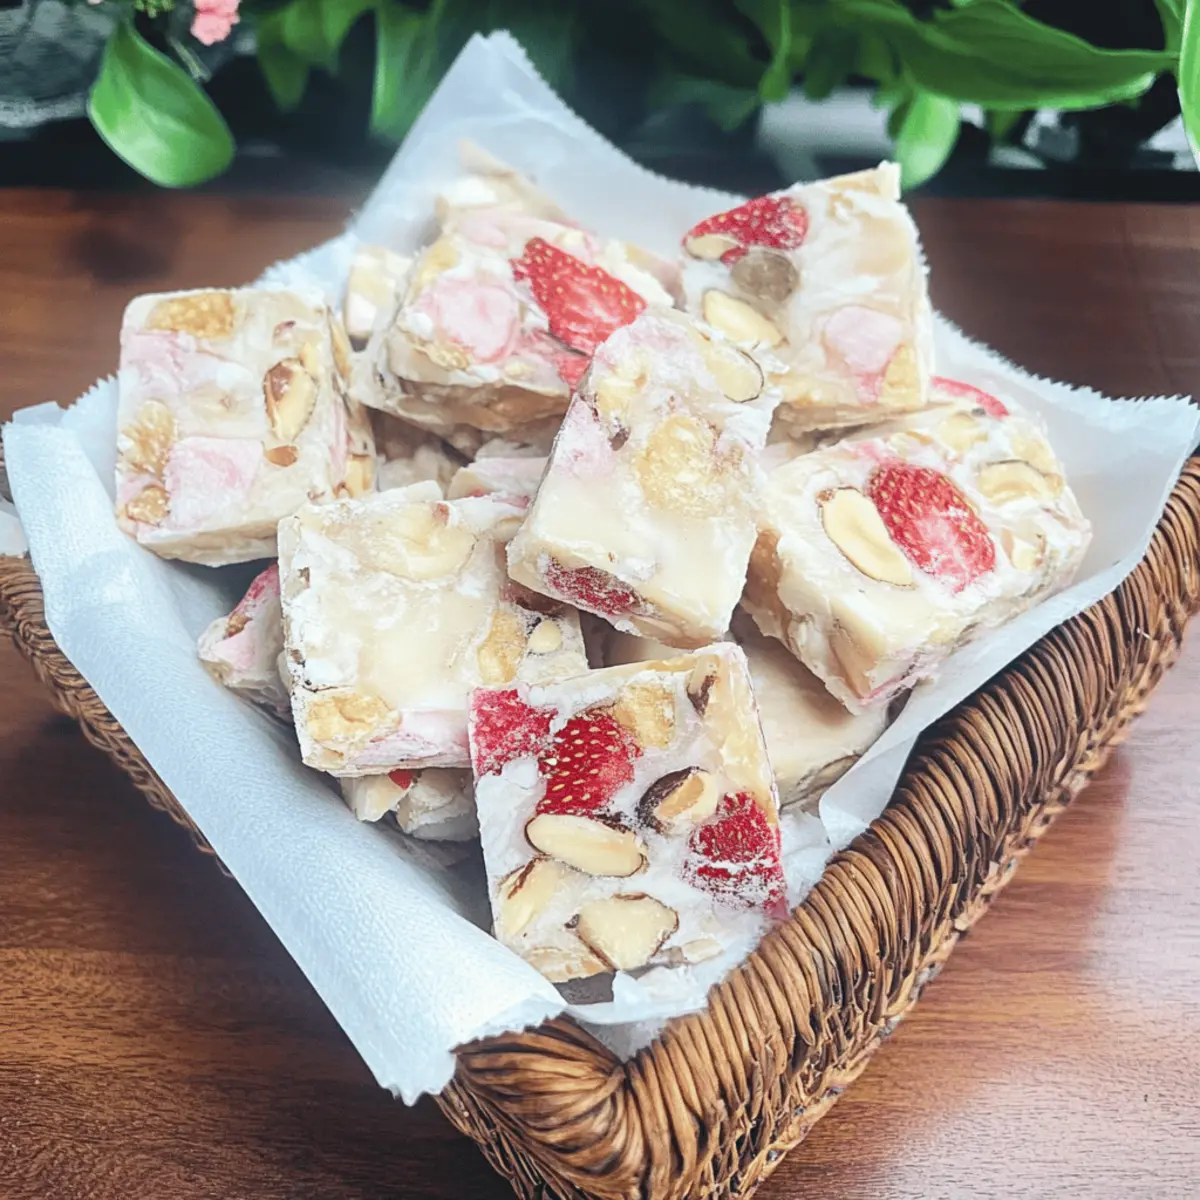
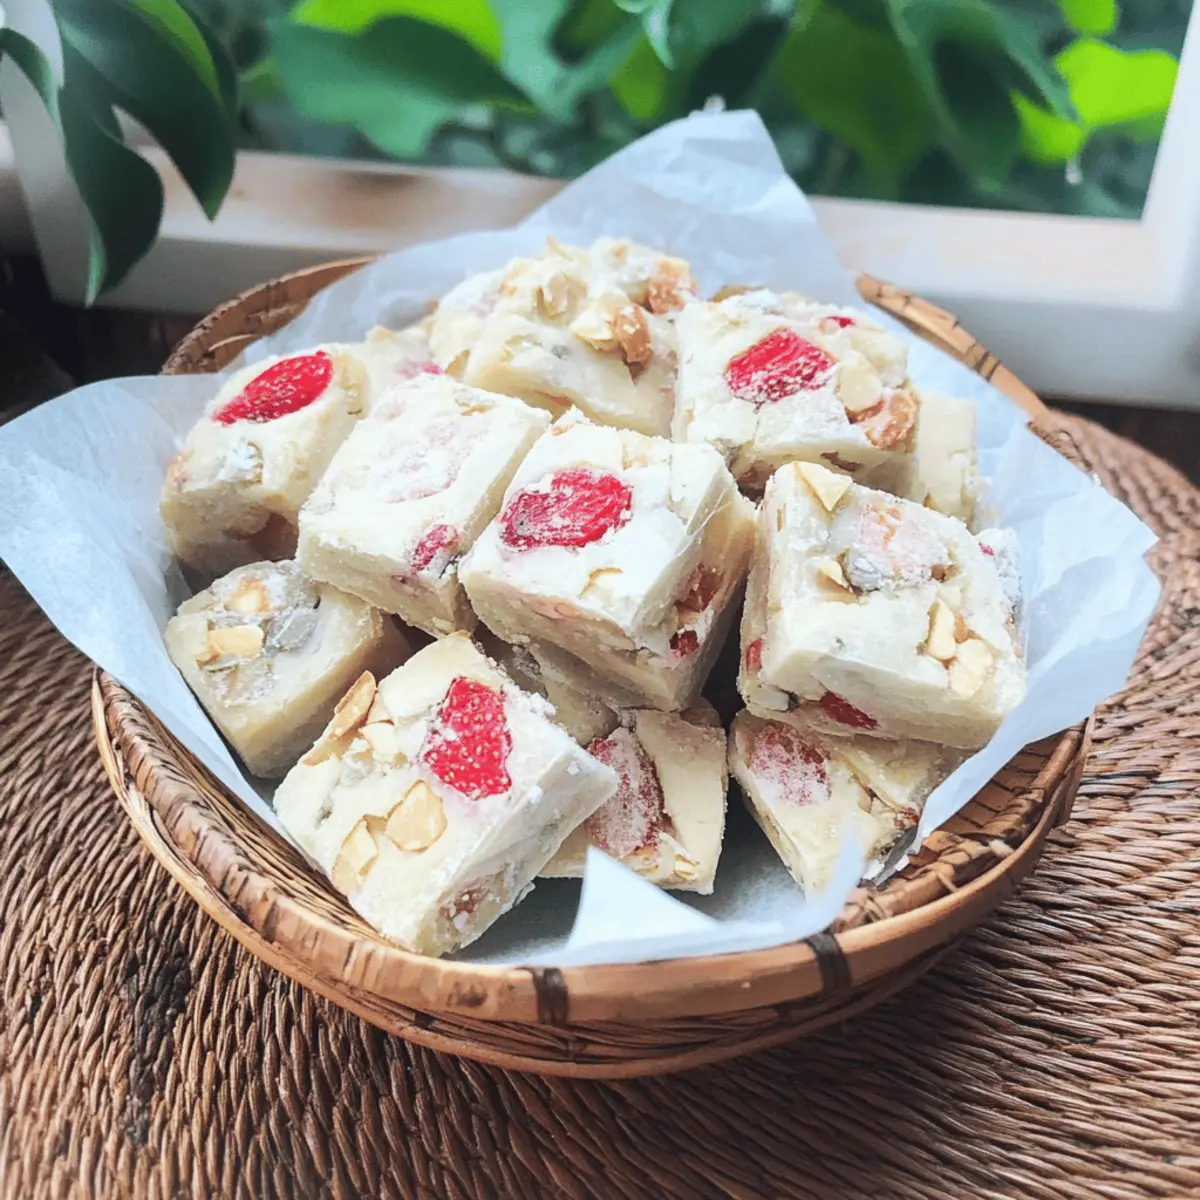
As the New Year approaches, the kitchen fills with excitement and anticipation, bringing with it the promise of delightful treats. One of my all-time favorite snacks to whip up during this season is the Snowflake Crisp, a light and airy delight that perfectly balances sweetness and crunch. This quick recipe not only takes just ten minutes to prepare but is also endlessly customizable—perfect for anyone looking to add their personal touch! Imagine the joy on your loved ones’ faces as they bite into this delicious Chinese dessert, with its creamy nougat base mingling harmoniously with crunchy crackers and an array of mix-ins. Whether you’re hosting a festive gathering or simply treating yourself, this Snowflake Crisp is bound to become a beloved staple. Ready to create an unforgettable snack? Let’s dive into the joy of making these delightful bites!

Why is Snowflake Crisp so irresistible?
Simplicity at its finest: This delightful treat comes together in just 10 minutes, making it an ideal choice for busy schedules. Endlessly customizable: Feel free to swap in your favorite nuts or dried fruits; every batch can be uniquely yours! Crowd-pleaser: Whether for holiday gatherings or snack time, it brings smiles to everyone’s faces. Light and crunchy: The airy texture paired with a sweet nougat base creates a delightful contrast you won’t forget. Impress your guests effortlessly with this quick recipe, and if you’re looking for more savory options, check out my Chicken Spring Pleasing or Tofu Oven Alternative.
Snowflake Crisp Ingredients
Unlock the secrets to making this delightful treat!
For the Base
- Marshmallows – Provides the base sweetness and chewy texture for the crisp; try different flavored marshmallows for variety.
- Butter – Adds richness and helps bind the ingredients together; margarine can be used for a dairy-free option.
- Milk Powder – Contributes a creamy, milky flavor; for lactose-free options, substitute with a plant-based milk powder.
For the Crunch
- Small Crackers – Forms the crunchy component; substitute with graham crackers, Digestive biscuits, or gluten-free options if needed.
- Nuts (e.g., pumpkin seeds, dried cranberries, almonds) – Provides extra crunch and flavor; feel free to swap with your favorite nuts or choose seeds for a nut-free version.
- Freeze-Dried Strawberries – Adds a fruity note and visual appeal; they can be replaced with freeze-dried cranberries or omitted for a simpler taste.
Dive into the joy of creating your very own Snowflake Crisp with these ingredients!
Step‑by‑Step Instructions for Snowflake Crisp
Step 1: Melt Butter
In a medium saucepan, set your stove to low heat and add butter. Allow it to melt gently, stirring occasionally for about 2-3 minutes until it’s completely liquefied and begins to bubble slightly around the edges. Make sure it doesn’t brown; we want a rich, creamy base for the Snowflake Crisp.
Step 2: Add Marshmallows
Once the butter has melted, add in the marshmallows immediately, keeping the heat low. Stir the mixture continuously for 3-5 minutes until the marshmallows have fully melted into a smooth, glossy mixture without any lumps. This step is crucial to achieving that delightful, chewy texture in your Snowflake Crisp.
Step 3: Incorporate Milk Powder
With the marshmallows entirely melted, promptly sprinkle in the milk powder while mixing vigorously. Continue to stir for another 2 minutes, ensuring there are no dry patches, and the mixture becomes thick and silky. Once well combined, remove the saucepan from the heat to prevent overcooking.
Step 4: Combine Other Ingredients
Now it’s time to bring the crunch to your Snowflake Crisp! Gradually fold in the small crackers, nuts, and freeze-dried strawberries. Gently mix with a spatula for about 2-3 minutes until everything is evenly coated and distributed, creating a harmonious blend of textures and flavors in your snack.
Step 5: Transfer & Press
Prepare a mold or a parchment-lined baking sheet for your mixture. Pour the Snowflake Crisp concoction into the mold, pressing it down firmly with your fingers or a spatula to compact the mixture. If using a baking sheet, spread it evenly to about half an inch thickness for optimal crunch and ease of cutting later.
Step 6: Finish
After pressing the mixture down firmly, lightly sprinkle additional milk powder on top for a snowy finish. Allow your Snowflake Crisp to cool for 15-20 minutes at room temperature until set. Once cool, cut into bite-sized pieces to serve, and store any leftovers in an airtight container to keep them crisp.
Make Ahead Options
Preparing Snowflake Crisp ahead of time is a fantastic way to save precious minutes on busy days! You can easily make the base mixture—combining melted butter, marshmallows, and milk powder—up to 24 hours in advance. Simply store this mixture in an airtight container in the refrigerator to maintain its quality, preventing any sticky issues. When you’re ready to enjoy your delightful treat, allow the mixture to come to room temperature, then fold in the crackers, nuts, and freeze-dried strawberries before transferring to a mold or baking sheet. In just minutes, you’ll have a delicious Snowflake Crisp that’s just as delightful as when freshly made!
What to Serve with Snowflake Crisp
As you delight in the airy crunch of these treats, consider pairing them with delightful accompaniments to create a memorable spread.
- Coconut Ice Cream: The creamy coconut flavor complements the sweetness of the Snowflake Crisp, adding an indulgent touch.
- Fresh Fruit Salad: Juicy berries and citrus provide a refreshing contrast, balancing sweetness while adding vibrant colors to the table.
- Hot Chocolate: A warm, rich cup of hot chocolate creates a cozy pairing, perfect for enjoying on chilly evenings.
- Green Tea: The delicate, earthy notes of green tea enhance the flavors of the Snowflake Crisp, offering a rejuvenating touch.
- Chocolate Dipped Strawberries: Add a touch of romance with these sweet bites, their juicy tang paired wonderfully with the crispy treat.
- Caramel Popcorn: Add an unexpected crunch; the sweet, buttery popcorn plays off the crisp’s textures in a delightful way.
- Candied Nuts: For a nutty crunch, try candied nuts that elevate each bite with a sweet-savory experience.
- Fruit Sorbet: An icy, fruity sorbet offers a light and refreshing way to cleanse the palate between sweet bites.
- Milkshake: A thick, creamy milkshake can create a nostalgic feel, perfect for treating the whole family or satisfying a sweet tooth.
- Sesame Cookies: These crunchy, nutty cookies provide another texture to explore, allowing you to experience flavor contrasts.
Expert Tips for Snowflake Crisp
• Perfectly Melted Mixture: Ensure your butter and marshmallows are completely melted together to avoid graininess in your Snowflake Crisp.
• Thorough Mixing: Use a spatula to mix thoroughly; failing to do so can leave dry spots that affect the texture.
• Cooling Time: Allow the mixture to cool completely before cutting for cleaner edges and a more appealing presentation.
• Airtight Storage: Store leftovers in an airtight container to maintain crispness; humidity can quickly ruin this treat.
• Creative Swaps: Don’t hesitate to customize the ingredients—different nuts or dried fruits can yield delightful variations of the Snowflake Crisp!
Snowflake Crisp Customization Ideas
Indulge your creativity and tailor this delightful treat to fit your taste buds perfectly!
-
Nut-Free: Substitute nuts with seeds, like sunflower or pumpkin seeds, for a delicious nut-free alternative.
These crunchy seeds not only maintain the must-have texture but also infuse the crisp with wholesome goodness without compromising flavor. -
Different Dried Fruits: Swap out freeze-dried strawberries with your favorite dried fruits, such as blueberries, mangoes, or bananas, for a flavor twist.
Each dried fruit brings a unique taste and adds to the visual appeal, making every bite an adventure. -
Flavored Marshmallows: Experiment with marshmallows in fun flavors like raspberry or coconut to elevate the sweetness.
This simple switch can take your Snowflake Crisp from classic to extraordinary in no time! -
Crunchy Alternatives: Instead of small crackers, try pretzel chips or even popcorn for a more adventurous crunch.
The flavors and textures of pretzels or popcorn work harmoniously with the sweet nougat base, creating an exciting new twist. -
Spicy Kick: Add a sprinkle of cayenne pepper or chili powder when mixing in the nuts for a surprising spicy kick.
The heat beautifully balances with the sweetness and creates a sensory experience that’s both exciting and addictive. -
Chocolate Drizzle: Top your cooled Snowflake Crisp with melted chocolate for an extra layer of indulgence.
Use dark, milk, or white chocolate to create visual contrasts and enhance the flavor profile. -
Cereal Boost: Mix in your favorite breakfast cereal, like Rice Krispies or Cheerios, for added crunch and fun.
The cereal not only amps up the texture but also adds a nostalgic twist, reminiscent of childhood snacks.
Explore these variations as you dive into the joyful making of your Snowflake Crisp and make this cherished treat distinctly yours!
How to Store and Freeze Snowflake Crisp
Room Temperature: Store in an airtight container at room temperature for up to 1 week. Keep it in a cool, dry place to maintain crunchiness.
Fridge: If you live in a humid area, refrigerate the Snowflake Crisp for up to 2 weeks. Ensure it’s sealed well to prevent moisture absorption.
Freezer: For long-term storage, freeze your Snowflake Crisp for up to 3 months. Wrap tightly in plastic wrap and then place in an airtight container before freezing.
Reheating: If the crispiness diminishes after refrigeration or freezing, re-crisp in the oven for 5-10 minutes at 300°F (150°C) before serving.
Snowflake Crisp Recipe FAQs
What type of marshmallows should I use for Snowflake Crisp?
Absolutely! You can use standard marshmallows, but for a fun twist, consider flavored marshmallows like strawberry or chocolate. They will not only add unique flavors but also enhance the visual appeal of your Snowflake Crisp.
How should I store Snowflake Crisp to keep it fresh?
Store the Snowflake Crisp in an airtight container at room temperature for up to 1 week. It’s best to keep it in a cool, dry place. If the humidity is high, consider refrigerating it to maintain its crispiness, where it can stay good for up to 2 weeks.
Can I freeze my Snowflake Crisp?
Yes! You can freeze Snowflake Crisp for up to 3 months. Wrap it tightly in plastic wrap, then place it in an airtight container before freezing. For best results, re-crisp it in the oven at 300°F (150°C) for about 5-10 minutes after thawing, ensuring a delightful crunch.
What if my Snowflake Crisp mixture is too sticky?
Very! If your mixture becomes overly sticky when combining all the ingredients, it may be due to too much heat or not enough mixing. To fix this, try letting the mixture cool slightly before adding ingredients. If it’s too sticky to handle, a light dusting of milk powder or powdered sugar on your hands while pressing can help.
Is Snowflake Crisp safe for dogs?
While Snowflake Crisp contains ingredients that are generally safe for dogs, such as nuts (if used), it also contains marshmallows, which are not ideal for pets due to their sugar content. It’s best to keep this tasty treat for human enjoyment only!
How can I customize my Snowflake Crisp?
The wonderful part of making Snowflake Crisp is its adaptability! Feel free to swap out the freeze-dried strawberries with other dried fruits like cranberries or blueberries. You can also replace nuts with seeds for a nut-free version. Just mix and match according to your likes—there’s no wrong way to make this!
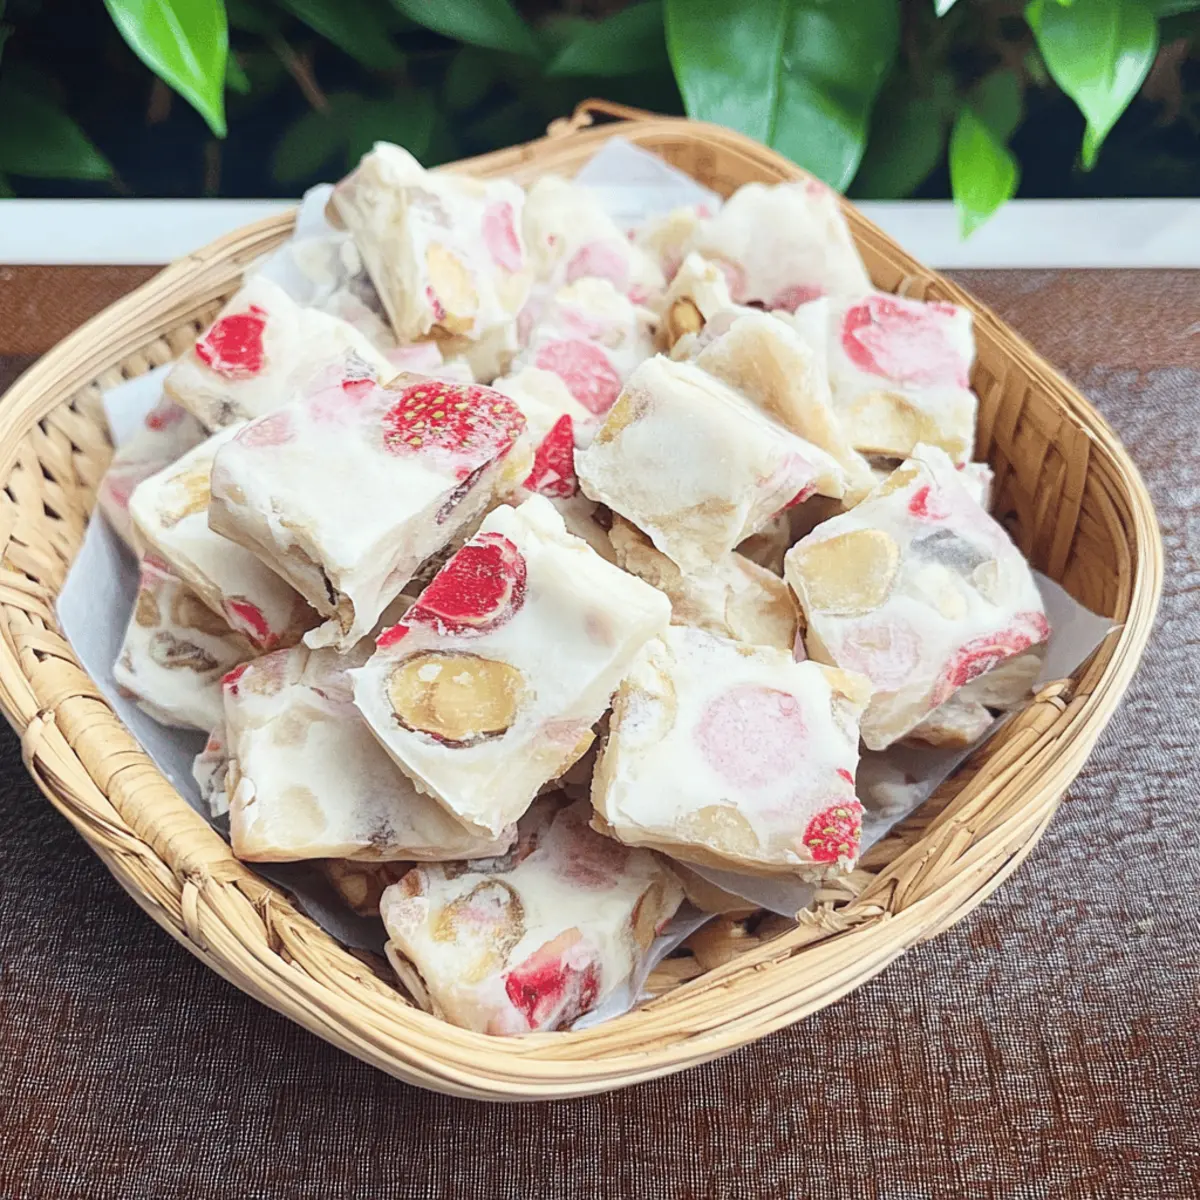
Snowflake Crisp: 10-Minute Crunchy Delight for Any Occasion
Ingredients
Equipment
Method
- In a medium saucepan, melt the butter over low heat, stirring occasionally for about 2-3 minutes until liquefied.
- Add the marshmallows and stir continuously for 3-5 minutes until fully melted.
- Sprinkle in the milk powder while mixing vigorously, and stir for another 2 minutes until thick and silky.
- Fold in the small crackers, nuts, and freeze-dried strawberries gently with a spatula for 2-3 minutes.
- Pour the mixture into a mold or parchment-lined baking sheet, pressing it down firmly.
- Sprinkle additional milk powder on top and allow to cool for 15-20 minutes until set.
- Cut into bite-sized pieces and store leftover in an airtight container.